How to build an AI chatbot for OnlyFans
Learn how to receive fan messages, generate replies with your AI, and send them through OnlyFansAPI.com.
Learn how to receive a fan message, send it to your AI, and reply through OnlyFansAPI.com.
By the end of this guide, you will have the basic chatbot working. A fan sends a message. Your webhook receives it. Your AI writes a reply. OnlyFansAPI.com sends it back.
Your AI is up to you
OnlyFansAPI.com gives you the messages and lets you send replies. You choose the AI service, prompts, chat history, and approval rules that fit your product.
What you need
- An OnlyFansAPI.com account
- A connected OnlyFans account
- A server with an HTTPS webhook URL
- An AI service or your own model
- A background queue for AI jobs
Build the chatbot
Create your API key
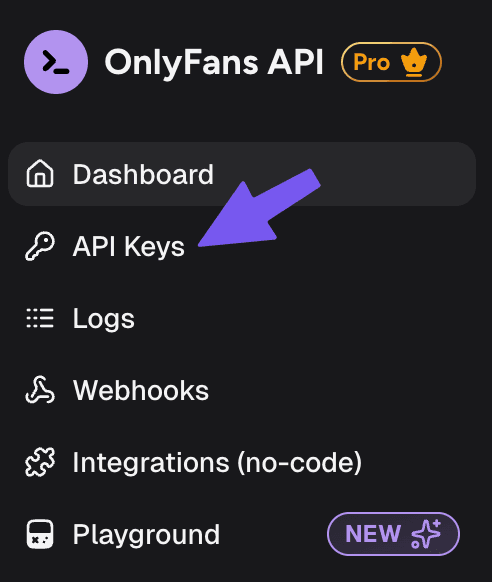
Sign up for OnlyFansAPI.com. Open API Keys, then click Create API Key.
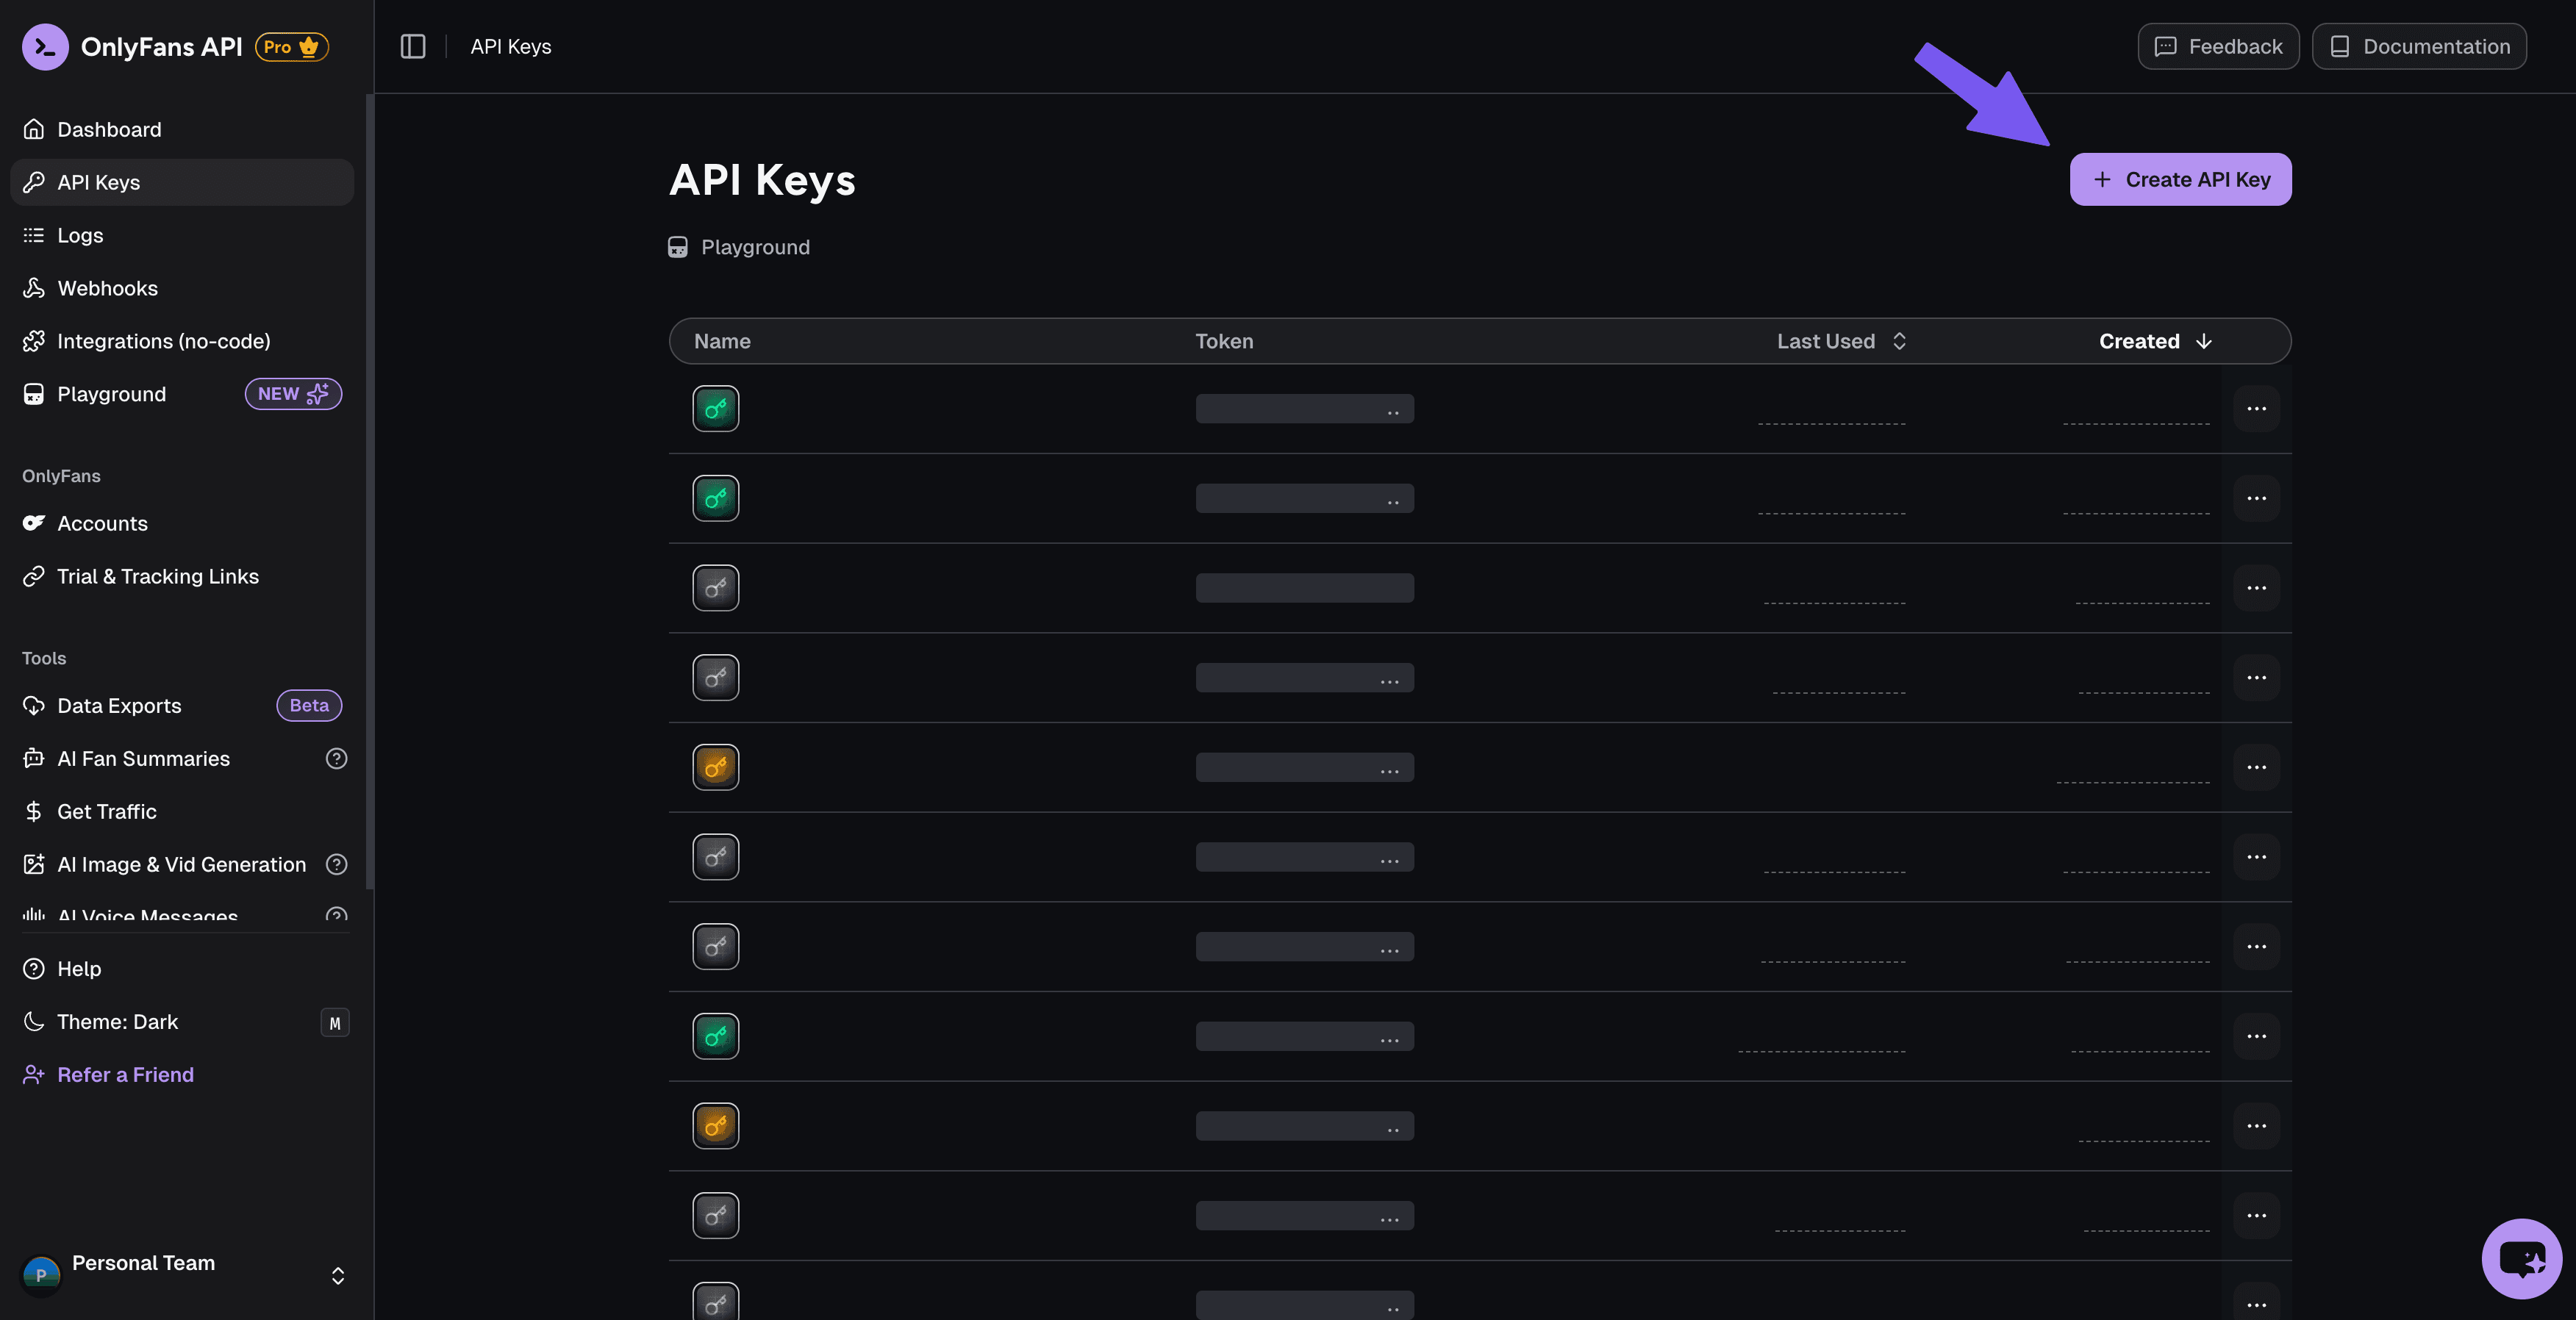
Give the key a name such as My AI chatbot. Copy it when it appears. You will only see it once.
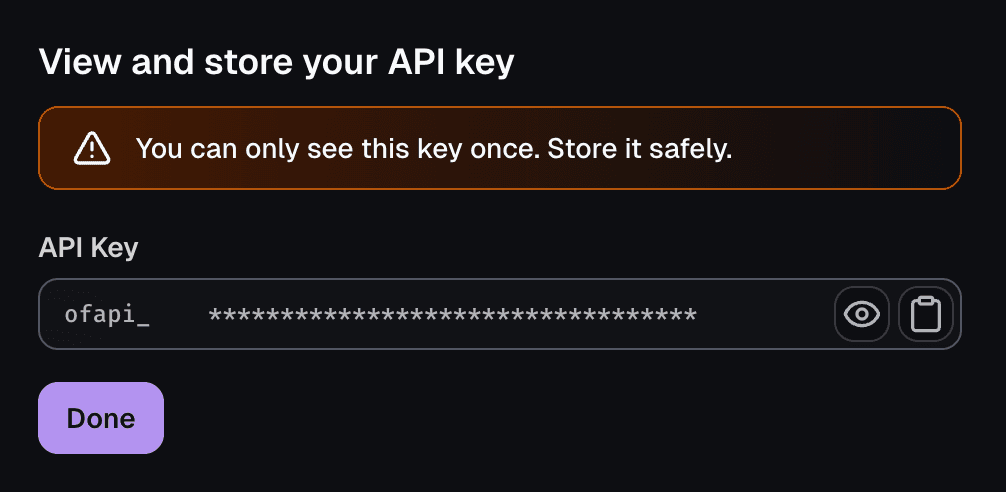
Save the key in an environment variable:
ONLYFANS_API_KEY=your_api_keyKeep your API key on your server. Never put it in browser code, commit it to Git, or share it with your AI model.
Add your webhook
Open Webhooks in the OnlyFansAPI.com dashboard and add your HTTPS endpoint. Add a signing secret, then subscribe to these events:
messages.receivedstarts a new AI reply.users.typinghelps your bot wait until the fan finishes typing.messages.ppv.unlockedlets your bot follow up after a fan buys a paid message.
You only need messages.received for a basic chatbot. The other two events make the conversation feel more natural.
When a fan sends a message, OnlyFansAPI.com sends the message to this endpoint.
Your code may look like this:
verifyWebhookSignature(request);

if (webhook.event === "users.typing") {
  await saveLastTypingTime(webhook);
}

if (
  webhook.event === "messages.received" ||
  webhook.event === "messages.ppv.unlocked"
) {
  await queue.add(webhook);
}

return 200;
See Subscribing to webhooks for the dashboard steps and Protecting your webhooks for signature checks.
Reply to the webhook first
Return 200 right away. Let a background job handle the AI reply. Otherwise, OnlyFansAPI.com may think the webhook failed and send it again.
Generate the reply
Your background job sends the fan's message to your AI:
const reply = await generateReply({
  message: webhook.payload.text,
  fan: webhook.payload.fromUser,
  creatorStyle,
  recentMessages,
});
The generateReply() function is your part. You can use OpenAI, Anthropic, Gemini, a local model, or your own system.
You decide:
- How the creator should sound
- How much chat history to include
- When to suggest content
- When to ask a human for help
- Which messages should never be sent automatically
Show the typing indicator
Call Start Typing Indicator while your AI writes the reply:
POST /api/{account}/chats/{chat_id}/typingThe typing indicator only stays visible for a few seconds. Call the endpoint again if your AI is still working.
Send the reply
Send the generated text with Send Message:
POST /api/{account}/chats/{chat_id}/messages{
"text": "Your generated reply"
}The webhook gives you both IDs you need:
- Use
account_idas the account. - Use
payload.fromUser.idas thechat_id.
Add a unique Idempotency-Key header when you send the message. If the request times out and you retry it, the same reply will not be sent twice.
Wait until the fan finishes typing
A fan may send several short messages in a row. Without a small delay, your bot may answer the first message while the fan is still writing the second one.
The users.typing webhook gives you:
account_id— the creator's connected accountpayload.id— the fan's ID and chat ID
Save the current time whenever this event arrives. Save it using both IDs, so typing in one creator's chat does not affect another chat.
if (webhook.event === "users.typing") {
  await saveLastTypingTime({
    accountId: webhook.account_id,
    chatId: webhook.payload.id,
    time: Date.now(),
  });

  return 200;
}
Before the reply job calls your AI, check that the fan has been quiet for a few seconds:
const lastTypingAt = await getLastTypingTime(accountId, chatId);

if (lastTypingAt && Date.now() - lastTypingAt < 8_000) {
  return runThisJobAgainIn(8_000);
}

const reply = await generateReply({ recentMessages });
The function names are only examples. Use the database, cache, and queue already in your app.
Start the reply job when messages.received arrives. If users.typing arrives after that, move the job back. Once the fan has been quiet for about 5 to 10 seconds, combine their recent messages and generate one reply.
Do not wait forever
Some fans will not trigger a typing event. Always start a reply timer from messages.received, then use users.typing only to extend that timer.
Typing events are short-lived signals and do not include an X-OFAPI-Idempotency-Key. You do not need to save every event forever. Keeping the latest typing time for each chat is enough.
Follow up after a PPV purchase
The messages.ppv.unlocked webhook fires when a fan buys a paid message that the creator sent.
You can use it to:
- Thank the fan for the purchase
- Continue the conversation without asking them to buy the same content again
- Stop any reminder for that paid message
- Save the purchase in the fan's chat history or profile
- Ask your AI for a natural follow-up based on the creator's style
The useful fields are:
account_id— the creator's connected accountpayload.chat_id— the chat the message was bought in (the fan's ID)payload.fan— basic fan details, including their namepayload.message_id— the purchased messagepayload.amountGross— the purchase amount as a number
Don't use payload.user_id here. In this event it is the creator's ID, not the fan's.
Queue the event just like a received message:
if (webhook.event === "messages.ppv.unlocked") {
  await queue.add({
    type: "ppv-follow-up",
    accountId: webhook.account_id,
    chatId: webhook.payload.chat_id,
    fan: webhook.payload.fan,
    messageId: webhook.payload.message_id,
    amount: webhook.payload.amountGross,
  });

  return 200;
}
Then give the purchase to your AI as an event, not as a message written by the fan:
const reply = await generateReply({
  event: "ppv_unlocked",
  fan,
  amount,
  creatorStyle,
  recentMessages,
  instruction: "Thank the fan naturally. Do not sell another PPV right away.",
});
Send the result with the same Send Message endpoint used for normal replies.
Match the purchase to the original message
payload.message_id is the ID of the purchased message. Save the PPV messages your app sends, then use that ID when you need to mark the exact offer as purchased.
Use the webhook's X-OFAPI-Idempotency-Key to make sure one purchase only creates one follow-up. It stays the same if the webhook is delivered again.
Add photos or videos
Start with text replies. Add media after the basic chatbot works.
- Use List Vault Media to get the creator's existing content.
- Use Upload Media to Vault to add new content.
- Pass the chosen media ID in
mediaFileswhen you send the message. - Need the actual photo or video file? Use Download Media.
- For protected videos, use Download DRM-protected Media.
For a paid message, add price to the request. Paid messages must include at least one media file.
Check for messages your bot missed
The messages.received webhook should handle new messages. These two endpoints are useful as a backup:
- List Chats with
filter=unreadorfilter=unread_with_tipsfinds chats that still need a reply. - List Chat Messages loads earlier messages when your AI needs more context.
Loading messages marks the chat as read
Do not keep calling List Chat Messages to look for new messages. Use the messages.received webhook instead.
Other webhooks you can add later
The webhook event list has more events you can add later:
messages.sentkeeps your chat history up to date when a human sends a reply.media_uploads.completedandmedia_uploads.failedtell you when a background upload finishes.tips.receivedandsubscriptions.newlet you add separate flows for tips and new subscribers.
Before you go live
- Check every webhook signature.
- Keep your OnlyFansAPI.com and AI keys on the server.
- Save each incoming message ID so you do not queue it twice.
- Test with one creator first.
- Start with human approval before sending replies automatically.
- Only let the AI choose from media and prices you approve.
- Check the current rules of the AI service you use.