Connect OnlyFans account
Learn how to connect your OnlyFans account so you can use it with OnlyFans API
Why do you need to connect your OnlyFans account?
If you want to use our API to interact with OnlyFans API endpoints like:
- Reading chats
- Sending messages to fans
- Getting statistics
- Getting fans
- Following / unfollowing users
- Getting webhook notifications
- ... basically anything that requires you to be logged in to your OnlyFans account.
Then, you need to connect your OnlyFans account to our API.
You can connect your OnlyFans account in five ways:
- Using our automated login flow (recommended for most users)
- Using our Auth+ iPhone app (recommended when 2FA tokens aren't available to you, or when Face ID is enabled)
- Add "Login with OnlyFans" to your app
- Connect using API (programmatic flow)
- By providing cURL request
Which option should you pick? If you (the OFAPI user — e.g. an agency) have easy access to the OnlyFans account's credentials and 2FA tokens, use Option 1 (automated login flow). If you don't have direct access to the creator's 2FA tokens, or the creator's OnlyFans account has Face ID verification enabled, use Option 2 (Auth+ app) — the creator completes sign-in and 2FA on their own iPhone.
Option 1: Using our automated login flow
This is the recommended flow when you already have the OnlyFans credentials and can enter the 2FA code on behalf of the creator. Our system can bypass captcha and if you've setup 2FA, you'll be able to enter the 2FA code directly inside our interface while we sign in your profile.
Your credentials are securely stored in our database and are never shared with anyone (not even our engineers can see your credentials).
Steps to connect your OnlyFans account:
- Go to the OnlyFans API Console -> Accounts
- Click on the + Connect Account button
- Enter name of the account (this will be used for your reference)
- Enter your OnlyFans email and password
- Choose Proxy Country — currently US and UK are available (we will automatically assign a dedicated mobile IP address for this account), or enter your own proxy details
Other proxy countries (DE, FR, IT) have been temporarily removed due to OnlyFans restrictions.
- Click on the Add button
- Your account will start connecting and you'll see the live progress of the login process.
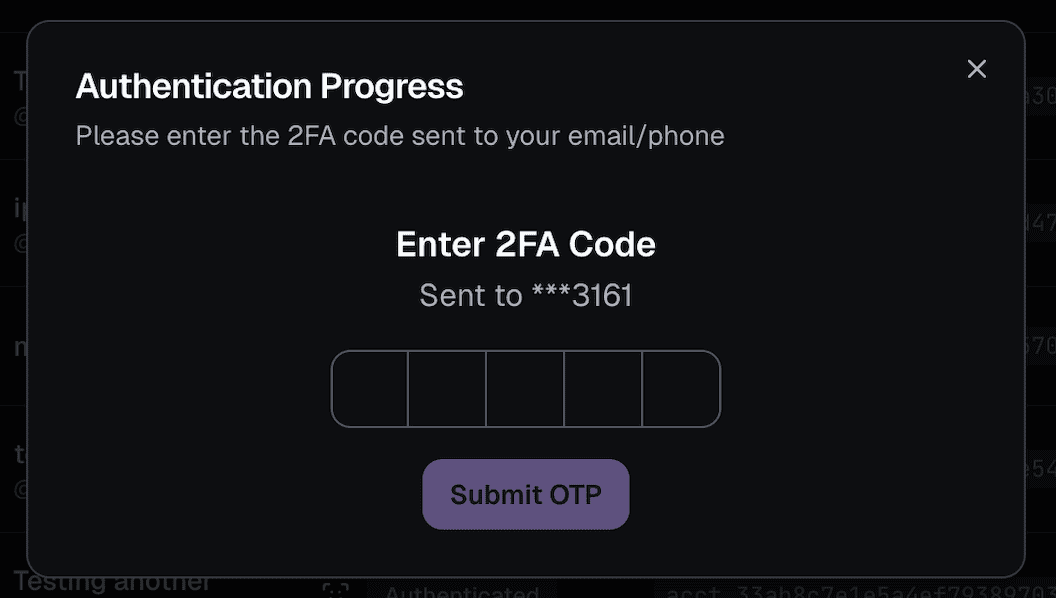
- If you've 2FA enabled on your OnlyFans account, you'll be asked to enter the 2FA code.
- Done! ✅ You're now able to see the account details and start using your account with our API.
Option 2: Using our Auth+ iPhone app
When to use Auth+: pick this option only if you (the OFAPI user) don't have easy access to the OnlyFans account's 2FA tokens, or if the creator's OnlyFans account has Face ID verification enabled. Otherwise, Option 1 is simpler.
📱 Install the Auth+ app first
Before starting a session, the creator should install the FansAPI Auth+ app on their iPhone via TestFlight: app.onlyfansapi.com/auth-plus-app
If they don't already have TestFlight, install it from the App Store first: Get TestFlight. The phone-only video below also walks through this.
Auth+ is our iPhone app that lets creators sign in to their OnlyFans account directly from their device. It handles every 2FA method OnlyFans supports — App/SMS OTP as well as Face ID verification — without the creator leaving their phone.
You can start an Auth+ session in two ways: from the OnlyFans API Console (creator scans a QR code), or programmatically via the API (creator pastes an auth code).
Video guides
Follow one of the two walkthroughs below depending on your setup.
Desktop + phone flow
Phone-only flow (includes TestFlight install)
Step 1a — Start the session from the Dashboard
- Go to the OnlyFans API Console -> Accounts
- Click on the + Connect Account button
- Enter the name of the account (this will be used for your reference)
- Click on Auth+
- Click on the Add button
You'll be shown a QR code and an auth code — hand either to the creator for the next step.
Step 1b — Or start the session via the API
Call POST /authenticate with auth_type set to mobile_app and a display_name for the account:
curl --request POST \
  --url 'https://app.onlyfansapi.com/api/authenticate' \
  --header 'Authorization: Bearer YOUR_API_KEY' \
  --header 'Content-Type: application/json' \
  --data '{
    "auth_type": "mobile_app",
    "display_name": "My Application / Model: John Doe"
  }'
Example response:
{
  "attempt_id": "auth_abc123",
  "message": "Authentication process started. Query the polling_url to check the progress.",
  "polling_url": "https://app.onlyfansapi.com/api/authenticate/auth_abc123",
  "mobile_auth_session_deeplink": "fansapiauth://auth/fansapi_auth_abc123"
}
The mobile_auth_session_deeplink opens the Auth+ app directly on the creator's iPhone with the session pre-filled. You can also hand them the auth code (fansapi_auth_abc123) to paste manually into the app.
Step 2 — Complete the sign-in on the creator's iPhone
These steps are the same whether the session was started from the Dashboard or the API.
- Install TestFlight from the App Store
- Install the FansAPI Auth+ app via TestFlight: app.onlyfansapi.com/auth-plus-app
- Open Auth+ and either scan the QR code (Dashboard flow) or paste the auth code (Dashboard or API flow)
- Sign in with the OnlyFans email and password
- Complete any 2FA step (App/SMS OTP or Face Authentication) directly inside the app
Done! ✅ The account is now connected and ready to use with our API.
Option 3: Add "Login with OnlyFans" to your app
If you want to embed a "Connect with OnlyFans" flow directly in your app UI, use the official auth package.
1) Install package
npm install @onlyfansapi/auth2) Create a client session token
Create a client session token (ofapi_cs_...) from your backend:
POST /client-sessions
curl --request POST \
  --url 'https://app.onlyfansapi.com/api/client-sessions' \
  --header 'Authorization: Bearer YOUR_API_KEY' \
  --header 'Content-Type: application/json' \
  --data '{
    "display_name": "My Application / Model: John Doe",
    "client_reference_id": "my-internal-id-123",
    "proxy_country": "us"
  }'
3) Start authentication in your frontend
import { startOnlyFansAuthentication } from "@onlyfansapi/auth";

startOnlyFansAuthentication("ofapi_cs_XXXXXXXXXXXXXXXXXXXXXXXXXXXXXXXX", {
  onSuccess: (data) => {
    // data.accountId
    // data.username
    // data.response (full response)
    console.log("Connected:", data);
  },
  onError: (error) => {
    // error.message
    // error.code (if available)
    // error.details (if available)
    console.error("Authentication failed:", error);
  },
});
This package handles the OTP / selfie authentication UI flow for you in an embedded modal.
For the full authentication API and package reference, see: /auth.
Option 4: Connect using API (programmatic flow)
Use this flow if you want to connect accounts from your backend or app UI instead of the dashboard.
Base URL for examples below: https://app.onlyfansapi.com/api
1) Start authentication
POST /authenticate
curl --request POST \
  --url 'https://app.onlyfansapi.com/api/authenticate' \
  --header 'Authorization: Bearer YOUR_API_KEY' \
  --header 'Content-Type: application/json' \
  --data '{
    "email": "model@example.com",
    "password": "super-secret-password",
    "proxyCountry": "us"
  }'
Example response:
{
  "attempt_id": "auth_xxxxxxxxxxxxx",
  "message": "Authentication process started. Query the polling_url to check the progress.",
  "polling_url": "https://app.onlyfansapi.com/api/authenticate/auth_xxxxxxxxxxxxx"
}
2) Poll status until completion or 2FA required
GET /authenticate/{attempt_id}
curl --request GET \
  --url 'https://app.onlyfansapi.com/api/authenticate/auth_xxxxxxxxxxxxx' \
  --header 'Authorization: Bearer YOUR_API_KEY'
Important fields:
stateprogresslastAttempt.successlastAttempt.needs_otplastAttempt.needs_face_otplastAttempt.face_otp_verification_urllastAttempt.error_messagelastAttempt.error_code
When lastAttempt.needs_face_otp is true, use lastAttempt.face_otp_verification_url.
That URL is the OnlyFans selfie verification page that the creator must open and complete.
3) Submit 2FA code (SMS or OTP app)
PUT /authenticate/{attempt_id}
curl --request PUT \
  --url 'https://app.onlyfansapi.com/api/authenticate/auth_xxxxxxxxxxxxx' \
  --header 'Authorization: Bearer YOUR_API_KEY' \
  --header 'Content-Type: application/json' \
  --data '{
    "code": "123456"
  }'
If selfie verification is required, submit:
{
  "selfie_verification_completed": true
}
For the standard (v1) selfie verification, no external mobile app is required. The creator only needs to open
the face_otp_verification_url link in a regular browser on their phone or desktop
and complete the verification steps there. Alternatively, they can complete it through our Auth+ app.
v2 Face Authentication requires Auth+
If the creator's OnlyFans account has OnlyFans' v2 Face Authentication system enabled, the Dashboard and API flows (without Auth+) CANNOT complete sign-in. You MUST use our Auth+ iPhone app — it's the only flow that supports v2 Face Authentication.
4) Optional: send OTP verification email to creator
POST /authenticate/{attempt_id}/send-email-to-creator
curl --request POST \
  --url 'https://app.onlyfansapi.com/api/authenticate/auth_xxxxxxxxxxxxx/send-email-to-creator' \
  --header 'Authorization: Bearer YOUR_API_KEY'
Handling failed 2FA and retry
Wrong code retry (phone/app OTP)
If the submitted OTP is invalid, the attempt enters retry mode instead of failing permanently.
- Retry progress:
wrong_2fa_code_retry - Definitive error code:
WRONG_2FA - Re-submit a fresh code via
PUT /authenticate/{attempt_id}(no restart needed)
Example poll response while retry is available:
{
  "state": "needs-app-otp",
  "progress": "wrong_2fa_code_retry",
  "lastAttempt": {
    "success": false,
    "error_message": null,
    "error_code": "WRONG_2FA",
    "needs_otp": true,
    "needs_face_otp": false
  }
}
Other 2FA failure cases
lastAttempt.error_messageis populated for terminal failures (for example timeout or upstream verification errors).- If you submit OTP when none is pending, API returns
400with:No pending OTP verification. - Recommended behavior:
- Keep polling while
completed_atisnull. - If
lastAttempt.needs_face_otpistrue, takelastAttempt.face_otp_verification_url, ask the creator to complete selfie verification in browser, then submit:{ "selfie_verification_completed": true } - If
stateisneeds-otp(phone OTP), prompt for SMS code and submit:{ "code": "12345" } - If
stateisneeds-app-otp(authenticator app), prompt for app code and submit:{ "code": "123456" } - If
progressiswrong_2fa_code_retry, prompt user for a new OTP and re-submit. - If attempt is completed with failure, show
error_messageand start a new authentication attempt.
- Keep polling while
Option 5: By providing cURL request
This is the manual way to connect your OnlyFans account to our API.
We recommend to sign in and enter the cURL request from a incognito window. Please do NOT sign out account after you've connected it to our API, just close the incognito window.
Honestly, it's easier to watch the video below and follow the steps.
What does "Face OTP request attempts exhausted" mean?
When you connect an OnlyFans account that requires Face ID Authentication, you may run into the message "Face OTP request attempts exhausted". This happens because OnlyFans enforces a daily limit of 3 Face ID requests per day on the account.
How attempts get used up
Every time the account is added to OnlyFans API, one Face ID attempt is used. We start a Face ID request by default when it's the only enabled 2FA method, so the attempt is consumed even if the Face ID verification was only started but never completed — a started-but-incomplete attempt still counts against the daily limit of 3.
How the limit resets
There are only two ways to reset the limit:
- Complete Face ID before the attempts are exhausted, or
- Wait 24 hours after exhaustion — the counter will then reset itself back to 3.
There is no way around Face ID attempt exhaustion. Once the 3 daily attempts are used up, you always have to wait 24 hours for the limit to reset. This is an OnlyFans-side restriction — neither you nor we can do anything to bypass or speed it up.