> ## Documentation Index
> Fetch the complete documentation index at: https://docs.onlyfansapi.com/llms.txt
> Use this file to discover all available pages before exploring further.
# Ready-made scenarios (/integrations/make/ready-made-scenarios)
import { Step, Steps } from 'fumadocs-ui/components/steps';
### Available blueprints
### Account synchronization \[!toc]
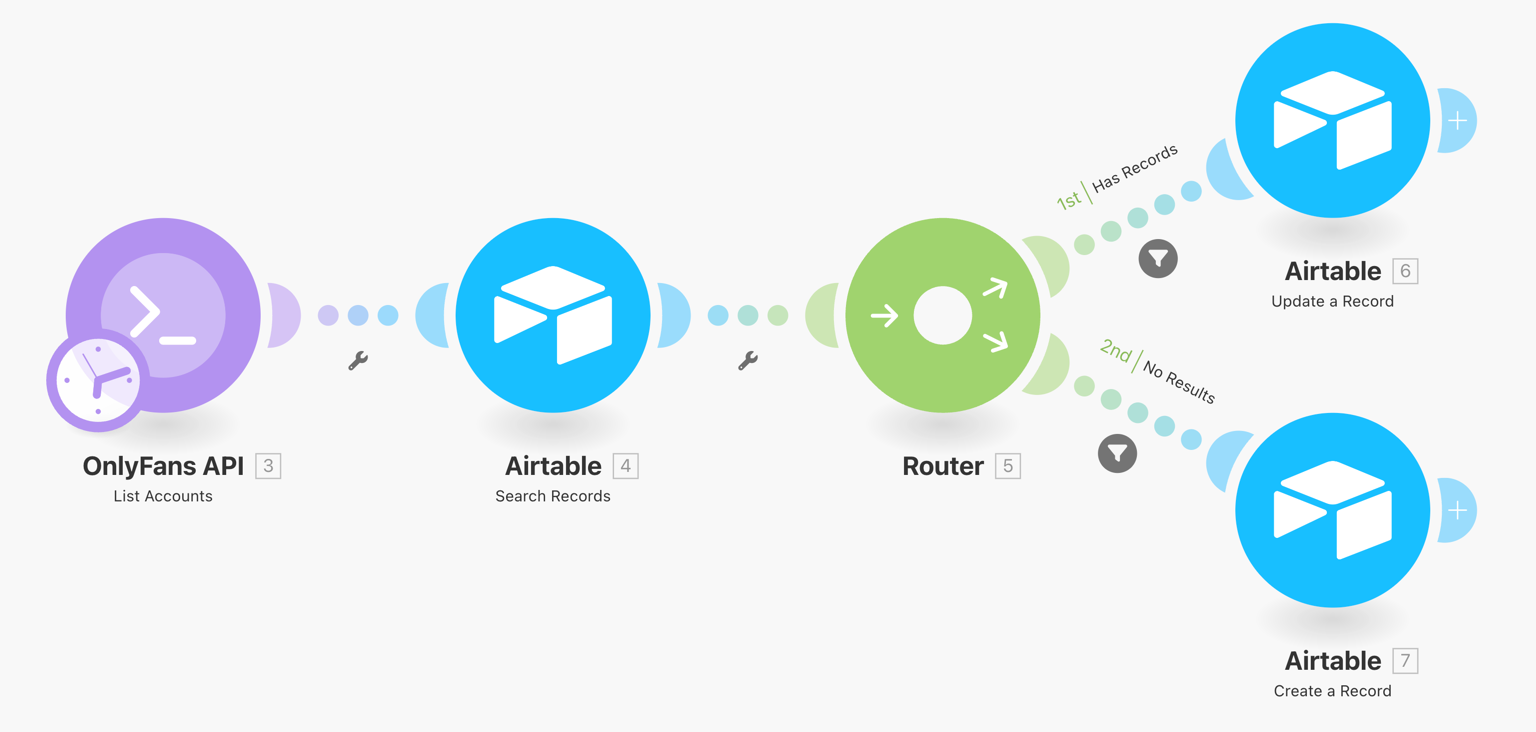 This scenario will synchronize your OnlyFans accounts with Airtable, and update the data once a day.
**Download scenario blueprint ›**
### Hourly account revenue data \[!toc]
This scenario will synchronize your OnlyFans accounts with Airtable, and update the data once a day.
**Download scenario blueprint ›**
### Hourly account revenue data \[!toc]
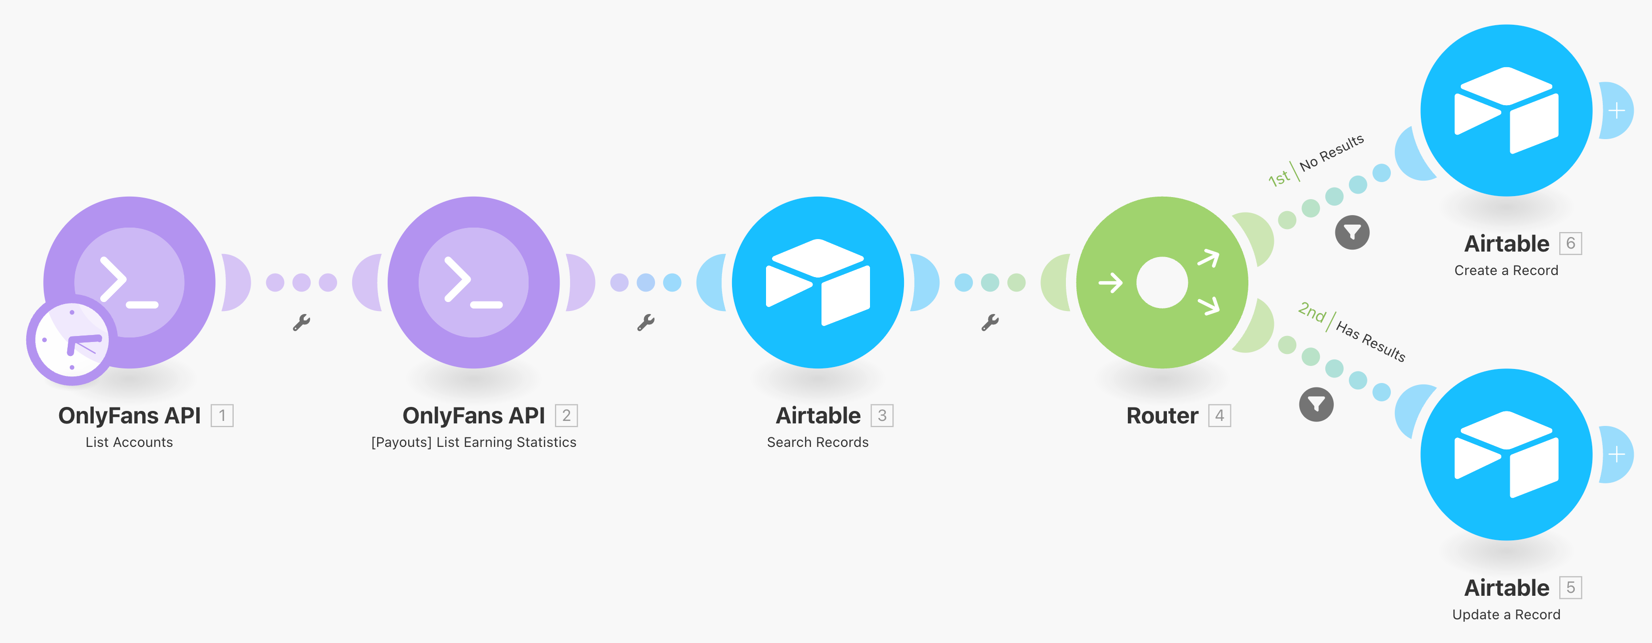 This scenario will synchronize your OnlyFans account revenue data with Airtable. Every account will have one record for each day, which updates hourly.
**Download scenario blueprint ›**
### How to use the scenario blueprints
If you import a blueprint while editing another scenario that hasn't been saved, all the changes in that scenario will be lost.
To import a blueprint:
#### On the Scenario Builder toolbar, click the three dots > Import blueprint. \[!toc]
This scenario will synchronize your OnlyFans account revenue data with Airtable. Every account will have one record for each day, which updates hourly.
**Download scenario blueprint ›**
### How to use the scenario blueprints
If you import a blueprint while editing another scenario that hasn't been saved, all the changes in that scenario will be lost.
To import a blueprint:
#### On the Scenario Builder toolbar, click the three dots > Import blueprint. \[!toc]
 #### Click Choose File, select the blueprint file in .json format, and click Save. \[!toc]
 The imported scenario appears in the Scenario Builder. You can now configure your own account connections, make any necessary edits to the scenario, schedule it, and click the Save icon.