# Frequently Asked Questions
URL: /faq
Quick answers to common OnlyFans API questions about authentication, security, rate limits, fan analytics, webhooks, and integration best practices.
***
title: Frequently Asked Questions
description: "Quick answers to common OnlyFans API questions about authentication, security, rate limits, fan analytics, webhooks, and integration best practices."
-------------------------------------------------------------------------------------------------------------------------------------------------------------------
import { Accordion, Accordions } from 'fumadocs-ui/components/accordion';
## API Capabilities & Features
Yes, our API fully supports reading and sending messages. Refer to our [List Chats](/api-reference/chats/listChats) and [Send Message](/api-reference/chats/sendMessage) endpoints for more details.
Image generation is not natively supported at this time. However, we recommend third-party solutions like [fanscreator.ai](https://fanscreator.ai) for this functionality.
Direct vault uploads aren’t supported by OnlyFans. However, you have a few options:
* **Recommended:** Upload media exactly when and where it needs to be posted — for example, directly to a post, message, or scheduled post — instead of preloading it into the vault. This keeps your workflow simple and avoids unnecessary steps.
* If you still want to store media in the vault ahead of time, you can:
* Upload media using our [OnlyFans CDN upload](/api-reference/media/uploadMediaToTheOnlyFansCDN) endpoint.
* [Create a post](/api-reference/posts/sendPost) with the media, then delete it immediately - the media will remain in your vault
* Use our [Send Message](/api-reference/chats/sendMessage) endpoint to include the media in a message, then delete the message — again, the media will stay in your vault.
Yes! Many customers successfully use tools like [n8n](https://n8n.io) and [Supabase](https://supabase.com) for faster development and deployment.
You're likely missing the account prefix.
* ❌ Wrong: `/api/fans/active`
* ✅ Correct: `/api/acct_XXXXXXXX/fans/active`
## Security & Safety
Yes, absolutely. We have a 5-year track record with:
* Zero accounts banned
* Zero accounts red-flagged
* Enterprise-grade security measures
Your security is our priority:
* All passwords and cookies are hashed in our database
* We use OpenSSL with AES-256-CBC encryption
* All data is signed with MAC (Message Authentication Code)
We implement robust proxy protection:
* Each connected account gets a dedicated IP address
* Public endpoints use rotating residential proxies
* This prevents detection and ensures account safety
For more information, refer to our dedicated [proxies guide](introduction/essentials/proxies).
## API Stability & Performance
Our API infrastructure includes:
* Web Application Firewall (WAF)
* Proxy management
* Built-in rate limiting
* No stability issues reported to date
Check our real-time status at: [status.onlyfansapi.com](https://status.onlyfansapi.com)
Website updates have minimal impact:
* Downtime only occurs if OnlyFans itself is down
* We typically adapt to changes within minutes
* No extended service interruptions
## Rate Limiting & Best Practices
**Recommended approach:** Implement exponential backoff
1. When you receive a 429 error, wait 1 second
2. If it happens again, double the wait time (2s → 4s → 8s)
3. Continue up to a maximum wait time
4. Use queuing systems like AWS SQS, Laravel Queues, or Ruby Sidekiq
Email us at [hello@onlyfansapi.com](mailto:hello@onlyfansapi.com) for code examples.
Rate limits are documented in our [Rate Limits](/introduction/essentials/rate-limits) guide.
## API Keys Management
**Best practice:** One API key per service/integration
* Create separate keys for different features
* Assign dedicated keys to external developers
* This improves security and tracking
No, you can create as many API keys as you want, regardless of your subscription plan.
Yes, a single API key can access all available endpoints.
## Account Authentication & Management
**Through our [Console](https://app.onlyfansapi.com):**
1. Go to Dashboard -> Accounts
2. Find the relevant account
3. Click on the Account ID to copy it
**Through our API:**
1. Call our [List Accounts](/api-reference/account/listAccounts) endpoint
2. The response includes the account ID in the `id` field
OnlyFans API account IDs **always** start with `acct_`
Always use the format: `acct_XXXXXXXX`
* Include the `acct_` prefix
* Endpoint URL example: `https://app.onlyfansapi.com/api/acct_abc123/chats`
Yes! Use these endpoints for authentication:
* [Start Authentication](/api-reference/connect-onlyfans-account/startAuthentication)
* [Poll Authentication Status](/api-reference/connect-onlyfans-account/pollAuthenticationStatus)
* Optionally, [Submit 2FA](/api-reference/connect-onlyfans-account/submit2FA)
Use our [Get Current Account](/api-reference/account/getCurrentAccount) endpoint to retrieve the authenticated account details.
No need to use our UI - integrate these endpoints directly with your platform.
## Fan Data & Analytics
This is normal behavior:
* Chat lists return immediately
* Fan details are scraped in the background (usually takes 2-3 seconds)
Either call our [Get User Details](/api-reference/users/getUserDetails) endpoint, or retry the original endpoint after 10 seconds.
Use the lastSeen field from our [Get Profile Details](/api-reference/public-profiles/getProfileDetails) or [Get User Details](/api-reference/users/getUserDetails) endpoints. If the `lastSeen` value is recent, the fan is likely online.
```json
{
"lastSeen": "2025-05-01T15:01:07+00:00"
...
}
```
[-> Read more about caching](/introduction/essentials/response-structure#cache-control)
There's two options available:
* **Calculate manually:** Use `subscribedOnData.subscribeAt` on endpoints like [List Active Fans](/api-reference/fans/listActiveFans) or [Get User Details](/api-reference/users/getUserDetails).
* **Human-readable format:** Use `subscribedOnData.duration` (e.g., "3 months")
Access comprehensive spending data through these fields:
| Field | Description |
| ---------------- | ------------------------------ |
| `totalSumm` | Combined total of all spending |
| `subscribesSumm` | Total spent on subscriptions |
| `tipsSumm` | Total spent on tips |
| `messagesSumm` | Total spent on paid messages |
| `postsSumm` | Total spent on paid posts |
| `streamsSumm` | Total spent on streams |
* [Get User Details](/api-reference/users/getUserDetails)
* [List Active Fans](/api-reference/fans/listActiveFans)
Sadly, OnlyFans doesn't store language preferences. Workaround:
1. Fetch chat messages from the fan
2. Use a third-party language detection API
3. Store the detected language in your database
No direct endpoint exists, but you can:
1. Retrieve chat messages using the [List ChatMessage](/api-reference/chats/listChatMessage) endpoint
2. Check if `isOpened = true` AND `price > 0`, which indicates a purchased PPV
## Webhooks & Media Handling
* 📚 Documentation: [docs.onlyfansapi.com/webhooks](/webhooks)
* 🎥 Video Demo: [cap.so/s/p2wfkj072yt2x96](https://cap.so/s/p2wfkj072yt2x96)
When `"isReady": false`, the media is still processing.
**Solution:**
1. Get the chat ID from the webhook
2. Poll the [List ChatMessage](/api-reference/chats/listChatMessage) endpoint every 10-20 seconds
3. Wait for `"isReady": true`
4. The URL will then be available
**Alternatively:** Scrape and store vault content internally for reverse searching by media ID, once the media is ready.
Yes, you can use webhooks with no-code tools like Make, n8n or Zapier. Just set up a webhook listener in your tool and configure it to receive data from our API.
We have most webhook events available as Make and Zapier modules, which you can find in our [Make](/integrations/make/available-modules#instant-triggers) and [Zapier](/integrations/zapier/available-modules#instant-triggers) directories.
# Overview
URL: /api-reference
Deep dive into our API endpoints and data structures
***
title: "Overview"
description: "Deep dive into our API endpoints and data structures"
-------------------------------------------------------------------
# Introduction
URL: /data-exports
Our no-code data exports offer full historic data of transactions, chat messages, media, and much more.
***
title: "Introduction"
description: "Our no-code data exports offer full historic data of transactions, chat messages, media, and much more."
icon: Hand
----------
import { Step, Steps } from 'fumadocs-ui/components/steps';
import {
ArrowLeftRightIcon,
BanknoteArrowDownIcon,
HeartIcon,
ImageIcon,
MessagesSquareIcon,
TagIcon,
UserSearchIcon
} from "lucide-react";
## Available data export types
} title="Transactions">
🟢 Available
} title="Banking & Payouts">
Coming soon
} title="Fans & Following">
Coming soon
} title="Tracking Links">
Coming soon
} title="Trial Links">
Coming soon
} title="Chat Messages">
Coming soon
} title="Media">
Coming soon
## Getting started
We are continuously working to improve and expand the available export types. If you run in to any issues, please contact us.
To get started with our no-code data exports, please visit the [Data Exports page](https://app.onlyfansapi.com/tools/data-export) on our Console.
### Starting an export
To get started, click on the "Create Export" button, which will take you to the export creation page. You're then prompted customize your export:
#### Data type
As the first step, select the type of data you want to export. Please refer to [the list above](#available-data-export-types) for available export types.
#### Export fields
Select the fields you want to include in your export. For a full list of available fields, please refer to [the available export fields list](#available-export-fields).
#### Accounts
Choose which accounts you want to include in your export. You can select all connected accounts, or select specific accounts.
#### Date range
Select the data range that you wish to be included in your export.
Transaction exports will always export up until the current date & time. You are only able to choose the start date.
#### View the export cost, and select the export file type
After providing the above details, the export cost will be calculated and shown to you. If all looks good, press on "Export Data" and choose either CSV or Excel (XSLX). This will start the export!
Your data export will now be processed by our servers in the background, and you will be able to download it once completed.
### Big data exports
Depending on the start & end date and account size, your export might take a long time to complete. We are working on improving this experience.\
As a workaround, you may start multiple smaller individual exports.
## Available export fields
| Transactions | Banking | Fans & Following | Tracking Links | Trial Links | Chat Messages | Media |
| ---------------- | ----------- | ---------------- | -------------- | ----------- | ------------- | ----------- |
| Account ID | Coming soon | Coming soon | Coming soon | Coming soon | Coming soon | Coming soon |
| Account Name | | | | | | |
| Account Username | | | | | | |
| Transaction ID | | | | | | |
| Transaction Type | | | | | | |
| Fan ID | | | | | | |
| Fan Username | | | | | | |
| Fan Name | | | | | | |
| Amount | | | | | | |
| VAT Amount | | | | | | |
| Tax Amount | | | | | | |
| Net Amount | | | | | | |
| Fee Amount | | | | | | |
| Currency | | | | | | |
| Description | | | | | | |
| Status | | | | | | |
| Created At | | | | | | |
## Pricing
The following pricing applies to our no-code data exports:
| Export type | Cost |
| ---------------- | ----------------------------- |
| Transactions | 1 credit per 100 transactions |
| Banking | Coming soon |
| Fans & Following | Coming soon |
| Tracking Links | Coming soon |
| Trial Links | Coming soon |
| Chat Messages | Coming soon |
| Media | Coming soon |
# Introduction
URL: /integrations
OnlyFans API offers various integrations with platforms like Make, Zapier, IFTTT & n8n. This documentation will help you understand how to make use of our supported integrations.
***
title: "Introduction"
description: "OnlyFans API offers various integrations with platforms like Make, Zapier, IFTTT & n8n. This documentation will help you understand how to make use of our supported integrations."
icon: Hand
----------
import {
SiMake,
SiMakeHex,
SiZapier,
SiZapierHex,
SiIfttt,
SiIftttHex,
SiN8n,
SiN8nHex
} from "@icons-pack/react-simple-icons";
Please choose an integration to get started:
} href="/integrations/make" title="Make">
Best for building complex, multi-step automations and custom integrations with OnlyFans, all without writing code. Ideal for users who want visual workflow design and advanced logic.
} href="/integrations/zapier" title="Zapier">
Best for quickly setting up no-code automations based on triggers like new messages, PPV purchases, or new fan subscriptions. Great for those who want ease-of-use and a large library of app connections.
} href="/integrations/n8n" title="n8n">
Best for building flexible yet advanced no-code automations. Perfect for users who want powerful automation capabilities with full control over their workflows.
Or watch our tutorial video:
# Introduction
URL: /introduction
Welcome to the OnlyFansAPI.com documentation!
***
title: Introduction
description: "Welcome to the OnlyFansAPI.com documentation!"
icon: Hand
----------
import {
CodeXmlIcon,
KeyRoundIcon,
LockIcon,
WebhookIcon,
} from 'lucide-react';
## Why OnlyFansAPI.com?
OnlyFansAPI.com is a platform that allows you to interact with the OnlyFans API without the need to build
your proxy management system, reverse engineer the API, or deal with WebSockets.
Our engineers who have been working with the OnlyFans API for years have built **a huge set of simple REST API endpoints** that allows you to:
* Access all public information about OnlyFans Creator Profiles
* Search within a database of over 3.5m+ OnlyFans Creator Profiles
* Connect your own OnlyFans account and:
* Get a list of your chats and messages
* Send messages (i.e. if you're building AI Chatbot solution)
* Get a list of your fans, and automatically follow them back
* Literally anything else you can think of!
## Get started
Whether you're building a chatbot, OnlyFans Search Engine, OnlyFans CRM, or anything else, you can get started with OnlyFansAPI.com in minutes.
} href="/introduction/quickstart">
Learn how to make your first API request and get started with OnlyFans API
} href="https://app.onlyfansapi.com/api-keys">
Create your first API Key and start making requests
} href="/introduction/guides/connect-onlyfans-account">
Learn how to connect you OnlyFans accounts in under 2 minutes
} href="/webhooks">
Get webhook notifications for new messages, new subscribers, tips, ...
# Quickstart (2m)
URL: /introduction/quickstart
Start using the OnlyFans API in minutes
***
title: "Quickstart (2m)"
description: "Start using the OnlyFans API in minutes"
icon: Rocket
------------
import {
CodeIcon, CoinsIcon, GaugeIcon, ShieldHalfIcon, ShieldIcon, ShieldUserIcon,
} from "lucide-react";
## Getting Started with OnlyFans API
Follow these steps to start using the OnlyFans API for your project.
### 1. Create Your API Key
To get started with the OnlyFans API, you'll need an API key:
1. Sign up for an account at [OnlyFansAPI Console](https://app.onlyfansapi.com)
2. Navigate to the API Keys section
3. Create a new API key for your project
4. Save your API key securely - you'll need it for all API requests
### 2. Connect Your OnlyFans Account
You'll need to connect your OnlyFans account to use the API. We offer two methods:
#### Automated Login Flow (Recommended)
1. Go to [OnlyFansAPI Console -> Accounts](https://app.onlyfansapi.com/accounts)
2. Click "+ Connect Account"
3. Follow the setup process (supports 2FA and captcha)
#### Manual cURL Method
An alternative method using cURL request is available. See our [detailed guide](/introduction/guides/connect-onlyfans-account) for instructions.
### 3. Essential Concepts
Before you start making API calls, familiarize yourself with these important concepts:
} href="/introduction/essentials/response-structure">
Understand how our API responses are structured.
} href="/introduction/essentials/rate-limits">
Understand API rate limits and how to handle them properly.
} href="/introduction/essentials/credits">
Learn about our credit-based billing and how to manage your usage.
} href="/introduction/essentials/proxies">
Learn about proxy options for secure API access.
### 4. Next Steps
Once you're set up, you can:
* Explore our API endpoints in the [API Reference](/api-reference)
* Test API calls directly from our documentation
* Start building your application with our comprehensive guides
# Available webhook events
URL: /webhooks/available-events
A list of all available webhook events that you can subscribe to.
***
title: "Available webhook events"
description: "A list of all available webhook events that you can subscribe to."
icon: Webhook
-------------
Please reach out to us, we can add it!
## Accounts
### `accounts.connected`
A new OnlyFans account was connected.
Please note that `payload.client_reference_id` can be null - it's only
included if you provided us with `client_reference_id` while [Creating Client
Session](/api-reference/client-sessions/createClientSession)
```json title="Example payload"
{
"event": "accounts.connected",
"account_id": "acct_123",
"payload": {
"client_reference_id": "my_crm_model_12345", // Optional - Value you provided while creating Client Session - otherwise null
"state": "authenticated",
"progress": "started",
"latestAuthAttempt": {
"started_at": "2025-05-13T20:26:56.000000Z",
"completed_at": null,
"success": false,
"error_message": null,
"needs_otp": false,
"needs_face_otp": false,
"otp_phone_ending": null
}
}
}
```
### `accounts.reconnected`
An OnlyFans account was reconnected.
```json title="Example payload"
{
"event": "accounts.reconnected",
"account_id": "acct_123",
"payload": {
"state": "authenticated",
"progress": "started",
"latestAuthAttempt": {
"started_at": "2025-05-13T20:26:56.000000Z",
"completed_at": null,
"success": false,
"error_message": null,
"needs_otp": false,
"needs_face_otp": false,
"otp_phone_ending": null
}
}
}
```
### `accounts.session_expired`
OnlyFans account connection has expired, but we automatically re-connected it using our system - you don't need to do anything.
```json title="Example payload"
{
"event": "accounts.session_expired",
"account_id": "acct_123",
"payload": {
"state": "authenticated",
"progress": "started",
"latestAuthAttempt": {
"started_at": "2025-05-13T20:26:56.000000Z",
"completed_at": null,
"success": false,
"error_message": null,
"needs_otp": false,
"needs_face_otp": false,
"otp_phone_ending": null
}
}
}
```
### `accounts.authentication_failed`
OnlyFans account connection has expired, and we couldn't automatically re-connect it using our system. You need to reconnect with our [/authenticate](/api-reference/connect-onlyfans-account/startAuthentication) endpoint or manually in our [dashboard](https://app.onlyfansapi.com).
```json title="Example payload"
{
"event": "accounts.authentication_failed",
"account_id": "acct_123",
"payload": {
"state": "authenticated",
"progress": "started",
"latestAuthAttempt": {
"started_at": "2025-05-13T20:26:56.000000Z",
"completed_at": null,
"success": false,
"error_message": null,
"needs_otp": false,
"needs_face_otp": false,
"otp_phone_ending": null
}
}
}
```
### `accounts.otp_code_required`
A two-factor authentication code is required to connect one of your OnlyFans accounts.
```json title="Example payload"
{
"event": "accounts.otp_code_required",
"account_id": "acct_123",
"payload": {
"state": "authenticated",
"progress": "started",
"latestAuthAttempt": {
"started_at": "2025-05-13T20:26:56.000000Z",
"completed_at": null,
"success": false,
"error_message": null,
"needs_otp": false,
"needs_face_otp": false,
"otp_phone_ending": null
}
}
}
```
### `accounts.face_otp_required`
Face verification is required to connect one of your OnlyFans accounts.
```json title="Example payload"
{
"event": "accounts.face_otp_required",
"account_id": "acct_123",
"payload": {
"state": "authenticated",
"progress": "started",
"face_otp_verification_url": "https://id.onlyfans.com/s?123",
"latestAuthAttempt": {
"started_at": "2025-05-13T20:26:56.000000Z",
"completed_at": null,
"success": false,
"error_message": null,
"needs_otp": false,
"needs_face_otp": false,
"otp_phone_ending": null
}
}
}
```
## Messages
### `messages.received`
New message received from a fan.
```json title="Example payload"
{
"event": "messages.received",
"account_id": "acct_123",
"payload": {
"responseType": "message",
"text": "
",
"giphyId": null,
"lockedText": false,
"isFree": true,
"price": 0,
"isMediaReady": true,
"mediaCount": 1,
"media": [
{
"id": 123,
"type": "photo",
"convertedToVideo": false,
"canView": true,
"hasError": false,
"createdAt": "2025-04-05T06:19:31+00:00",
"isReady": true,
"files": {
"full": {
"url": "https://example.com",
"width": 3840,
"height": 5215,
"size": 0,
"sources": []
},
"thumb": {
"url": "https://example.com",
"width": 300,
"height": 300,
"size": 0
},
"preview": {
"url": "https://example.com",
"width": 960,
"height": 1304,
"size": 0
},
"squarePreview": {
"url": "https://example.com",
"width": 960,
"height": 960,
"size": 0
}
},
"duration": 0,
"releaseForms": [],
"hasCustomPreview": false,
"videoSources": {
"240": null,
"720": null
}
}
],
"previews": [],
"isTip": false,
"isReportedByMe": false,
"isCouplePeopleMedia": false,
"queueId": 123,
"isMarkdownDisabled": true,
"releaseForms": [],
"isFromQueue": false,
"id": 123,
"isOpened": false,
"isNew": true,
"createdAt": "2025-05-15T23:37:24+00:00",
"changedAt": "2025-05-15T23:37:24+00:00",
"cancelSeconds": 86400,
"isLiked": false,
"canPurchase": false,
"canPurchaseReason": "free",
"canReport": false,
"canBePinned": true,
"isPinned": false,
"toUser": {
"view": "s",
"avatar": null,
"avatarThumbs": null,
"header": null,
"headerSize": null,
"headerThumbs": null,
"id": 123,
"name": "Name",
"username": "username",
"canLookStory": false,
"canCommentStory": false,
"hasNotViewedStory": false,
"isVerified": false,
"canPayInternal": true,
"hasScheduledStream": false,
"hasStream": false,
"hasStories": false,
"tipsEnabled": false,
"tipsTextEnabled": true,
"tipsMin": 5,
"tipsMinInternal": 1,
"tipsMax": 200,
"canEarn": false,
"canAddSubscriber": true,
"subscribePrice": 0,
"displayName": "",
"notice": "",
"isRestricted": false,
"canRestrict": true,
"subscribedBy": false,
"subscribedByExpire": null,
"subscribedByExpireDate": null,
"subscribedByAutoprolong": null,
"subscribedIsExpiredNow": null,
"currentSubscribePrice": null,
"subscribedOn": true,
"subscribedOnExpiredNow": false,
"subscribedOnDuration": "",
"listsStates": [
{
"id": "fans",
"type": "fans",
"name": "Fans",
"hasUser": true,
"canAddUser": false,
"cannotAddUserReason": "ALREADY_EXISTS"
},
{
"id": "following",
"type": "following",
"name": "Following",
"hasUser": false,
"canAddUser": false,
"cannotAddUserReason": "SYSTEM_LIST"
},
{
"id": "recent",
"type": "recent",
"name": "Recent (last 24 hours)",
"hasUser": true,
"canAddUser": false,
"cannotAddUserReason": "ALREADY_EXISTS"
},
{
"id": "muted",
"type": "muted",
"name": "Muted",
"hasUser": false,
"canAddUser": true,
"cannotAddUserReason": null
},
{
"id": "tagged",
"type": "tagged",
"name": "Tagged",
"hasUser": false,
"canAddUser": false,
"cannotAddUserReason": "SYSTEM_LIST"
},
{
"id": "friends",
"type": "friends",
"name": "Friends",
"hasUser": false,
"canAddUser": false,
"cannotAddUserReason": "USER_NOT_PERFORMER"
}
],
"showMediaCount": true,
"lastSeen": "2025-05-15T23:37:03+00:00",
"canReport": false
}
}
}
```
### `messages.ppv.unlocked`
A PPV message that you sent has been purchased by a fan.
```json title="Example payload"
{
"event": "messages.ppv.unlocked",
"account_id": "acct_123",
"payload": {
"id": "123",
"type": "paided_message",
"createdAt": "2025-05-05T22:18:00+00:00",
"text": "has purchased your message for $5.00!",
"replacePairs": {
"{NAME}": "Name",
"{MESSAGE_LINK}": "message",
"{AMOUNT}": "$5.00"
},
"subType": "subscriber_pay_for_chat_message",
"user_id": "123",
"isRead": false,
"canGoToProfile": true,
"user": {
"avatar": null,
"avatarThumbs": null,
"header": null,
"headerSize": null,
"headerThumbs": null,
"id": 123,
"name": "Name",
"username": "username",
"canLookStory": false,
"canCommentStory": false,
"hasNotViewedStory": false,
"isVerified": false,
"canPayInternal": false,
"hasScheduledStream": false,
"hasStream": false,
"hasStories": false,
"tipsEnabled": false,
"tipsTextEnabled": true,
"tipsMin": 5,
"tipsMinInternal": 1,
"tipsMax": 200,
"canEarn": false,
"canAddSubscriber": false,
"subscribePrice": 0,
"subscribedBy": false,
"subscribedOn": false,
"canReceiveChatMessage": false,
"hideChat": false,
"lastSeen": "2025-05-05T22:17:29+00:00",
"isPerformer": false,
"isRealPerformer": false,
"view": "mn",
"canReport": true,
"subscribedByData": null,
"subscribedOnData": null,
"isBlocked": false
}
}
}
```
## Subscriptions
### `subscriptions.new`
A new fan has subscribed.
```json title="Example payload"
{
"event": "subscriptions.new",
"account_id": "acct_123",
"payload": {
"id": "123",
"type": "subscribed",
"createdAt": "2025-05-05T21:27:00+00:00",
"text": "subscribed to your profile!",
"replacePairs": {
"{SUBSCRIBER_LINK}": "Name",
"{PRICE}": "free"
},
"subType": "new_subscriber",
"user_id": "123",
"isRead": false,
"canGoToProfile": true,
"user": {
"avatar": "https://example.com",
"avatarThumbs": {
"c50": "https://example.com",
"c144": "https://example.com"
},
"header": "https://example.com",
"headerSize": {
"width": 767,
"height": 1152
},
"headerThumbs": {
"w480": "https://example.com",
"w760": "https://example.com"
},
"id": 123,
"name": "Name",
"username": "username",
"canLookStory": false,
"canCommentStory": false,
"hasNotViewedStory": false,
"isVerified": true,
"canPayInternal": false,
"hasScheduledStream": false,
"hasStream": false,
"hasStories": false,
"tipsEnabled": true,
"tipsTextEnabled": true,
"tipsMin": 5,
"tipsMinInternal": 1,
"tipsMax": 200,
"canEarn": true,
"canAddSubscriber": false,
"subscribePrice": 0,
"subscribedBy": false,
"subscribedOn": false,
"canReceiveChatMessage": false,
"hideChat": false,
"lastSeen": "2025-05-05T21:26:04+00:00",
"isPerformer": true,
"isRealPerformer": true,
"view": "mn",
"canReport": true,
"subscribedByData": null,
"subscribedOnData": null,
"isBlocked": false
}
}
}
```
## Posts
### `posts.liked`
A fan has liked one of your posts.
```json title="Example payload"
{
"event": "posts.liked",
"account_id": "acct_123",
"payload": {
"id": "123",
"type": "favorited",
"createdAt": "2025-05-05T22:22:00+00:00",
"text": "liked your post",
"replacePairs": {
"{POST_LINK}": "post"
},
"subType": "new_favorite",
"user_id": "123",
"isRead": false,
"canGoToProfile": true,
"user": {
"avatar": null,
"avatarThumbs": null,
"header": null,
"headerSize": null,
"headerThumbs": null,
"id": 123,
"name": "Name",
"username": "username",
"canLookStory": false,
"canCommentStory": false,
"hasNotViewedStory": false,
"isVerified": false,
"canPayInternal": false,
"hasScheduledStream": false,
"hasStream": false,
"hasStories": false,
"tipsEnabled": false,
"tipsTextEnabled": true,
"tipsMin": 5,
"tipsMinInternal": 1,
"tipsMax": 200,
"canEarn": false,
"canAddSubscriber": false,
"subscribePrice": 0,
"subscribedBy": false,
"subscribedOn": false,
"canReceiveChatMessage": false,
"hideChat": false,
"lastSeen": null,
"isPerformer": false,
"isRealPerformer": false,
"view": "mn",
"canReport": true,
"subscribedByData": null,
"subscribedOnData": null,
"isBlocked": false
}
}
}
```
## Users
### `users.typing`
A fan is typing a message.
```json title="Example payload"
{
"event": "users.typing",
"account_id": "acct_123",
"payload": {
"id": 1910197
}
}
```
# Introduction
URL: /webhooks
Listen to events from your OnlyFans accounts on your webhook endpoint so your integration can automatically process data.
***
title: "Introduction"
description: "Listen to events from your OnlyFans accounts on your webhook endpoint so your integration can automatically process data."
icon: Hand
----------
Webhooks are only available for Pro and Enterprise plans.
A webhook is an HTTP endpoint that receives events from OnlyFans API. They allow you to be notified about events such as:
* Receiving a message from a fan (`messages.received`)
* New fan subscriptions (`subscriptions.new`)
* Fan purchased a PPV message (`messages.ppv.unlocked`)
You can use our API for less frequent actions like retrieving specific chats, profiles, or earning details, while webhooks help you scale your integration and process large volumes of business-critical events in near real-time.
# Protecting your webhooks
URL: /webhooks/protecting-your-webhooks
It is recommended to validate incoming webhook requests to ensure that they originate from OnlyFans API, and not from a malicious actor. You can do this by verifying the `Signature` header in the request.
***
title: "Protecting your webhooks"
description: "It is recommended to validate incoming webhook requests to ensure that they originate from OnlyFans API, and not from a malicious actor. You can do this by verifying the `Signature` header in the request."
icon: ShieldCheck
-----------------
You can choose any signing secret, but it is recommended to use a long, random string.
## How the signature is calculated
We calculate the signature using the HMAC SHA256 algorithm. The payload (as json) is the string, and the signing secret is the key.
## Verifying the signature
Below you can find examples of how to verify the signature in different programming languages.
```php tab="PHP"
$computedSignature = hash_hmac('sha256', $requestContent, $signingSecret);
```
```python tab="Python"
import hmac
import hashlib
computed_signature = hmac.new(signing_secret.encode(), request_content.encode(), hashlib.sha256).hexdigest()
```
```javascript tab="JavaScript"
const crypto = require('crypto');
const computedSignature = crypto
.createHmac('sha256', signingSecret)
.update(requestContent)
.digest('hex');
```
```go tab="Go"
package main
import (
"crypto/hmac"
"crypto/sha256"
"encoding/hex"
)
func main() {
signingSecret := []byte("your_signing_secret")
requestContent := []byte("your_request_content")
h := hmac.New(sha256.New, signingSecret)
h.Write(requestContent)
computedSignature := hex.EncodeToString(h.Sum(nil))
// Use `computedSignature` as needed
}
```
```java tab="Java"
import javax.crypto.Mac;
import javax.crypto.spec.SecretKeySpec;
import java.util.Base64;
import java.nio.charset.StandardCharsets;
public class HmacSha256Example {
public static void main(String[] args) throws Exception {
String signingSecret = "your_signing_secret";
String requestContent = "your_request_content";
Mac mac = Mac.getInstance("HmacSHA256");
SecretKeySpec secretKeySpec = new SecretKeySpec(signingSecret.getBytes(StandardCharsets.UTF_8), "HmacSHA256");
mac.init(secretKeySpec);
byte[] hmacBytes = mac.doFinal(requestContent.getBytes(StandardCharsets.UTF_8));
String computedSignature = bytesToHex(hmacBytes);
// Use `computedSignature` as needed
}
private static String bytesToHex(byte[] bytes) {
StringBuilder hexString = new StringBuilder();
for (byte b : bytes) {
String hex = Integer.toHexString(0xff & b);
if (hex.length() == 1) {
hexString.append('0');
}
hexString.append(hex);
}
return hexString.toString();
}
}
```
```ruby tab="Ruby"
require 'openssl'
computed_signature = OpenSSL::HMAC.hexdigest('sha256', signing_secret, request_content)
```
# Subscribing to webhooks
URL: /webhooks/subscribing-to-webhooks
Listen to events from your OnlyFans accounts on your webhook endpoint so your integration can automatically process data.
***
title: "Subscribing to webhooks"
description: "Listen to events from your OnlyFans accounts on your webhook endpoint so your integration can automatically process data."
icon: BellPlus
--------------
Webhooks are only available for Pro and Enterprise plans.
You can easily subscribe to webhooks using our console. To do this, follow these steps:
1. Go to the [OnlyFansAPI Console -> Webhooks](https://app.onlyfansapi.com)
2. Click on the **+ Add Webhook** button
3. Fill in the **Endpoint URL** field with your webhook endpoint
4. Optionally, add a [Signing Secret](/webhooks/protecting-your-webhooks) to verify the webhook payloads (recommended)
5. Select the [events](/webhooks/available-events) you want to subscribe to
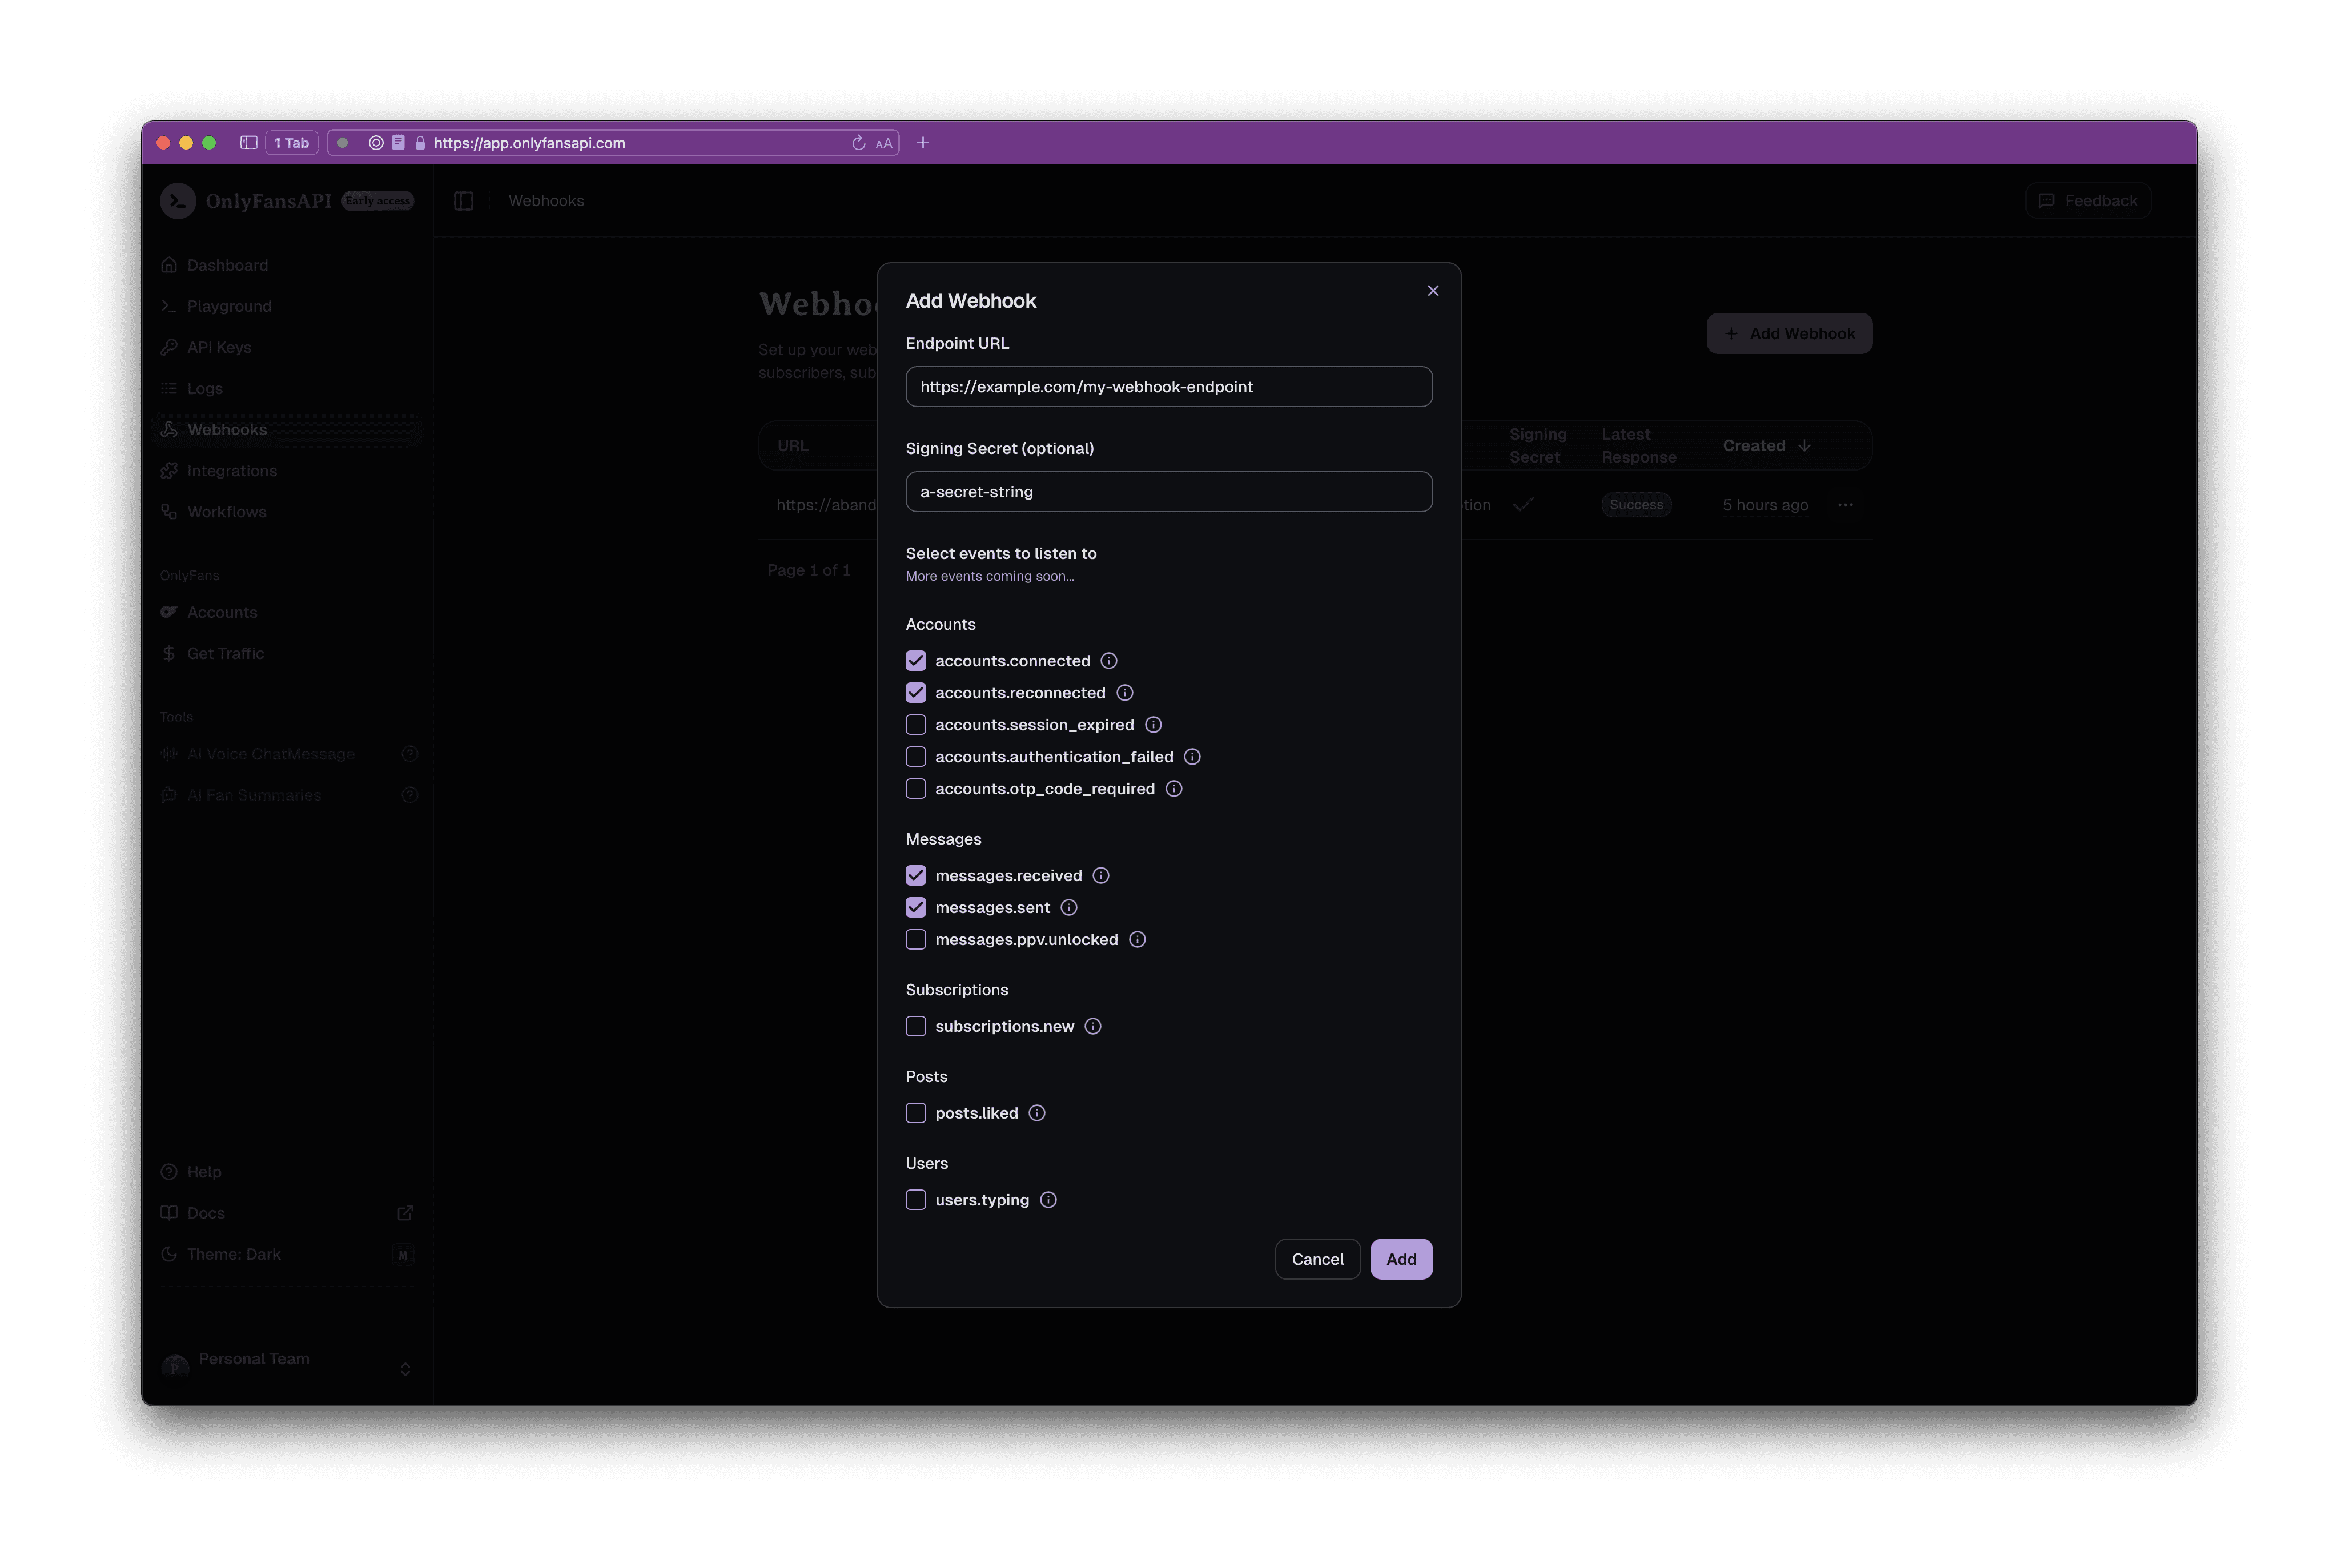
Once you have added your webhook, you will start receiving events on your webhook endpoint.
You will be able to view the latest response status in the console.
# Disconnect Account
URL: /api-reference/account/disconnectAccount
Disconnect an OnlyFans account.
***
title: Disconnect Account
description: Disconnect an OnlyFans account.
full: true
\_openapi:
method: DELETE
route: /api/accounts/{id}
toc: \[]
structuredData:
headings: \[]
contents:
* content: Disconnect an OnlyFans account.
***
{/* This file was generated by Fumadocs. Do not edit this file directly. Any changes should be made by running the generation command again. */}
# Get Current Account
URL: /api-reference/account/getCurrentAccount
Get OnlyFans Profile details for the currently used Account
***
title: Get Current Account
description: Get OnlyFans Profile details for the currently used Account
full: true
\_openapi:
method: GET
route: /api/{account}/me
toc: \[]
structuredData:
headings: \[]
contents:
* content: Get OnlyFans Profile details for the currently used Account
***
{/* This file was generated by Fumadocs. Do not edit this file directly. Any changes should be made by running the generation command again. */}
# Get Model Start Date
URL: /api-reference/account/getModelStartDate
Get the start date of the model (the date+time monetization was enabled)
***
title: Get Model Start Date
description: Get the start date of the model (the date+time monetization was enabled)
full: true
\_openapi:
method: GET
route: /api/{account}/me/model-start-date
toc: \[]
structuredData:
headings: \[]
contents:
* content: >-
Get the start date of the model (the date+time monetization was
enabled)
***
{/* This file was generated by Fumadocs. Do not edit this file directly. Any changes should be made by running the generation command again. */}
# List Accounts
URL: /api-reference/account/listAccounts
List all connected OnlyFans accounts.
***
title: List Accounts
description: List all connected OnlyFans accounts.
full: true
\_openapi:
method: GET
route: /api/accounts
toc: \[]
structuredData:
headings: \[]
contents:
* content: List all connected OnlyFans accounts.
***
{/* This file was generated by Fumadocs. Do not edit this file directly. Any changes should be made by running the generation command again. */}
# Whoami
URL: /api-reference/api-keys/whoami
Get details about the currently used API Key & the relevant Team
***
title: Whoami
description: Get details about the currently used API Key & the relevant Team
full: true
\_openapi:
method: GET
route: /api/whoami
toc: \[]
structuredData:
headings: \[]
contents:
* content: Get details about the currently used API Key & the relevant Team
***
{/* This file was generated by Fumadocs. Do not edit this file directly. Any changes should be made by running the generation command again. */}
# Get Account Country Details
URL: /api-reference/banking/getAccountCountryDetails
Returns the account owner's country details for banking, including country code, name, whether the country has states and zip codes, payout eligibility, and W9 form availability.
***
title: Get Account Country Details
description: >-
Returns the account owner's country details for banking, including country
code, name, whether the country has states and zip codes, payout eligibility,
and W9 form availability.
full: true
\_openapi:
method: GET
route: /api/{account}/banking/details/account-country
toc: \[]
structuredData:
headings: \[]
contents:
* content: >-
Returns the account owner's country details for banking, including
country code, name, whether the country has states and zip codes,
payout eligibility, and W9 form availability.
***
{/* This file was generated by Fumadocs. Do not edit this file directly. Any changes should be made by running the generation command again. */}
# Get Bank Payout Details
URL: /api-reference/banking/getBankPayoutDetails
Returns the account owner's bank payout details, including whether payout data is filled, available payout methods with their descriptions, and required bank fields.
***
title: Get Bank Payout Details
description: >-
Returns the account owner's bank payout details, including whether payout data
is filled, available payout methods with their descriptions, and required bank
fields.
full: true
\_openapi:
method: GET
route: /api/{account}/banking/details/bank
toc: \[]
structuredData:
headings: \[]
contents:
* content: >-
Returns the account owner's bank payout details, including whether
payout data is filled, available payout methods with their
descriptions, and required bank fields.
***
{/* This file was generated by Fumadocs. Do not edit this file directly. Any changes should be made by running the generation command again. */}
# Get DAC7 Form Details
URL: /api-reference/banking/getDAC7FormDetails
If available, returns the account owner's DAC7 form information required for tax reporting, including personal details, address, tax identification, country information, and DAC7 status.
***
title: Get DAC7 Form Details
description: >-
If available, returns the account owner's DAC7 form information required for
tax reporting, including personal details, address, tax identification,
country information, and DAC7 status.
full: true
\_openapi:
method: GET
route: /api/{account}/banking/details/dac7-form
toc: \[]
structuredData:
headings: \[]
contents:
* content: >-
If available, returns the account owner's DAC7 form information
required for tax reporting, including personal details, address, tax
identification, country information, and DAC7 status.
***
{/* This file was generated by Fumadocs. Do not edit this file directly. Any changes should be made by running the generation command again. */}
# Get Legal and Tax Status
URL: /api-reference/banking/getLegalAndTaxStatus
Returns the account owner's legal and tax status required for banking and payout configuration, including W9 requirements, identity verification status, DAC7 compliance, and tax information.
***
title: Get Legal and Tax Status
description: >-
Returns the account owner's legal and tax status required for banking and
payout configuration, including W9 requirements, identity verification status,
DAC7 compliance, and tax information.
full: true
\_openapi:
method: GET
route: /api/{account}/banking/details/legal-info
toc: \[]
structuredData:
headings: \[]
contents:
* content: >-
Returns the account owner's legal and tax status required for banking
and payout configuration, including W9 requirements, identity
verification status, DAC7 compliance, and tax information.
***
{/* This file was generated by Fumadocs. Do not edit this file directly. Any changes should be made by running the generation command again. */}
# Get Legal Form Details
URL: /api-reference/banking/getLegalFormDetails
Returns the account owner's legal form details for banking, including personal or business name, address, social media links, date of birth, and available document types for identity verification.
***
title: Get Legal Form Details
description: >-
Returns the account owner's legal form details for banking, including personal
or business name, address, social media links, date of birth, and available
document types for identity verification.
full: true
\_openapi:
method: GET
route: /api/{account}/banking/details/legal-form
toc: \[]
structuredData:
headings: \[]
contents:
* content: >-
Returns the account owner's legal form details for banking, including
personal or business name, address, social media links, date of birth,
and available document types for identity verification.
***
{/* This file was generated by Fumadocs. Do not edit this file directly. Any changes should be made by running the generation command again. */}
# List Available Payout Systems
URL: /api-reference/banking/listAvailablePayoutSystems
Returns a list of available payout systems for the account, including details such as payout method codes, titles, descriptions, minimum payout amounts, processing times, and the currently selected payout method.
***
title: List Available Payout Systems
description: >-
Returns a list of available payout systems for the account, including details
such as payout method codes, titles, descriptions, minimum payout amounts,
processing times, and the currently selected payout method.
full: true
\_openapi:
method: GET
route: /api/{account}/banking/available-payout-systems
toc: \[]
structuredData:
headings: \[]
contents:
* content: >-
Returns a list of available payout systems for the account, including
details such as payout method codes, titles, descriptions, minimum
payout amounts, processing times, and the currently selected payout
method.
***
{/* This file was generated by Fumadocs. Do not edit this file directly. Any changes should be made by running the generation command again. */}
# List Countries
URL: /api-reference/banking/listCountries
List countries, their internal OnlyFans IDs, and their payment & tax information.
***
title: List Countries
description: >-
List countries, their internal OnlyFans IDs, and their payment & tax
information.
full: true
\_openapi:
method: GET
route: /api/{account}/banking/countries
toc: \[]
structuredData:
headings: \[]
contents:
* content: >-
List countries, their internal OnlyFans IDs, and their payment & tax
information.
***
{/* This file was generated by Fumadocs. Do not edit this file directly. Any changes should be made by running the generation command again. */}
# Delete Message
URL: /api-reference/chats/deleteMessage
Delete a message from a chat. Please note that ONLY messages sent less than 24 hours ago can be deleted.
***
title: Delete Message
description: >-
Delete a message from a chat. Please note that ONLY messages sent less than 24
hours ago can be deleted.
full: true
\_openapi:
method: DELETE
route: /api/{account}/chats/{chat_id}/messages/{message_id}
toc: \[]
structuredData:
headings: \[]
contents:
* content: >-
Delete a message from a chat. Please note that ONLY messages sent less
than 24 hours ago can be deleted.
***
{/* This file was generated by Fumadocs. Do not edit this file directly. Any changes should be made by running the generation command again. */}
# List ChatMessage
URL: /api-reference/chats/listChatMessage
Get messages from a specific chat.
***
title: List ChatMessage
description: Get messages from a specific chat.
full: true
\_openapi:
method: GET
route: /api/{account}/chats/{chat_id}/messages
toc: \[]
structuredData:
headings: \[]
contents:
* content: Get messages from a specific chat.
***
{/* This file was generated by Fumadocs. Do not edit this file directly. Any changes should be made by running the generation command again. */}
# List Chats
URL: /api-reference/chats/listChats
Get the list of chats for an Account.
***
title: List Chats
description: Get the list of chats for an Account.
full: true
\_openapi:
method: GET
route: /api/{account}/chats
toc: \[]
structuredData:
headings: \[]
contents:
* content: Get the list of chats for an Account.
***
{/* This file was generated by Fumadocs. Do not edit this file directly. Any changes should be made by running the generation command again. */}
# Send Message
URL: /api-reference/chats/sendMessage
Send a new message to a chat.
***
title: Send Message
description: Send a new message to a chat.
full: true
\_openapi:
method: POST
route: /api/{account}/chats/{chat_id}/messages
toc: \[]
structuredData:
headings: \[]
contents:
* content: Send a new message to a chat.
***
{/* This file was generated by Fumadocs. Do not edit this file directly. Any changes should be made by running the generation command again. */}
# Start Typing Indicator
URL: /api-reference/chats/startTypingIndicator
Calling this endpoint will show the target fan a "Model is typing..." note in the chat for ~4 seconds. If you want to continue showing the indicator call this endpoint multiple times. Free - no credits charged.
***
title: Start Typing Indicator
description: >-
Calling this endpoint will show the target fan a "Model is typing..." note in
the chat for \~4 seconds. If you want to continue showing the indicator call
this endpoint multiple times. Free - no credits charged.
full: true
\_openapi:
method: POST
route: /api/{account}/chats/{chat_id}/typing
toc: \[]
structuredData:
headings: \[]
contents:
* content: >-
Calling this endpoint will show the target fan a "Model is typing..."
note in the chat for \~4 seconds. If you want to continue showing the
indicator call this endpoint multiple times. Free - no credits
charged.
***
{/* This file was generated by Fumadocs. Do not edit this file directly. Any changes should be made by running the generation command again. */}
# Create Client Session
URL: /api-reference/client-sessions/createClientSession
Create Client Session Token for later use in embedded auth components - eg. via @onlyfansapi/auth npm package.
***
title: Create Client Session
description: >-
Create Client Session Token for later use in embedded auth components - eg.
via @onlyfansapi/auth npm package.
full: true
\_openapi:
method: POST
route: /api/client-sessions
toc: \[]
structuredData:
headings: \[]
contents:
* content: >-
Create Client Session Token for later use in embedded auth components
* eg. via @onlyfansapi/auth npm package.
***
{/* This file was generated by Fumadocs. Do not edit this file directly. Any changes should be made by running the generation command again. */}
# Poll Authentication Status
URL: /api-reference/connect-onlyfans-account/pollAuthenticationStatus
Poll the status of the authentication process. Eg. if 2FA is required, we will ask you for the code using the `twoFactorPending = true` in the response body.
***
title: Poll Authentication Status
description: >-
Poll the status of the authentication process. Eg. if 2FA is required, we will
ask you for the code using the `twoFactorPending = true` in the response body.
full: true
\_openapi:
method: GET
route: /api/authenticate/{attempt_id}
toc: \[]
structuredData:
headings: \[]
contents:
* content: >-
Poll the status of the authentication process. Eg. if 2FA is required,
we will ask you for the code using the `twoFactorPending = true` in
the response body.
***
{/* This file was generated by Fumadocs. Do not edit this file directly. Any changes should be made by running the generation command again. */}
# Start Authentication
URL: /api-reference/connect-onlyfans-account/startAuthentication
Start the authentication process for a new account. Our systems will bypass Captcha and also ask you for 2FA code if required. All credentials are stored securely using bcrypt and only used during login.
***
title: Start Authentication
description: >-
Start the authentication process for a new account. Our systems will bypass
Captcha and also ask you for 2FA code if required. All credentials are stored
securely using bcrypt and only used during login.
full: true
\_openapi:
method: POST
route: /api/authenticate
toc: \[]
structuredData:
headings: \[]
contents:
* content: >-
Start the authentication process for a new account. Our systems will
bypass Captcha and also ask you for 2FA code if required. All
credentials are stored securely using bcrypt and only used during
login.
***
{/* This file was generated by Fumadocs. Do not edit this file directly. Any changes should be made by running the generation command again. */}
# Submit 2FA
URL: /api-reference/connect-onlyfans-account/submit2FA
Submit the 2FA code for the authentication process.
***
title: Submit 2FA
description: Submit the 2FA code for the authentication process.
full: true
\_openapi:
method: PUT
route: /api/authenticate/{attempt_id}
toc: \[]
structuredData:
headings: \[]
contents:
* content: Submit the 2FA code for the authentication process.
***
{/* This file was generated by Fumadocs. Do not edit this file directly. Any changes should be made by running the generation command again. */}
# List Active Followings
URL: /api-reference/following/listActiveFollowings
Get a paginated list of followings for an Account. Newest followings are first.
***
title: List Active Followings
description: >-
Get a paginated list of followings for an Account. Newest followings are
first.
full: true
\_openapi:
method: GET
route: /api/{account}/following/active
toc: \[]
structuredData:
headings: \[]
contents:
* content: >-
Get a paginated list of followings for an Account. Newest followings
are first.
***
{/* This file was generated by Fumadocs. Do not edit this file directly. Any changes should be made by running the generation command again. */}
# List All Followings
URL: /api-reference/following/listAllFollowings
Get a paginated list of followings for an Account. Newest followings are first.
***
title: List All Followings
description: >-
Get a paginated list of followings for an Account. Newest followings are
first.
full: true
\_openapi:
method: GET
route: /api/{account}/following/all
toc: \[]
structuredData:
headings: \[]
contents:
* content: >-
Get a paginated list of followings for an Account. Newest followings
are first.
***
{/* This file was generated by Fumadocs. Do not edit this file directly. Any changes should be made by running the generation command again. */}
# List Expired Followings
URL: /api-reference/following/listExpiredFollowings
Get a paginated list of expired followings for an Account. Newest followings are first.
***
title: List Expired Followings
description: >-
Get a paginated list of expired followings for an Account. Newest followings
are first.
full: true
\_openapi:
method: GET
route: /api/{account}/following/expired
toc: \[]
structuredData:
headings: \[]
contents:
* content: >-
Get a paginated list of expired followings for an Account. Newest
followings are first.
***
{/* This file was generated by Fumadocs. Do not edit this file directly. Any changes should be made by running the generation command again. */}
# List Active Fans
URL: /api-reference/fans/listActiveFans
Get a paginated list of fans for an Account. Newest fans are first.
***
title: List Active Fans
description: Get a paginated list of fans for an Account. Newest fans are first.
full: true
\_openapi:
method: GET
route: /api/{account}/fans/active
toc: \[]
structuredData:
headings: \[]
contents:
* content: Get a paginated list of fans for an Account. Newest fans are first.
***
{/* This file was generated by Fumadocs. Do not edit this file directly. Any changes should be made by running the generation command again. */}
# List All Fans
URL: /api-reference/fans/listAllFans
Get a paginated list of fans for an Account. Newest fans are first.
***
title: List All Fans
description: Get a paginated list of fans for an Account. Newest fans are first.
full: true
\_openapi:
method: GET
route: /api/{account}/fans/all
toc: \[]
structuredData:
headings: \[]
contents:
* content: Get a paginated list of fans for an Account. Newest fans are first.
***
{/* This file was generated by Fumadocs. Do not edit this file directly. Any changes should be made by running the generation command again. */}
# List Expired Fans
URL: /api-reference/fans/listExpiredFans
Get a paginated list of expired fans for an Account. Newest fans are first.
***
title: List Expired Fans
description: Get a paginated list of expired fans for an Account. Newest fans are first.
full: true
\_openapi:
method: GET
route: /api/{account}/fans/expired
toc: \[]
structuredData:
headings: \[]
contents:
* content: >-
Get a paginated list of expired fans for an Account. Newest fans are
first.
***
{/* This file was generated by Fumadocs. Do not edit this file directly. Any changes should be made by running the generation command again. */}
# List Latest Fans
URL: /api-reference/fans/listLatestFans
Get a paginated list fans, filterable by total, only new subscribers, or only renewals. Newest fans are first.
***
title: List Latest Fans
description: >-
Get a paginated list fans, filterable by total, only new subscribers, or only
renewals. Newest fans are first.
full: true
\_openapi:
method: GET
route: /api/{account}/fans/latest
toc: \[]
structuredData:
headings: \[]
contents:
* content: >-
Get a paginated list fans, filterable by total, only new subscribers,
or only renewals. Newest fans are first.
***
{/* This file was generated by Fumadocs. Do not edit this file directly. Any changes should be made by running the generation command again. */}
# Get Mass Message
URL: /api-reference/mass-messaging/getMassMessage
Get the content of a mass message.
***
title: Get Mass Message
description: Get the content of a mass message.
full: true
\_openapi:
method: GET
route: /api/{account}/mass-messaging/{id}
toc: \[]
structuredData:
headings: \[]
contents:
* content: Get the content of a mass message.
***
{/* This file was generated by Fumadocs. Do not edit this file directly. Any changes should be made by running the generation command again. */}
# List Mass Message Queue
URL: /api-reference/mass-messaging/listMassMessageQueue
List the pending or recently sent mass messages in the message queue.
***
title: List Mass Message Queue
description: List the pending or recently sent mass messages in the message queue.
full: true
\_openapi:
method: GET
route: /api/{account}/mass-messaging
toc: \[]
structuredData:
headings: \[]
contents:
* content: List the pending or recently sent mass messages in the message queue.
***
{/* This file was generated by Fumadocs. Do not edit this file directly. Any changes should be made by running the generation command again. */}
# List Mass Message Statistics
URL: /api-reference/mass-messaging/listMassMessageStatistics
List mass messaging statistics, showing the send count and view count.
***
title: List Mass Message Statistics
description: List mass messaging statistics, showing the send count and view count.
full: true
\_openapi:
method: GET
route: /api/{account}/mass-messaging/statistics
toc: \[]
structuredData:
headings: \[]
contents:
* content: List mass messaging statistics, showing the send count and view count.
***
{/* This file was generated by Fumadocs. Do not edit this file directly. Any changes should be made by running the generation command again. */}
# Send Mass Message
URL: /api-reference/mass-messaging/sendMassMessage
Send a mass message to lists and/or users. You may use both the `userLists` and `userIds` parameters to send the same message to both lists and individual users.
***
title: Send Mass Message
description: >-
Send a mass message to lists and/or users. You may use both the `userLists`
and `userIds` parameters to send the same message to both lists and individual
users.
full: true
\_openapi:
method: POST
route: /api/{account}/mass-messaging
toc: \[]
structuredData:
headings: \[]
contents:
* content: >-
Send a mass message to lists and/or users. You may use both the
`userLists` and `userIds` parameters to send the same message to both
lists and individual users.
***
{/* This file was generated by Fumadocs. Do not edit this file directly. Any changes should be made by running the generation command again. */}
# Unsend/Delete Mass Message
URL: /api-reference/mass-messaging/unsendDeleteMassMessage
Unsend a recently sent mass message, or delete a scheduled/saved message. When unsending, purchased content will continue to be able to viewable.
***
title: Unsend/Delete Mass Message
description: >-
Unsend a recently sent mass message, or delete a scheduled/saved message. When
unsending, purchased content will continue to be able to viewable.
full: true
\_openapi:
method: DELETE
route: /api/{account}/mass-messaging/{id}
toc: \[]
structuredData:
headings: \[]
contents:
* content: >-
Unsend a recently sent mass message, or delete a scheduled/saved
message. When unsending, purchased content will continue to be able to
viewable.
***
{/* This file was generated by Fumadocs. Do not edit this file directly. Any changes should be made by running the generation command again. */}
# Update Mass Message
URL: /api-reference/mass-messaging/updateMassMessage
Update a mass message.
***
title: Update Mass Message
description: Update a mass message.
full: true
\_openapi:
method: PUT
route: /api/{account}/mass-messaging/{id}
toc: \[]
structuredData:
headings: \[]
contents:
* content: Update a mass message.
***
{/* This file was generated by Fumadocs. Do not edit this file directly. Any changes should be made by running the generation command again. */}
# Scrape media from the OnlyFans CDN
URL: /api-reference/media/scrapeMediaFromTheOnlyFansCDN
Scrapes a `https://cdn*.onlyfans.com/*` URL and uploads it to the OnlyFans API CDN, so that you can view or download the file. **Max file size is 500MB**
***
title: Scrape media from the OnlyFans CDN
description: >-
Scrapes a `https://cdn*.onlyfans.com/*` URL and uploads it to the OnlyFans API
CDN, so that you can view or download the file. **Max file size is 500MB**
full: true
\_openapi:
method: POST
route: /api/{account}/media/scrape
toc: \[]
structuredData:
headings: \[]
contents:
* content: >-
Scrapes a `https://cdn*.onlyfans.com/*` URL and uploads it to the
OnlyFans API CDN, so that you can view or download the file. **Max
file size is 500MB**
***
{/* This file was generated by Fumadocs. Do not edit this file directly. Any changes should be made by running the generation command again. */}
# Upload media to the OnlyFans CDN
URL: /api-reference/media/uploadMediaToTheOnlyFansCDN
The response can be used **only once** to manually include media in a post or message. This endpoint does not upload media to the Vault.
***
title: Upload media to the OnlyFans CDN
description: >-
The response can be used **only once** to manually include media in a post or
message. This endpoint does not upload media to the Vault.
full: true
\_openapi:
method: POST
route: /api/{account}/media/upload
toc: \[]
structuredData:
headings: \[]
contents:
* content: >-
The response can be used **only once** to manually include media in a
post or message. This endpoint does not upload media to the Vault.
***
{/* This file was generated by Fumadocs. Do not edit this file directly. Any changes should be made by running the generation command again. */}
# Delete Vault Media
URL: /api-reference/media-vault/deleteVaultMedia
Delete one or multiple media from your vault.
***
title: Delete Vault Media
description: Delete one or multiple media from your vault.
full: true
\_openapi:
method: DELETE
route: /api/{account}/media/vault/delete-media
toc: \[]
structuredData:
headings: \[]
contents:
* content: Delete one or multiple media from your vault.
***
{/* This file was generated by Fumadocs. Do not edit this file directly. Any changes should be made by running the generation command again. */}
# List Vault Media
URL: /api-reference/media-vault/listVaultMedia
List media items stored in your vault. See how many likes and how much tips did they get.
***
title: List Vault Media
description: >-
List media items stored in your vault. See how many likes and how much tips
did they get.
full: true
\_openapi:
method: GET
route: /api/{account}/media/vault
toc: \[]
structuredData:
headings: \[]
contents:
* content: >-
List media items stored in your vault. See how many likes and how much
tips did they get.
***
{/* This file was generated by Fumadocs. Do not edit this file directly. Any changes should be made by running the generation command again. */}
# Add Media To List
URL: /api-reference/media-vault-lists/addMediaToList
Add one or multiple media to a list.
***
title: Add Media To List
description: Add one or multiple media to a list.
full: true
\_openapi:
method: POST
route: /api/{account}/media/vault/lists/{list_id}/media
toc: \[]
structuredData:
headings: \[]
contents:
* content: Add one or multiple media to a list.
***
{/* This file was generated by Fumadocs. Do not edit this file directly. Any changes should be made by running the generation command again. */}
# Create Vault List
URL: /api-reference/media-vault-lists/createVaultList
Create a new Vault list.
***
title: Create Vault List
description: Create a new Vault list.
full: true
\_openapi:
method: POST
route: /api/{account}/media/vault/lists
toc: \[]
structuredData:
headings: \[]
contents:
* content: Create a new Vault list.
***
{/* This file was generated by Fumadocs. Do not edit this file directly. Any changes should be made by running the generation command again. */}
# Delete Vault List
URL: /api-reference/media-vault-lists/deleteVaultList
Delete a Vault list.
***
title: Delete Vault List
description: Delete a Vault list.
full: true
\_openapi:
method: DELETE
route: /api/{account}/media/vault/lists/{list_id}
toc: \[]
structuredData:
headings: \[]
contents:
* content: Delete a Vault list.
***
{/* This file was generated by Fumadocs. Do not edit this file directly. Any changes should be made by running the generation command again. */}
# List Vault Lists
URL: /api-reference/media-vault-lists/listVaultLists
List your Vault lists (categories).
***
title: List Vault Lists
description: List your Vault lists (categories).
full: true
\_openapi:
method: GET
route: /api/{account}/media/vault/lists
toc: \[]
structuredData:
headings: \[]
contents:
* content: List your Vault lists (categories).
***
{/* This file was generated by Fumadocs. Do not edit this file directly. Any changes should be made by running the generation command again. */}
# Remove Media From List
URL: /api-reference/media-vault-lists/removeMediaFromList
Remove one or multiple media from a list.
***
title: Remove Media From List
description: Remove one or multiple media from a list.
full: true
\_openapi:
method: DELETE
route: /api/{account}/media/vault/lists/{list_id}/media
toc: \[]
structuredData:
headings: \[]
contents:
* content: Remove one or multiple media from a list.
***
{/* This file was generated by Fumadocs. Do not edit this file directly. Any changes should be made by running the generation command again. */}
# Rename Vault List
URL: /api-reference/media-vault-lists/renameVaultList
Rename a Vault list.
***
title: Rename Vault List
description: Rename a Vault list.
full: true
\_openapi:
method: PUT
route: /api/{account}/media/vault/lists/{list_id}
toc: \[]
structuredData:
headings: \[]
contents:
* content: Rename a Vault list.
***
{/* This file was generated by Fumadocs. Do not edit this file directly. Any changes should be made by running the generation command again. */}
# Show Vault List
URL: /api-reference/media-vault-lists/showVaultList
Show a Vault list.
***
title: Show Vault List
description: Show a Vault list.
full: true
\_openapi:
method: GET
route: /api/{account}/media/vault/lists/{list_id}
toc: \[]
structuredData:
headings: \[]
contents:
* content: Show a Vault list.
***
{/* This file was generated by Fumadocs. Do not edit this file directly. Any changes should be made by running the generation command again. */}
# Get Notification Counts
URL: /api-reference/notifications/getNotificationCounts
Get a quick overview of all unread notification types
***
title: Get Notification Counts
description: Get a quick overview of all unread notification types
full: true
\_openapi:
method: GET
route: /api/{account}/notifications/counts
toc: \[]
structuredData:
headings: \[]
contents:
* content: Get a quick overview of all unread notification types
***
{/* This file was generated by Fumadocs. Do not edit this file directly. Any changes should be made by running the generation command again. */}
# Get Notification Tabs Order
URL: /api-reference/notifications/getNotificationTabsOrder
Get the order of an account's notification tabs as displayed on the OnlyFans notifications page
***
title: Get Notification Tabs Order
description: >-
Get the order of an account's notification tabs as displayed on the OnlyFans
notifications page
full: true
\_openapi:
method: GET
route: /api/{account}/notifications/tabs-order
toc: \[]
structuredData:
headings: \[]
contents:
* content: >-
Get the order of an account's notification tabs as displayed on the
OnlyFans notifications page
***
{/* This file was generated by Fumadocs. Do not edit this file directly. Any changes should be made by running the generation command again. */}
# List Notifications
URL: /api-reference/notifications/listNotifications
List all notifications for the account
***
title: List Notifications
description: List all notifications for the account
full: true
\_openapi:
method: GET
route: /api/{account}/notifications
toc: \[]
structuredData:
headings: \[]
contents:
* content: List all notifications for the account
***
{/* This file was generated by Fumadocs. Do not edit this file directly. Any changes should be made by running the generation command again. */}
# Mark All Notifications As Read
URL: /api-reference/notifications/markAllNotificationsAsRead
Mark all notifications of this account as read
***
title: Mark All Notifications As Read
description: Mark all notifications of this account as read
full: true
\_openapi:
method: POST
route: /api/{account}/notifications/mark-all-as-read
toc: \[]
structuredData:
headings: \[]
contents:
* content: Mark all notifications of this account as read
***
{/* This file was generated by Fumadocs. Do not edit this file directly. Any changes should be made by running the generation command again. */}
# Search Users In Notifications
URL: /api-reference/notifications/searchUsersInNotifications
Search users that have appeared in your notifications
***
title: Search Users In Notifications
description: Search users that have appeared in your notifications
full: true
\_openapi:
method: GET
route: /api/{account}/notifications/search-users
toc: \[]
structuredData:
headings: \[]
contents:
* content: Search users that have appeared in your notifications
***
{/* This file was generated by Fumadocs. Do not edit this file directly. Any changes should be made by running the generation command again. */}
# Update Notification Tabs Order
URL: /api-reference/notifications/updateNotificationTabsOrder
Update the order of an account's notification tabs as displayed on the OnlyFans notifications page
***
title: Update Notification Tabs Order
description: >-
Update the order of an account's notification tabs as displayed on the
OnlyFans notifications page
full: true
\_openapi:
method: PUT
route: /api/{account}/notifications/tabs-order
toc: \[]
structuredData:
headings: \[]
contents:
* content: >-
Update the order of an account's notification tabs as displayed on the
OnlyFans notifications page
***
{/* This file was generated by Fumadocs. Do not edit this file directly. Any changes should be made by running the generation command again. */}
# Get Account Balances
URL: /api-reference/payouts/getAccountBalances
Get the current available and pending balances for the account.
***
title: Get Account Balances
description: Get the current available and pending balances for the account.
full: true
\_openapi:
method: GET
route: /api/{account}/payouts/balances
toc: \[]
structuredData:
headings: \[]
contents:
* content: Get the current available and pending balances for the account.
***
{/* This file was generated by Fumadocs. Do not edit this file directly. Any changes should be made by running the generation command again. */}
# Get Eligibility
URL: /api-reference/payouts/getEligibility
Get the eligibility details for receiving payouts.
***
title: Get Eligibility
description: Get the eligibility details for receiving payouts.
full: true
\_openapi:
method: GET
route: /api/{account}/payouts/eligibility
toc: \[]
structuredData:
headings: \[]
contents:
* content: Get the eligibility details for receiving payouts.
***
{/* This file was generated by Fumadocs. Do not edit this file directly. Any changes should be made by running the generation command again. */}
# List Earning Statistics
URL: /api-reference/payouts/listEarningStatistics
List earning statistics for the account.
***
title: List Earning Statistics
description: List earning statistics for the account.
full: true
\_openapi:
method: GET
route: /api/{account}/payouts/earning-statistics
toc: \[]
structuredData:
headings: \[]
contents:
* content: List earning statistics for the account.
***
{/* This file was generated by Fumadocs. Do not edit this file directly. Any changes should be made by running the generation command again. */}
# List Payout Requests
URL: /api-reference/payouts/listPayoutRequests
List all payout requests for the account.
***
title: List Payout Requests
description: List all payout requests for the account.
full: true
\_openapi:
method: GET
route: /api/{account}/payouts/payout-requests
toc: \[]
structuredData:
headings: \[]
contents:
* content: List all payout requests for the account.
***
{/* This file was generated by Fumadocs. Do not edit this file directly. Any changes should be made by running the generation command again. */}
# List Transactions (Earnings)
URL: /api-reference/payouts/listTransactionsEarnings
List all transactions for the account.
***
title: List Transactions (Earnings)
description: List all transactions for the account.
full: true
\_openapi:
method: GET
route: /api/{account}/payouts/transactions
toc: \[]
structuredData:
headings: \[]
contents:
* content: List all transactions for the account.
***
{/* This file was generated by Fumadocs. Do not edit this file directly. Any changes should be made by running the generation command again. */}
# Request Manual Withdrawal
URL: /api-reference/payouts/requestManualWithdrawal
Request a payout withdrawal, if the frequency is set to manual. Refer to our `/payouts/balances` endpoint to retrieve the minimum and maximum withdrawal amounts.
***
title: Request Manual Withdrawal
description: >-
Request a payout withdrawal, if the frequency is set to manual. Refer to our
`/payouts/balances` endpoint to retrieve the minimum and maximum withdrawal
amounts.
full: true
\_openapi:
method: POST
route: /api/{account}/payouts/request-manual-withdrawal
toc: \[]
structuredData:
headings: \[]
contents:
* content: >-
Request a payout withdrawal, if the frequency is set to manual. Refer
to our `/payouts/balances` endpoint to retrieve the minimum and
maximum withdrawal amounts.
***
{/* This file was generated by Fumadocs. Do not edit this file directly. Any changes should be made by running the generation command again. */}
# Update Payout Frequency
URL: /api-reference/payouts/updatePayoutFrequency
Update the payout frequency for the account (Manual, Weekly or Monthly).
***
title: Update Payout Frequency
description: Update the payout frequency for the account (Manual, Weekly or Monthly).
full: true
\_openapi:
method: PATCH
route: /api/{account}/payouts/payout-frequency
toc: \[]
structuredData:
headings: \[]
contents:
* content: >-
Update the payout frequency for the account (Manual, Weekly or
Monthly).
***
{/* This file was generated by Fumadocs. Do not edit this file directly. Any changes should be made by running the generation command again. */}
# Create Post Comment
URL: /api-reference/post-comments/createPostComment
Create a comment on one of your posts.
***
title: Create Post Comment
description: Create a comment on one of your posts.
full: true
\_openapi:
method: POST
route: /api/{account}/posts/{post_id}/comments
toc: \[]
structuredData:
headings: \[]
contents:
* content: Create a comment on one of your posts.
***
{/* This file was generated by Fumadocs. Do not edit this file directly. Any changes should be made by running the generation command again. */}
# Delete Post Comment
URL: /api-reference/post-comments/deletePostComment
Delete a comment on one of your posts.
***
title: Delete Post Comment
description: Delete a comment on one of your posts.
full: true
\_openapi:
method: DELETE
route: /api/{account}/posts/{post_id}/comments/{comment_id}
toc: \[]
structuredData:
headings: \[]
contents:
* content: Delete a comment on one of your posts.
***
{/* This file was generated by Fumadocs. Do not edit this file directly. Any changes should be made by running the generation command again. */}
# Like Post Comment
URL: /api-reference/post-comments/likePostComment
Like a comment on one of your posts.
***
title: Like Post Comment
description: Like a comment on one of your posts.
full: true
\_openapi:
method: POST
route: /api/{account}/posts/{post_id}/comments/{comment_id}/like
toc: \[]
structuredData:
headings: \[]
contents:
* content: Like a comment on one of your posts.
***
{/* This file was generated by Fumadocs. Do not edit this file directly. Any changes should be made by running the generation command again. */}
# List Post Comments
URL: /api-reference/post-comments/listPostComments
Get comments from one of your posts.
***
title: List Post Comments
description: Get comments from one of your posts.
full: true
\_openapi:
method: GET
route: /api/{account}/posts/{post_id}/comments
toc: \[]
structuredData:
headings: \[]
contents:
* content: Get comments from one of your posts.
***
{/* This file was generated by Fumadocs. Do not edit this file directly. Any changes should be made by running the generation command again. */}
# Pin Post Comment
URL: /api-reference/post-comments/pinPostComment
Pin a comment on one of your posts.
***
title: Pin Post Comment
description: Pin a comment on one of your posts.
full: true
\_openapi:
method: POST
route: /api/{account}/posts/{post_id}/comments/{comment_id}/pin
toc: \[]
structuredData:
headings: \[]
contents:
* content: Pin a comment on one of your posts.
***
{/* This file was generated by Fumadocs. Do not edit this file directly. Any changes should be made by running the generation command again. */}
# Unlike Post Comment
URL: /api-reference/post-comments/unlikePostComment
Unlike a comment on one of your posts.
***
title: Unlike Post Comment
description: Unlike a comment on one of your posts.
full: true
\_openapi:
method: DELETE
route: /api/{account}/posts/{post_id}/comments/{comment_id}/like
toc: \[]
structuredData:
headings: \[]
contents:
* content: Unlike a comment on one of your posts.
***
{/* This file was generated by Fumadocs. Do not edit this file directly. Any changes should be made by running the generation command again. */}
# Unpin Post Comment
URL: /api-reference/post-comments/unpinPostComment
Unpin a comment from one of your posts.
***
title: Unpin Post Comment
description: Unpin a comment from one of your posts.
full: true
\_openapi:
method: DELETE
route: /api/{account}/posts/{post_id}/comments/{comment_id}/pin
toc: \[]
structuredData:
headings: \[]
contents:
* content: Unpin a comment from one of your posts.
***
{/* This file was generated by Fumadocs. Do not edit this file directly. Any changes should be made by running the generation command again. */}
# Create Label
URL: /api-reference/post-labels/createLabel
Create a new post label.
***
title: Create Label
description: Create a new post label.
full: true
\_openapi:
method: POST
route: /api/{account}/posts/labels
toc: \[]
structuredData:
headings: \[]
contents:
* content: Create a new post label.
***
{/* This file was generated by Fumadocs. Do not edit this file directly. Any changes should be made by running the generation command again. */}
# List Labels
URL: /api-reference/post-labels/listLabels
List the labels that you can use to organize your posts.
***
title: List Labels
description: List the labels that you can use to organize your posts.
full: true
\_openapi:
method: GET
route: /api/{account}/posts/labels
toc: \[]
structuredData:
headings: \[]
contents:
* content: List the labels that you can use to organize your posts.
***
{/* This file was generated by Fumadocs. Do not edit this file directly. Any changes should be made by running the generation command again. */}
# Archive Post
URL: /api-reference/posts/archivePost
Archive a post from your account. Also can be used to move posts between the Regular and Private Archive.
***
title: Archive Post
description: >-
Archive a post from your account. Also can be used to move posts between the
Regular and Private Archive.
full: true
\_openapi:
method: POST
route: /api/{account}/posts/{post_id}/archive
toc: \[]
structuredData:
headings: \[]
contents:
* content: >-
Archive a post from your account. Also can be used to move posts
between the Regular and Private Archive.
***
{/* This file was generated by Fumadocs. Do not edit this file directly. Any changes should be made by running the generation command again. */}
# Delete Post
URL: /api-reference/posts/deletePost
Delete a post from your account.
***
title: Delete Post
description: Delete a post from your account.
full: true
\_openapi:
method: DELETE
route: /api/{account}/posts/{post_id}
toc: \[]
structuredData:
headings: \[]
contents:
* content: Delete a post from your account.
***
{/* This file was generated by Fumadocs. Do not edit this file directly. Any changes should be made by running the generation command again. */}
# Get Post
URL: /api-reference/posts/getPost
Retrieve details of a post from your account.
***
title: Get Post
description: Retrieve details of a post from your account.
full: true
\_openapi:
method: GET
route: /api/{account}/posts/{post_id}
toc: \[]
structuredData:
headings: \[]
contents:
* content: Retrieve details of a post from your account.
***
{/* This file was generated by Fumadocs. Do not edit this file directly. Any changes should be made by running the generation command again. */}
# List Posts
URL: /api-reference/posts/listPosts
Get posts from your OnlyFans account.
***
title: List Posts
description: Get posts from your OnlyFans account.
full: true
\_openapi:
method: GET
route: /api/{account}/posts
toc: \[]
structuredData:
headings: \[]
contents:
* content: Get posts from your OnlyFans account.
***
{/* This file was generated by Fumadocs. Do not edit this file directly. Any changes should be made by running the generation command again. */}
# Pin/Unpin Post
URL: /api-reference/posts/pinUnpinPost
Pin or unpin a post to your account.
***
title: Pin/Unpin Post
description: Pin or unpin a post to your account.
full: true
\_openapi:
method: POST
route: /api/{account}/posts/{post_id}/pin
toc: \[]
structuredData:
headings: \[]
contents:
* content: Pin or unpin a post to your account.
***
{/* This file was generated by Fumadocs. Do not edit this file directly. Any changes should be made by running the generation command again. */}
# Send Post
URL: /api-reference/posts/sendPost
Compose and send a new post to your OnlyFans account.
***
title: Send Post
description: Compose and send a new post to your OnlyFans account.
full: true
\_openapi:
method: POST
route: /api/{account}/posts
toc: \[]
structuredData:
headings: \[]
contents:
* content: Compose and send a new post to your OnlyFans account.
***
{/* This file was generated by Fumadocs. Do not edit this file directly. Any changes should be made by running the generation command again. */}
# Show Post Statistics
URL: /api-reference/posts/showPostStatistics
Show the statistics of a post like purchases, views, likes, tips and more.
***
title: Show Post Statistics
description: Show the statistics of a post like purchases, views, likes, tips and more.
full: true
\_openapi:
method: GET
route: /api/{account}/posts/{post_id}/stats
toc: \[]
structuredData:
headings: \[]
contents:
* content: >-
Show the statistics of a post like purchases, views, likes, tips and
more.
***
{/* This file was generated by Fumadocs. Do not edit this file directly. Any changes should be made by running the generation command again. */}
# Unarchive Post
URL: /api-reference/posts/unarchivePost
Unarchive a post from your account.
***
title: Unarchive Post
description: Unarchive a post from your account.
full: true
\_openapi:
method: POST
route: /api/{account}/posts/{post_id}/unarchive
toc: \[]
structuredData:
headings: \[]
contents:
* content: Unarchive a post from your account.
***
{/* This file was generated by Fumadocs. Do not edit this file directly. Any changes should be made by running the generation command again. */}
# Update Post
URL: /api-reference/posts/updatePost
Update a posted, queued, or "saved for later" post.
***
title: Update Post
description: Update a posted, queued, or "saved for later" post.
full: true
\_openapi:
method: PUT
route: /api/{account}/posts/{post_id}
toc: \[]
structuredData:
headings: \[]
contents:
* content: Update a posted, queued, or "saved for later" post.
***
{/* This file was generated by Fumadocs. Do not edit this file directly. Any changes should be made by running the generation command again. */}
# Get Profile Details
URL: /api-reference/public-profiles/getProfileDetails
Get profile details by username.
***
title: Get Profile Details
description: Get profile details by username.
full: true
\_openapi:
method: GET
route: /api/profiles/{username}
toc: \[]
structuredData:
headings: \[]
contents:
* content: Get profile details by username.
***
{/* This file was generated by Fumadocs. Do not edit this file directly. Any changes should be made by running the generation command again. */}
# Search Profiles
URL: /api-reference/public-profiles/searchProfiles
Full-text search for profiles with filters for pricing, free trials, location, media count and more.
***
title: Search Profiles
description: >-
Full-text search for profiles with filters for pricing, free trials, location,
media count and more.
full: true
\_openapi:
method: GET
route: /api/search
toc: \[]
structuredData:
headings: \[]
contents:
* content: >-
Full-text search for profiles with filters for pricing, free trials,
location, media count and more.
***
{/* This file was generated by Fumadocs. Do not edit this file directly. Any changes should be made by running the generation command again. */}
# Count Queue Items
URL: /api-reference/queue/countQueueItems
Count posts and messages in the queue.
***
title: Count Queue Items
description: Count posts and messages in the queue.
full: true
\_openapi:
method: GET
route: /api/{account}/queue/counts
toc: \[]
structuredData:
headings: \[]
contents:
* content: Count posts and messages in the queue.
***
{/* This file was generated by Fumadocs. Do not edit this file directly. Any changes should be made by running the generation command again. */}
# List Queue Items
URL: /api-reference/queue/listQueueItems
List posts and messages in the queue.
***
title: List Queue Items
description: List posts and messages in the queue.
full: true
\_openapi:
method: GET
route: /api/{account}/queue
toc: \[]
structuredData:
headings: \[]
contents:
* content: List posts and messages in the queue.
***
{/* This file was generated by Fumadocs. Do not edit this file directly. Any changes should be made by running the generation command again. */}
# Publish Queue Item
URL: /api-reference/queue/publishQueueItem
Publish a queue item or "saved for later" item (post or mass message). This means that the item will be sent immediately, regardless of its scheduled date.
***
title: Publish Queue Item
description: >-
Publish a queue item or "saved for later" item (post or mass message). This
means that the item will be sent immediately, regardless of its scheduled
date.
full: true
\_openapi:
method: PUT
route: /api/{account}/queue/{queue_id}/publish
toc: \[]
structuredData:
headings: \[]
contents:
* content: >-
Publish a queue item or "saved for later" item (post or mass message).
This means that the item will be sent immediately, regardless of its
scheduled date.
***
{/* This file was generated by Fumadocs. Do not edit this file directly. Any changes should be made by running the generation command again. */}
# Disable Automatic Messaging
URL: /api-reference/saved-for-later-(messages)/disableAutomaticMessaging
Disable automatic messaging of Saved For Later messages.
***
title: Disable Automatic Messaging
description: Disable automatic messaging of Saved For Later messages.
full: true
\_openapi:
method: PATCH
route: /api/{account}/saved-for-later/messages/settings/disable-automatic-messaging
toc: \[]
structuredData:
headings: \[]
contents:
* content: Disable automatic messaging of Saved For Later messages.
***
{/* This file was generated by Fumadocs. Do not edit this file directly. Any changes should be made by running the generation command again. */}
# Enable/Update Automatic Messaging
URL: /api-reference/saved-for-later-(messages)/enableUpdateAutomaticMessaging
Enable or update automatic messaging of Saved For Later messages.
***
title: Enable/Update Automatic Messaging
description: Enable or update automatic messaging of Saved For Later messages.
full: true
\_openapi:
method: PATCH
route: >-
/api/{account}/saved-for-later/messages/settings/enable-or-update-automatic-messaging
toc: \[]
structuredData:
headings: \[]
contents:
* content: Enable or update automatic messaging of Saved For Later messages.
***
{/* This file was generated by Fumadocs. Do not edit this file directly. Any changes should be made by running the generation command again. */}
# Get Message Settings
URL: /api-reference/saved-for-later-(messages)/getMessageSettings
Get the Saved For Later message settings.
***
title: Get Message Settings
description: Get the Saved For Later message settings.
full: true
\_openapi:
method: GET
route: /api/{account}/saved-for-later/messages/settings
toc: \[]
structuredData:
headings: \[]
contents:
* content: Get the Saved For Later message settings.
***
{/* This file was generated by Fumadocs. Do not edit this file directly. Any changes should be made by running the generation command again. */}
# List Saved For Later Messages
URL: /api-reference/saved-for-later-(messages)/listSavedForLaterMessages
List all messages that are marked as "Save For Later".
***
title: List Saved For Later Messages
description: List all messages that are marked as "Save For Later".
full: true
\_openapi:
method: GET
route: /api/{account}/saved-for-later/messages
toc: \[]
structuredData:
headings: \[]
contents:
* content: List all messages that are marked as "Save For Later".
***
{/* This file was generated by Fumadocs. Do not edit this file directly. Any changes should be made by running the generation command again. */}
# Disable Automatic Posting
URL: /api-reference/saved-for-later-(posts)/disableAutomaticPosting
Disable automatic posting of Saved For Later posts.
***
title: Disable Automatic Posting
description: Disable automatic posting of Saved For Later posts.
full: true
\_openapi:
method: PATCH
route: /api/{account}/saved-for-later/posts/settings/disable-automatic-posting
toc: \[]
structuredData:
headings: \[]
contents:
* content: Disable automatic posting of Saved For Later posts.
***
{/* This file was generated by Fumadocs. Do not edit this file directly. Any changes should be made by running the generation command again. */}
# Enable/Update Automatic Posting
URL: /api-reference/saved-for-later-(posts)/enableUpdateAutomaticPosting
Enable or update automatic posting of Saved For Later posts.
***
title: Enable/Update Automatic Posting
description: Enable or update automatic posting of Saved For Later posts.
full: true
\_openapi:
method: PATCH
route: >-
/api/{account}/saved-for-later/posts/settings/enable-or-update-automatic-posting
toc: \[]
structuredData:
headings: \[]
contents:
* content: Enable or update automatic posting of Saved For Later posts.
***
{/* This file was generated by Fumadocs. Do not edit this file directly. Any changes should be made by running the generation command again. */}
# Get Post Settings
URL: /api-reference/saved-for-later-(posts)/getPostSettings
Get the Saved For Later post settings.
***
title: Get Post Settings
description: Get the Saved For Later post settings.
full: true
\_openapi:
method: GET
route: /api/{account}/saved-for-later/posts/settings
toc: \[]
structuredData:
headings: \[]
contents:
* content: Get the Saved For Later post settings.
***
{/* This file was generated by Fumadocs. Do not edit this file directly. Any changes should be made by running the generation command again. */}
# List Saved For Later Posts
URL: /api-reference/saved-for-later-(posts)/listSavedForLaterPosts
List all posts that are marked as "Save For Later".
***
title: List Saved For Later Posts
description: List all posts that are marked as "Save For Later".
full: true
\_openapi:
method: GET
route: /api/{account}/saved-for-later/posts
toc: \[]
structuredData:
headings: \[]
contents:
* content: List all posts that are marked as "Save For Later".
***
{/* This file was generated by Fumadocs. Do not edit this file directly. Any changes should be made by running the generation command again. */}
# Check Username Availability
URL: /api-reference/settings/checkUsernameAvailability
Check if a username is taken. Returns `false` if the username is available, `true` if it is already taken.
***
title: Check Username Availability
description: >-
Check if a username is taken. Returns `false` if the username is available,
`true` if it is already taken.
full: true
\_openapi:
method: POST
route: /api/{account}/settings/username-exists
toc: \[]
structuredData:
headings: \[]
contents:
* content: >-
Check if a username is taken. Returns `false` if the username is
available, `true` if it is already taken.
***
{/* This file was generated by Fumadocs. Do not edit this file directly. Any changes should be made by running the generation command again. */}
# Get Settings
URL: /api-reference/settings/getSettings
Returns the account settings
***
title: Get Settings
description: Returns the account settings
full: true
\_openapi:
method: GET
route: /api/{account}/settings
toc: \[]
structuredData:
headings: \[]
contents:
* content: Returns the account settings
***
{/* This file was generated by Fumadocs. Do not edit this file directly. Any changes should be made by running the generation command again. */}
# Update Profile
URL: /api-reference/settings/updateProfile
Updates the account profile. **Only include the fields you want to update.** To make a field empty, set it to `null`.
***
title: Update Profile
description: >-
Updates the account profile. **Only include the fields you want to update.**
To make a field empty, set it to `null`.
full: true
\_openapi:
method: POST
route: /api/{account}/settings/profile
toc: \[]
structuredData:
headings: \[]
contents:
* content: >-
Updates the account profile. **Only include the fields you want to
update.** To make a field empty, set it to `null`.
***
{/* This file was generated by Fumadocs. Do not edit this file directly. Any changes should be made by running the generation command again. */}
# Calculate Total Transactions
URL: /api-reference/statistics/calculateTotalTransactions
Calculate the total transactions and amounts.
***
title: Calculate Total Transactions
description: Calculate the total transactions and amounts.
full: true
\_openapi:
method: GET
route: /api/{account}/statistics/total-transactions
toc: \[]
structuredData:
headings: \[]
contents:
* content: Calculate the total transactions and amounts.
***
{/* This file was generated by Fumadocs. Do not edit this file directly. Any changes should be made by running the generation command again. */}
# Get Earnings
URL: /api-reference/statistics/getEarnings
Get the earnings for a given period.
***
title: Get Earnings
description: Get the earnings for a given period.
full: true
\_openapi:
method: GET
route: /api/{account}/statistics/statements/earnings
toc: \[]
structuredData:
headings: \[]
contents:
* content: Get the earnings for a given period.
***
{/* This file was generated by Fumadocs. Do not edit this file directly. Any changes should be made by running the generation command again. */}
# Get Profile Visitors
URL: /api-reference/statistics/getProfileVisitors
Get the number of profile visitors for a given period.
***
title: Get Profile Visitors
description: Get the number of profile visitors for a given period.
full: true
\_openapi:
method: GET
route: /api/{account}/statistics/reach/profile-visitors
toc: \[]
structuredData:
headings: \[]
contents:
* content: Get the number of profile visitors for a given period.
***
{/* This file was generated by Fumadocs. Do not edit this file directly. Any changes should be made by running the generation command again. */}
# Get Subscriber Metrics
URL: /api-reference/statistics/getSubscriberMetrics
Get subscriber metrics including total, new, renewed, paid, and free subscriptions for a specified timeframe. `unknown_subscriptions` indicates deleted fan accounts.
***
title: Get Subscriber Metrics
description: >-
Get subscriber metrics including total, new, renewed, paid, and free
subscriptions for a specified timeframe. `unknown_subscriptions` indicates
deleted fan accounts.
full: true
\_openapi:
method: GET
route: /api/{account}/statistics/subscriber-metrics
toc: \[]
structuredData:
headings: \[]
contents:
* content: >-
Get subscriber metrics including total, new, renewed, paid, and free
subscriptions for a specified timeframe. `unknown_subscriptions`
indicates deleted fan accounts.
***
{/* This file was generated by Fumadocs. Do not edit this file directly. Any changes should be made by running the generation command again. */}
# Get Subscriber Statistics
URL: /api-reference/statistics/getSubscriberStatistics
Get subscriber and earning statistics for an account for a specified timeframe. Optionally, filter by all, renews, or new subscribers.
***
title: Get Subscriber Statistics
description: >-
Get subscriber and earning statistics for an account for a specified
timeframe. Optionally, filter by all, renews, or new subscribers.
full: true
\_openapi:
method: GET
route: /api/{account}/subscribers/statistics
toc: \[]
structuredData:
headings: \[]
contents:
* content: >-
Get subscriber and earning statistics for an account for a specified
timeframe. Optionally, filter by all, renews, or new subscribers.
***
{/* This file was generated by Fumadocs. Do not edit this file directly. Any changes should be made by running the generation command again. */}
# Statistics Overview
URL: /api-reference/statistics/statisticsOverview
Get an overview of statistics for fans, visitors, posts, or general.
***
title: Statistics Overview
description: Get an overview of statistics for fans, visitors, posts, or general.
full: true
\_openapi:
method: GET
route: /api/{account}/statistics/overview
toc: \[]
structuredData:
headings: \[]
contents:
* content: Get an overview of statistics for fans, visitors, posts, or general.
***
{/* This file was generated by Fumadocs. Do not edit this file directly. Any changes should be made by running the generation command again. */}
# Create Tracking Link
URL: /api-reference/tracking-links/createTrackingLink
Create a new Tracking Link for the account
***
title: Create Tracking Link
description: Create a new Tracking Link for the account
full: true
\_openapi:
method: POST
route: /api/{account}/tracking-links
toc: \[]
structuredData:
headings: \[]
contents:
* content: Create a new Tracking Link for the account
***
{/* This file was generated by Fumadocs. Do not edit this file directly. Any changes should be made by running the generation command again. */}
# Delete Tracking Link
URL: /api-reference/tracking-links/deleteTrackingLink
Delete a Tracking Link
***
title: Delete Tracking Link
description: Delete a Tracking Link
full: true
\_openapi:
method: DELETE
route: /api/{account}/tracking-links/{tracking_link_id}
toc: \[]
structuredData:
headings: \[]
contents:
* content: Delete a Tracking Link
***
{/* This file was generated by Fumadocs. Do not edit this file directly. Any changes should be made by running the generation command again. */}
# List Tracking Link Subscribers
URL: /api-reference/tracking-links/listTrackingLinkSubscribers
Get list of subscribers who joined through a Tracking Link
***
title: List Tracking Link Subscribers
description: Get list of subscribers who joined through a Tracking Link
full: true
\_openapi:
method: GET
route: /api/{account}/tracking-links/{tracking_link_id}/subscribers
toc: \[]
structuredData:
headings: \[]
contents:
* content: Get list of subscribers who joined through a Tracking Link
***
{/* This file was generated by Fumadocs. Do not edit this file directly. Any changes should be made by running the generation command again. */}
# List Tracking Links
URL: /api-reference/tracking-links/listTrackingLinks
List all tracking links for the account and revenue data
***
title: List Tracking Links
description: List all tracking links for the account and revenue data
full: true
\_openapi:
method: GET
route: /api/{account}/tracking-links
toc: \[]
structuredData:
headings: \[]
contents:
* content: List all tracking links for the account and revenue data
***
{/* This file was generated by Fumadocs. Do not edit this file directly. Any changes should be made by running the generation command again. */}
# List Transactions
URL: /api-reference/transactions/listTransactions
Get a paginated list of transactions for an Account. Newest transactions are first.
***
title: List Transactions
description: >-
Get a paginated list of transactions for an Account. Newest transactions are
first.
full: true
\_openapi:
method: GET
route: /api/{account}/transactions
toc: \[]
structuredData:
headings: \[]
contents:
* content: >-
Get a paginated list of transactions for an Account. Newest
transactions are first.
***
{/* This file was generated by Fumadocs. Do not edit this file directly. Any changes should be made by running the generation command again. */}
# Create Trial Link
URL: /api-reference/trial-links/createTrialLink
Create a new trial link for the account
***
title: Create Trial Link
description: Create a new trial link for the account
full: true
\_openapi:
method: POST
route: /api/{account}/trial-links
toc: \[]
structuredData:
headings: \[]
contents:
* content: Create a new trial link for the account
***
{/* This file was generated by Fumadocs. Do not edit this file directly. Any changes should be made by running the generation command again. */}
# Delete Trial Link
URL: /api-reference/trial-links/deleteTrialLink
Delete a trial link by its ID
***
title: Delete Trial Link
description: Delete a trial link by its ID
full: true
\_openapi:
method: DELETE
route: /api/{account}/trial-links/{trial_link_id}
toc: \[]
structuredData:
headings: \[]
contents:
* content: Delete a trial link by its ID
***
{/* This file was generated by Fumadocs. Do not edit this file directly. Any changes should be made by running the generation command again. */}
# List Trial Link Subscribers
URL: /api-reference/trial-links/listTrialLinkSubscribers
Get list of subscribers who joined through a Trial Link
***
title: List Trial Link Subscribers
description: Get list of subscribers who joined through a Trial Link
full: true
\_openapi:
method: GET
route: /api/{account}/trial-links/{trial_link_id}/subscribers
toc: \[]
structuredData:
headings: \[]
contents:
* content: Get list of subscribers who joined through a Trial Link
***
{/* This file was generated by Fumadocs. Do not edit this file directly. Any changes should be made by running the generation command again. */}
# List Trial Links
URL: /api-reference/trial-links/listTrialLinks
List all trial links for the account, including the details and statistics
***
title: List Trial Links
description: List all trial links for the account, including the details and statistics
full: true
\_openapi:
method: GET
route: /api/{account}/trial-links
toc: \[]
structuredData:
headings: \[]
contents:
* content: >-
List all trial links for the account, including the details and
statistics
***
{/* This file was generated by Fumadocs. Do not edit this file directly. Any changes should be made by running the generation command again. */}
# Get User Details
URL: /api-reference/users/getUserDetails
Get OnlyFans Profile details for a given username. User details are retrieved using the current current `{account}` so fields like `subscribedOnData` which include potential subscription details will be included.
***
title: Get User Details
description: >-
Get OnlyFans Profile details for a given username. User details are retrieved
using the current current `{account}` so fields like `subscribedOnData` which
include potential subscription details will be included.
full: true
\_openapi:
method: GET
route: /api/{account}/users/{username}
toc: \[]
structuredData:
headings: \[]
contents:
* content: >-
Get OnlyFans Profile details for a given username. User details are
retrieved using the current current `{account}` so fields like
`subscribedOnData` which include potential subscription details will
be included.
***
{/* This file was generated by Fumadocs. Do not edit this file directly. Any changes should be made by running the generation command again. */}
# Create Webhook
URL: /api-reference/webhooks/createWebhook
Create a new webhook for your Team
***
title: Create Webhook
description: Create a new webhook for your Team
full: true
\_openapi:
method: POST
route: /api/webhooks
toc: \[]
structuredData:
headings: \[]
contents:
* content: Create a new webhook for your Team
***
{/* This file was generated by Fumadocs. Do not edit this file directly. Any changes should be made by running the generation command again. */}
# Delete Webhook
URL: /api-reference/webhooks/deleteWebhook
Delete an existing webhook
***
title: Delete Webhook
description: Delete an existing webhook
full: true
\_openapi:
method: DELETE
route: /api/webhooks/{webhook_id}
toc: \[]
structuredData:
headings: \[]
contents:
* content: Delete an existing webhook
***
{/* This file was generated by Fumadocs. Do not edit this file directly. Any changes should be made by running the generation command again. */}
# Available modules
URL: /integrations/make/available-modules
A list of all available OnlyFans API modules in Make.com.
***
title: "Available modules"
description: "A list of all available OnlyFans API modules in Make.com."
icon: Puzzle
------------
Please reach out to us, we can add it!
## Instant Triggers
An Instant Trigger (also known as a "webhook"), is a module that is executed immediately when an event occurs.
### 🤑 Chat Message PPV Purchased
A PPV (pay-per-view) message that you sent has been purchased by a fan
```json title="Example data"
{
"event": "messages.ppv.unlocked",
"account_id": "acct_123",
"payload": {
"id": "123",
"type": "paided_message",
"createdAt": "2025-05-05T22:18:00+00:00",
"text": "has purchased your message for $5.00!",
"replacePairs": {
"{NAME}": "Name",
"{MESSAGE_LINK}": "message",
"{AMOUNT}": "$5.00"
},
"subType": "subscriber_pay_for_chat_message",
"user_id": "123",
"isRead": false,
"canGoToProfile": true,
"user": {
"avatar": null,
"avatarThumbs": null,
"header": null,
"headerSize": null,
"headerThumbs": null,
"id": 123,
"name": "Name",
"username": "username",
"canLookStory": false,
"canCommentStory": false,
"hasNotViewedStory": false,
"isVerified": false,
"canPayInternal": false,
"hasScheduledStream": false,
"hasStream": false,
"hasStories": false,
"tipsEnabled": false,
"tipsTextEnabled": true,
"tipsMin": 5,
"tipsMinInternal": 1,
"tipsMax": 200,
"canEarn": false,
"canAddSubscriber": false,
"subscribePrice": 0,
"subscribedBy": false,
"subscribedOn": false,
"canReceiveChatMessage": false,
"hideChat": false,
"lastSeen": "2025-05-05T22:17:29+00:00",
"isPerformer": false,
"isRealPerformer": false,
"view": "mn",
"canReport": true,
"subscribedByData": null,
"subscribedOnData": null,
"isBlocked": false
}
}
}
```
### 📥 Chat Message Received
A new chat message has been received.
```json title="Example data"
{
"event": "messages.received",
"account_id": "acct_abc123",
"payload": {
"responseType": "message",
"text": "
",
"email": "user@example.com",
"wsUrl": "wss://ws2.onlyfans.com/ws3/01",
"avatar": "https://public.onlyfans.com/.../avatar.jpg",
"header": "https://public.onlyfans.com/.../header_image.jpg",
"isAuth": true,
"ivFlow": "default",
"upload": {
"geoUploadArgs": {
"preset": "of_beta",
"isDelay": true,
"additional": {
"user": "123"
},
"needThumbs": true,
"preset_png": "of_png",
"protected_preset": "of_drm"
}
},
"canChat": true,
"canEarn": true,
"hasTags": false,
"tipsMax": 200,
"tipsMin": 5,
"website": null,
"advBlock": ["banners"],
"hasLinks": false,
"ivStatus": "approved",
"joinDate": "2025-01-01T00:00:00+00:00",
"lastSeen": "2025-01-21T00:00:00+00:00",
"location": null,
"paidFeed": false,
"username": "username",
"wishlist": null,
"hasLabels": true,
"hasStream": false,
"hasStripe": false,
"ivCountry": "US",
"canAddCard": true,
"canPinPost": true,
"creditsMax": 200,
"creditsMin": 10,
"hasFriends": false,
"hasStories": false,
"headerSize": {
"width": 4032,
"height": 3024
},
"isVerified": true,
"payoutType": "bank_ebics_sepa",
"postsCount": 1,
"unreadTips": 0,
"audiosCount": 0,
"canAddStory": true,
"hasNewHints": true,
"hasScenario": false,
"isPerformer": true,
"mediasCount": 1,
"photosCount": 1,
"tipsEnabled": false,
"videosCount": 0,
"wsAuthToken": "wsAuthToken",
"avatarThumbs": {
"c50": "https://thumbs.onlyfans.com/.../avatar.jpg",
"c144": "https://thumbs.onlyfans.com/.../avatar.jpg"
},
"canLookStory": true,
"canStreaming": false,
"canTrialSend": false,
"hasNewAlerts": false,
"headerThumbs": {
"w480": "https://thumbs.onlyfans.com/.../header_image.jpg",
"w760": "https://thumbs.onlyfans.com/.../header_image.jpg"
},
"isOtpEnabled": true,
"ivFailReason": null,
"newTagsCount": 0,
"postMaxPrice": 100,
"postMinPrice": 3,
"trialMaxDays": 7,
"creditBalance": 0,
"faceIdRegular": [],
"isAgeVerified": false,
"isAllowTweets": false,
"isMakePayment": false,
"isStripeExist": false,
"isVatRequired": false,
"needIVApprove": false,
"vatNumberName": "VAT",
"watermarkText": "OnlyFans.com/username",
"canCreateLists": true,
"canCreateTrial": true,
"canPayInternal": true,
"favoritedCount": 0,
"favoritesCount": 0,
"hasPinnedPosts": false,
"isAdultContent": false,
"isEmailChecked": true,
"isWantComments": true,
"showMediaCount": true,
"subscribePrice": 4.99,
"canCommentStory": true,
"countPinnedChat": 0,
"isEmailRequired": false,
"isPaywallPassed": true,
"isRealPerformer": true,
"isVisibleOnline": true,
"messageMaxPrice": 100,
"messageMinPrice": 3,
"showPostsInFeed": true,
"subscribesCount": 123,
"tipsMinInternal": 1,
"tipsTextEnabled": true,
"twitterUsername": "TwitterUsername",
"canAddSubscriber": false,
"canSendChatToAll": true,
"isCountryWithVat": false,
"isCreditsEnabled": true,
"isVerifiedReason": false,
"pinnedPostsCount": 0,
"subscribedByData": null,
"subscribedOnData": null,
"subscribersCount": 123,
"chatMessagesCount": 123,
"countPriorityChat": 123,
"hasNotViewedStory": false,
"hasPurchasedPosts": false,
"hasWatermarkPhoto": true,
"hasWatermarkVideo": true,
"isDeleteInitiated": false,
"isReferrerAllowed": true,
"isSpringConnected": false,
"subscribeMaxPrice": 50,
"subscribeMinPrice": 4.99,
"watermarkPosition": "bottom_right",
"archivedPostsCount": 0,
"canCreatePromotion": true,
"canMakeExpirePosts": true,
"hasScheduledStream": false,
"isSpotifyConnected": false,
"isTwitterConnected": false,
"notificationsCount": 0,
"walletFirstRebills": false,
"canConnectOfAccount": true,
"connectedOfAccounts": [],
"hasInternalPayments": false,
"hasNewTicketReplies": {
"open": false,
"closed": false,
"solved": false
},
"isNeedConfirmPayout": false,
"isRealCardConnected": true,
"ivHideForPerformers": false,
"maxPinnedPostsCount": 5,
"subscriptionBundles": [],
"trialMaxExpiresDays": 30,
"canCreateFundRaising": false,
"isPrivateRestriction": false,
"isWalletAutorecharge": false,
"maxFundRaisingTarget": 10000,
"minFundRaisingTarget": 10,
"showSubscribersCount": false,
"canChangeContentPrice": true,
"canReceiveChatMessage": false,
"walletAutorechargeMin": 0,
"canReceiveManualPayout": true,
"canReceiveStripePayout": false,
"firstPublishedPostDate": "2025-01-01T00:00:00+00:00",
"hasSystemNotifications": false,
"isCountryVatRefundable": false,
"isLegalApprovedAllowed": true,
"isPaymentCardConnected": true,
"ageVerificationRequired": false,
"payoutLegalApproveState": "approved",
"walletAutorechargeAmount": 0,
"canAlternativeWalletTopUp": false,
"enabledImageEditorForChat": true,
"isCountryVatNumberCollect": false,
"isScheduledStreamsAllowed": false,
"privateArchivedPostsCount": 0,
"isMarkdownDisabledForAbout": true,
"avatarHeaderConverterUpload": true,
"hasNewChangedPriceSubscriptions": true
}
}
```
### 💰 List Earnings (monetary values)
Get the earnings in monetary values for a given period. E.g. `123.45`
```json title="Example data"
{
"date": "2025-01-01T00:00:00+00:00",
"count": 123.45
}
```
### 💰 List Earnings (transaction count)
Get the transaction counts for a given period. E.g. `123`
```json title="Example data"
{
"date": "2025-01-01T00:00:00+00:00",
"count": 123
}
```
### 🔗 List Tracking Links
List all tracking links & their revenue data for the account.
```json title="Example data"
{
"id": 123,
"campaignCode": 1,
"campaignName": "campaign-name",
"campaignUrl": "https://onlyfans.com/username/c1",
"subscribersCount": 123,
"clicksCount": 123,
"createdAt": "2025-05-23T16:19:38+00:00",
"endDate": null,
"revenue": {
"total": 0,
"revenuePerSubscriber": 0,
"revenuePerClick": 0,
"calculatedAt": "2025-05-23T16:45:36.000000Z",
"isLoading": false
},
"links": {
"related": {
"subscribers": "https://app.onlyfansapi.com/api/acct_123/tracking-links/123/subscribers"
}
}
}
```
### 🔗 List Tracking Link Subscribers
Get list of subscribers who joined through a Tracking Link.
```json title="Example data"
{
"view": "s",
"avatar": null,
"avatarThumbs": null,
"header": null,
"headerSize": null,
"headerThumbs": null,
"id": 123,
"name": "name",
"username": "username",
"canLookStory": false,
"canCommentStory": false,
"hasNotViewedStory": false,
"isVerified": false,
"canPayInternal": false,
"hasScheduledStream": false,
"hasStream": false,
"hasStories": false,
"tipsEnabled": false,
"tipsTextEnabled": true,
"tipsMin": 5,
"tipsMinInternal": 1,
"tipsMax": 200,
"canEarn": false,
"canAddSubscriber": false,
"subscribePrice": 0,
"displayName": "",
"notice": "",
"isRestricted": false,
"canRestrict": true,
"subscribedBy": true,
"subscribedByExpire": false,
"subscribedByExpireDate": "2025-01-01T00:00:00+00:00",
"subscribedByAutoprolong": true,
"subscribedIsExpiredNow": false,
"currentSubscribePrice": 0,
"subscribedOn": true,
"subscribedOnExpiredNow": false,
"subscribedOnDuration": "1 year",
"showMediaCount": true,
"lastSeen": null,
"canReport": true
}
```
### 💳 List Transactions
Get a paginated list of transactions for an Account. Newest transactions are first.
```json title="Example data"
{
"amount": 9.99,
"vatAmount": 0.5,
"taxAmount": 0,
"net": 7.99,
"fee": 2,
"createdAt": "2025-05-26T00:00:00+00:00",
"currency": "USD",
"description": "Payment for message from User",
"status": "loading",
"user": {
"view": "t",
"id": 123,
"name": "Name",
"username": "username",
"isVerified": false,
"avatar": null,
"avatarThumbs": null
},
"payoutPendingDays": 7,
"id": "exampleId"
}
```
### 🆓 List Trial Links
List all trial links & their revenue data for the account.
```json title="Example data"
{
"id": 123,
"trialLinkName": "My trial link",
"url": "https://onlyfans.com/username/trial/abc123",
"subscribeDays": 7,
"subscribeCounts": 123,
"claimCounts": 123,
"expiredAt": null,
"createdAt": "2025-01-01T00:00:00+00:00",
"isFinished": false
}
```
## Universal
### Make a custom API call
Call any OnlyFans API endpoint from Make.com.
# Quickstart
URL: /integrations/make
Best for building complex, multi-step automations and custom integrations with OnlyFans, all without writing code. Ideal for users who want visual workflow design and advanced logic.
***
title: "Quickstart"
description: "Best for building complex, multi-step automations and custom integrations with OnlyFans, all without writing code. Ideal for users who want visual workflow design and advanced logic."
icon: Rocket
------------
import {DownloadIcon} from "lucide-react";
import { Step, Steps } from 'fumadocs-ui/components/steps';
import {Card} from "fumadocs-ui/components/card";
## Prerequisites
To get started, you must have:
* An OnlyFans API account with a creator account connected
* A [Make.com](https://www.make.com/en/register?pc=onlyfans) account
## Getting started
Log in to your Make.com account.
Install our Make.com integration:
} href="https://www.make.com/en/hq/app-invitation/ee8eed5fafe0c65c4989c5b7112b741d" title="Install our Make.com app" className="w-fit">
It only takes a few seconds.
## Connecting your OnlyFans API account to Make.com
### Go to a Make scenario, or create a new scenario \[!toc]
Go to the Scenarios page in Make.com, click on the relevant scenario, or click on "Create a new scenario".
### Add the OnlyFans API app \[!toc]
Click on the "+" button to add an app, and search for "OnlyFans API".
### Select or search for a module \[!toc]
### Add a new API connection \[!toc]
### Create a new API key from the OnlyFans API Console \[!toc]
#### Go to the OnlyFans API console -> API Keys \[!toc]
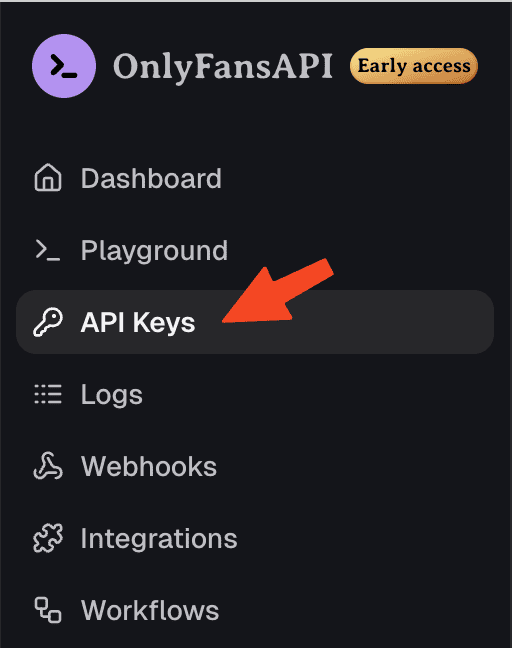
#### Create a new API key from the OnlyFans API Console \[!toc]
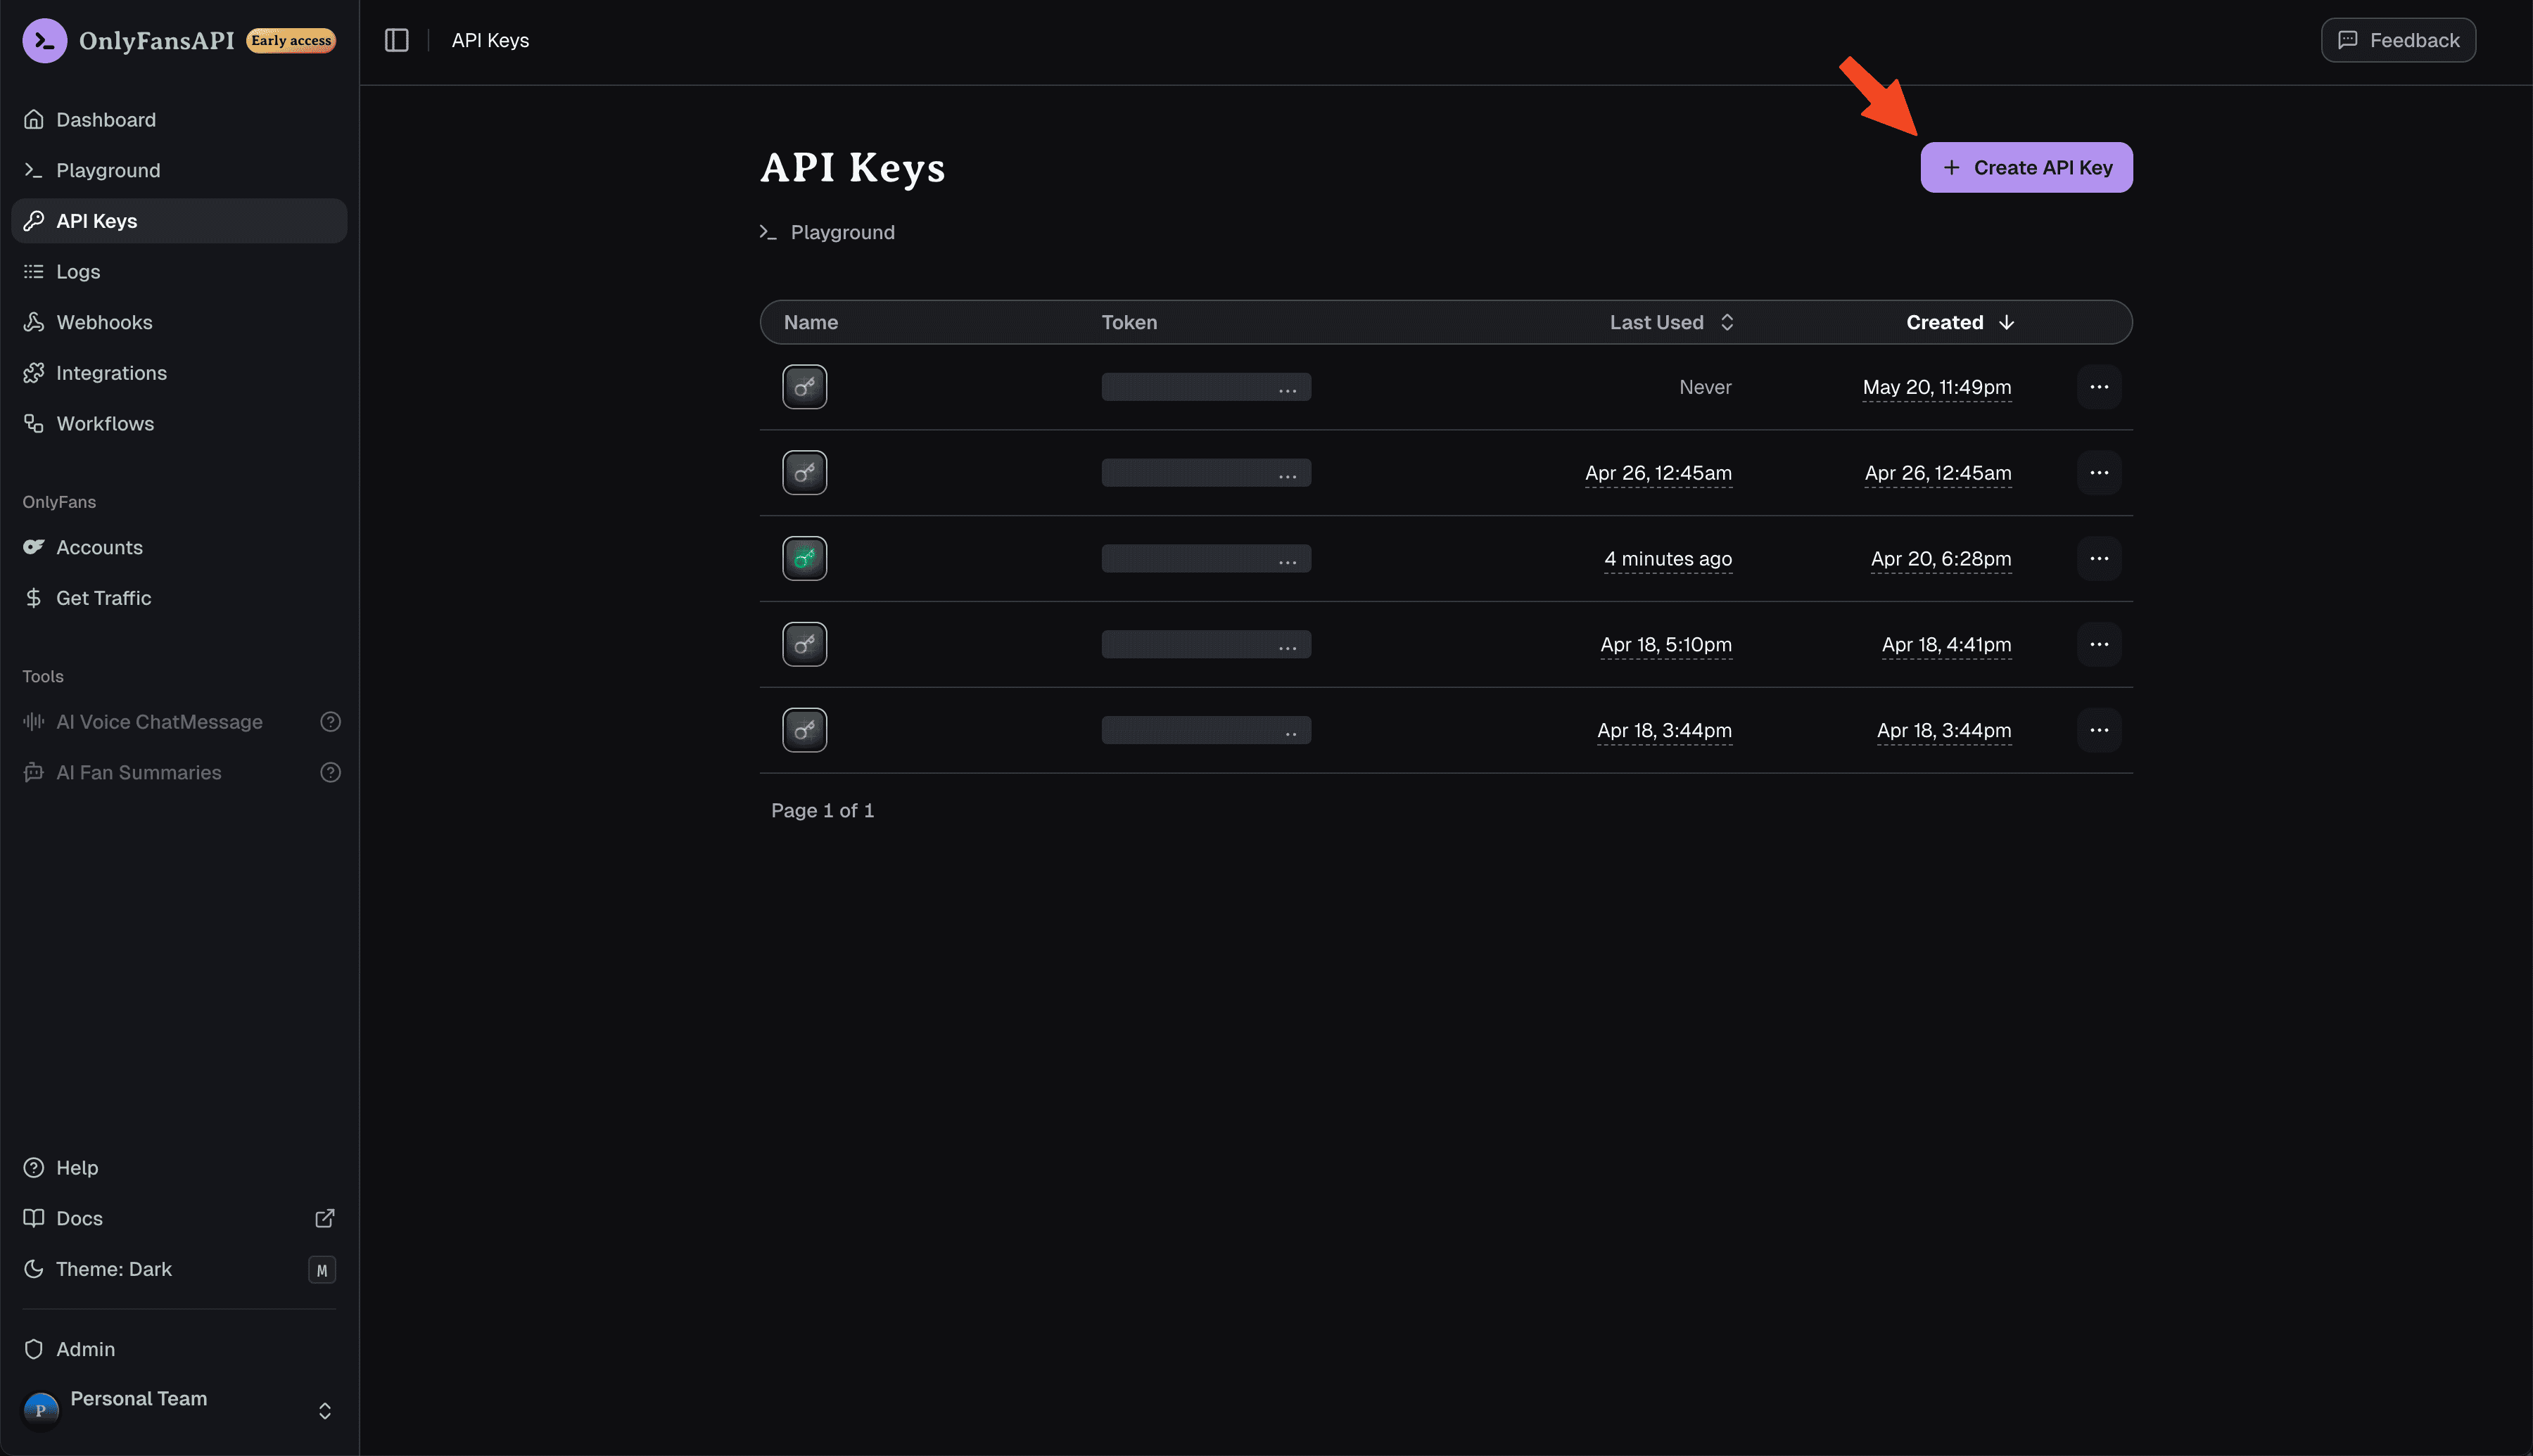
#### Give it a name, and press "Add" \[!toc]
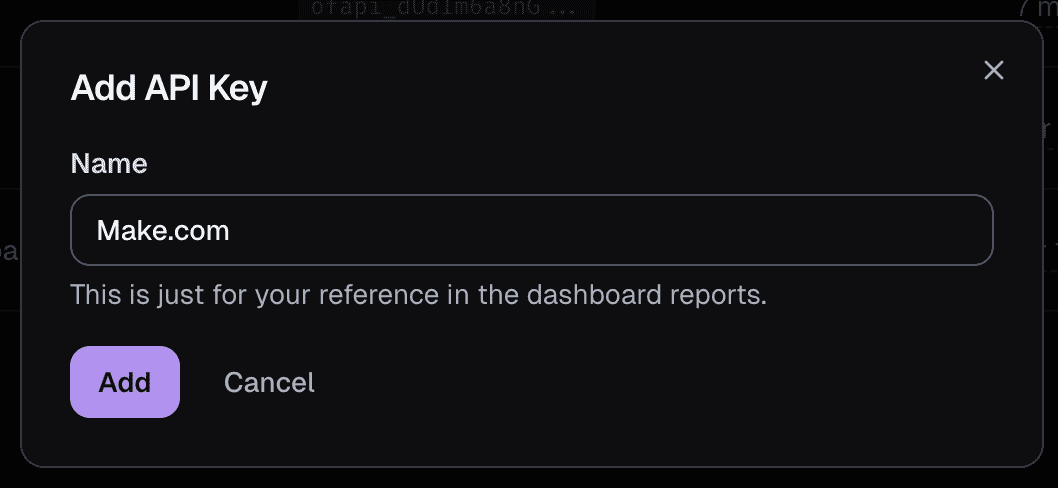
#### Copy the API key to your clipboard \[!toc]
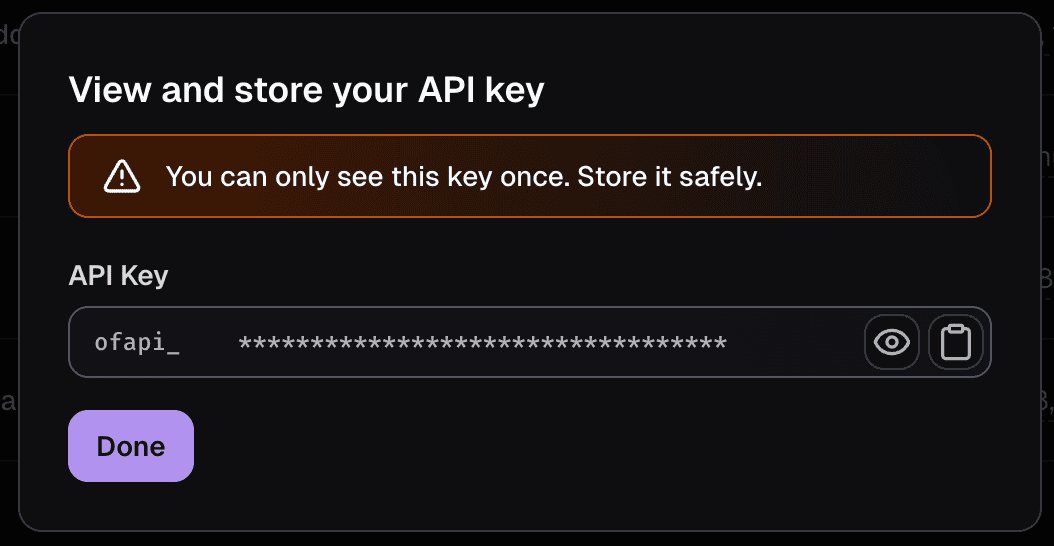
### Save the new API key in Make.com \[!toc]
Give the connection a helpful name, paste the API key, and click "Save".
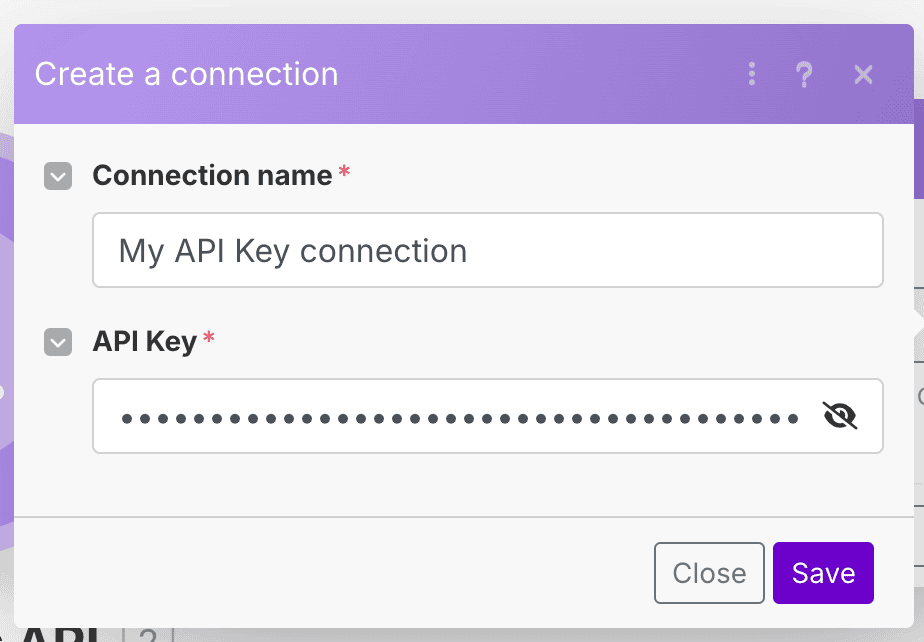
You're now ready to use the OnlyFans API app in your Make.com scenario.
## Tutorial Video
# Ready-made scenarios
URL: /integrations/make/ready-made-scenarios
Can't wait to get started? Use our ready-made scenarios to get going in a matter of minutes!
***
title: "Ready-made scenarios"
description: "Can't wait to get started? Use our ready-made scenarios to get going in a matter of minutes!"
icon: WandSparkles
------------------
import { Step, Steps } from 'fumadocs-ui/components/steps';
### Available blueprints
### Account synchronization \[!toc]
This scenario will synchronize your OnlyFans accounts with Airtable, and update the data once a day.
**Download scenario blueprint ›**
### Hourly account revenue data \[!toc]
This scenario will synchronize your OnlyFans account revenue data with Airtable. Every account will have one record for each day, which updates hourly.
**Download scenario blueprint ›**
### How to use the scenario blueprints
If you import a blueprint while editing another scenario that hasn't been saved, all the changes in that scenario will be lost.
To import a blueprint:
#### On the Scenario Builder toolbar, click the three dots > Import blueprint. \[!toc]
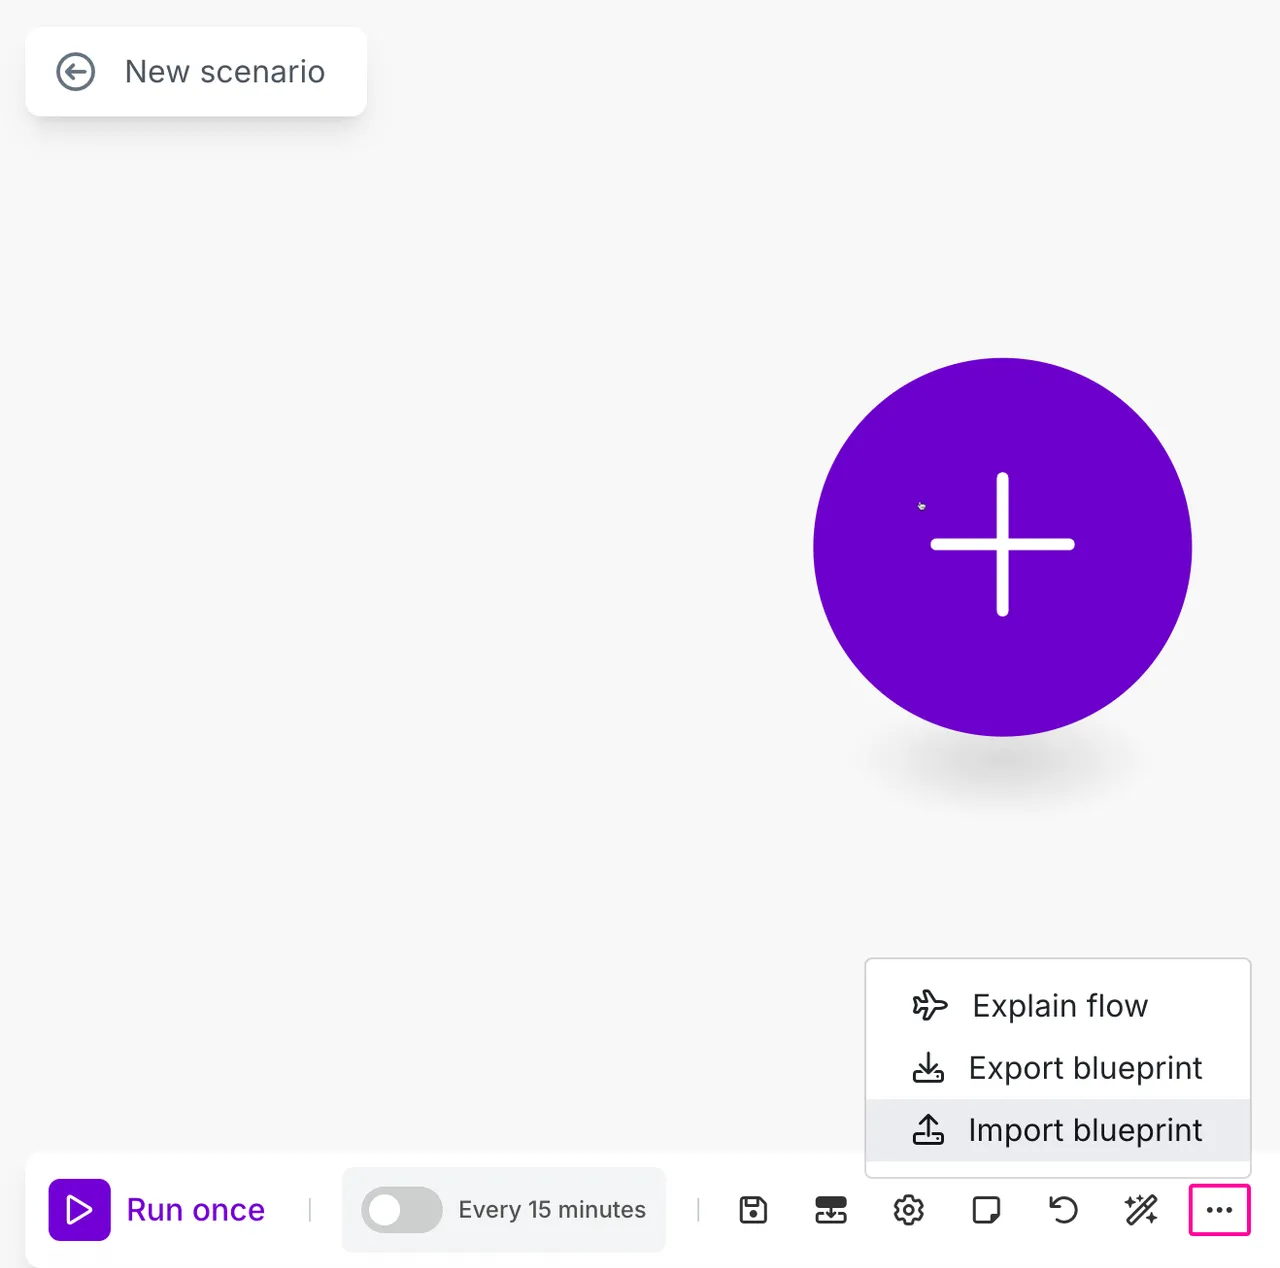
#### Click Choose File, select the blueprint file in .json format, and click Save. \[!toc]
The imported scenario appears in the Scenario Builder. You can now configure your own account connections, make any necessary edits to the scenario, schedule it, and click the Save icon.
# Available modules
URL: /integrations/zapier/available-modules
A list of all available OnlyFans API modules in Zapier.
***
title: "Available modules"
description: "A list of all available OnlyFans API modules in Zapier."
icon: Puzzle
------------
Please reach out to us, we can add it!
## Instant Triggers
An Instant Trigger (also known as a "webhook"), is a module that is executed immediately when an event occurs.
### 🤑 Chat Message PPV Purchased
A PPV (pay-per-view) message that you sent has been purchased by a fan
```json title="Example data"
{
"event": "messages.ppv.unlocked",
"account_id": "acct_123",
"payload": {
"id": "123",
"type": "paided_message",
"createdAt": "2025-05-05T22:18:00+00:00",
"text": "has purchased your message for $5.00!",
"replacePairs": {
"{NAME}": "Name",
"{MESSAGE_LINK}": "message",
"{AMOUNT}": "$5.00"
},
"subType": "subscriber_pay_for_chat_message",
"user_id": "123",
"isRead": false,
"canGoToProfile": true,
"user": {
"avatar": null,
"avatarThumbs": null,
"header": null,
"headerSize": null,
"headerThumbs": null,
"id": 123,
"name": "Name",
"username": "username",
"canLookStory": false,
"canCommentStory": false,
"hasNotViewedStory": false,
"isVerified": false,
"canPayInternal": false,
"hasScheduledStream": false,
"hasStream": false,
"hasStories": false,
"tipsEnabled": false,
"tipsTextEnabled": true,
"tipsMin": 5,
"tipsMinInternal": 1,
"tipsMax": 200,
"canEarn": false,
"canAddSubscriber": false,
"subscribePrice": 0,
"subscribedBy": false,
"subscribedOn": false,
"canReceiveChatMessage": false,
"hideChat": false,
"lastSeen": "2025-05-05T22:17:29+00:00",
"isPerformer": false,
"isRealPerformer": false,
"view": "mn",
"canReport": true,
"subscribedByData": null,
"subscribedOnData": null,
"isBlocked": false
}
}
}
```
### 📥 Chat Message Received
A new chat message has been received.
```json title="Example data"
{
"event": "messages.received",
"account_id": "acct_abc123",
"payload": {
"responseType": "message",
"text": "
",
"giphyId": null,
"lockedText": true,
"isFree": true,
"price": 0,
"isMediaReady": true,
"mediaCount": 0,
"media": [ ],
"previews": [ ],
"isTip": false,
"isReportedByMe": false,
"isCouplePeopleMedia": false,
"queueId": 123,
"isMarkdownDisabled": true,
"releaseForms": [ ],
"isFromQueue": false,
"id": 123,
"isOpened": false,
"isNew": true,
"createdAt": "2025-07-02T00:00:00+00:00",
"changedAt": "2025-07-02T00:00:00+00:00",
"cancelSeconds": 86400,
"isLiked": false,
"canPurchase": false,
"canPurchaseReason": "free",
"canReport": false,
"canBePinned": true,
"isPinned": false,
"toUser": {
"view": "s",
"avatar": null,
"avatarThumbs": null,
"header": null,
"headerSize": null,
"headerThumbs": null,
"id": 123,
"name": "Name",
"username": "username",
"canLookStory": false,
"canCommentStory": false,
"hasNotViewedStory": false,
"isVerified": false,
"canPayInternal": true,
"hasScheduledStream": false,
"hasStream": false,
"hasStories": false,
"tipsEnabled": false,
"tipsTextEnabled": true,
"tipsMin": 5,
"tipsMinInternal": 1,
"tipsMax": 200,
"canEarn": false,
"canAddSubscriber": true,
"subscribePrice": 0,
"displayName": "",
"notice": "",
"isRestricted": false,
"canRestrict": true,
"subscribedBy": false,
"subscribedByExpire": null,
"subscribedByExpireDate": null,
"subscribedByAutoprolong": null,
"subscribedIsExpiredNow": null,
"currentSubscribePrice": null,
"subscribedOn": true,
"subscribedOnExpiredNow": false,
"subscribedOnDuration": "1 month",
"listsStates": [
{
"id": "friends",
"type": "friends",
"name": "Friends",
"hasUser": false,
"canAddUser": false,
"cannotAddUserReason": "USER_NOT_PERFORMER"
},
{
"id": "muted",
"type": "muted",
"name": "Muted",
"hasUser": false,
"canAddUser": true,
"cannotAddUserReason": null
},
{
"id": "tagged",
"type": "tagged",
"name": "Tagged",
"hasUser": false,
"canAddUser": false,
"cannotAddUserReason": "SYSTEM_LIST"
},
{
"id": "rebill_on",
"type": "rebill_on",
"name": "Renew On",
"hasUser": false,
"canAddUser": false,
"cannotAddUserReason": null
},
{
"id": "recent",
"type": "recent",
"name": "Recent (last 24 hours)",
"hasUser": false,
"canAddUser": false,
"cannotAddUserReason": "SYSTEM_LIST"
},
{
"id": "fans",
"type": "fans",
"name": "Fans",
"hasUser": true,
"canAddUser": false,
"cannotAddUserReason": "ALREADY_EXISTS"
},
{
"id": "rebill_off",
"type": "rebill_off",
"name": "Renew Off",
"hasUser": true,
"canAddUser": false,
"cannotAddUserReason": "ALREADY_EXISTS"
},
{
"id": "following",
"type": "following",
"name": "Following",
"hasUser": false,
"canAddUser": false,
"cannotAddUserReason": "SYSTEM_LIST"
}
],
"showMediaCount": true,
"lastSeen": "2025-07-02T00:00:00+00:00",
"canReport": false
}
}
}
```
### 🎉 New Subscriber
A new fan has subscribed.
```json title="Example data"
{
"event": "subscriptions.new",
"account_id": "acct_123",
"payload": {
"id": "123",
"type": "subscribed",
"createdAt": "2025-05-05T21:27:00+00:00",
"text": "subscribed to your profile!",
"replacePairs": {
"{SUBSCRIBER_LINK}": "Name",
"{PRICE}": "free"
},
"subType": "new_subscriber",
"user_id": "123",
"isRead": false,
"canGoToProfile": true,
"user": {
"avatar": "https://example.com",
"avatarThumbs": {
"c50": "https://example.com",
"c144": "https://example.com"
},
"header": "https://example.com",
"headerSize": {
"width": 767,
"height": 1152
},
"headerThumbs": {
"w480": "https://example.com",
"w760": "https://example.com"
},
"id": 123,
"name": "Name",
"username": "username",
"canLookStory": false,
"canCommentStory": false,
"hasNotViewedStory": false,
"isVerified": true,
"canPayInternal": false,
"hasScheduledStream": false,
"hasStream": false,
"hasStories": false,
"tipsEnabled": true,
"tipsTextEnabled": true,
"tipsMin": 5,
"tipsMinInternal": 1,
"tipsMax": 200,
"canEarn": true,
"canAddSubscriber": false,
"subscribePrice": 0,
"subscribedBy": false,
"subscribedOn": false,
"canReceiveChatMessage": false,
"hideChat": false,
"lastSeen": "2025-05-05T21:26:04+00:00",
"isPerformer": true,
"isRealPerformer": true,
"view": "mn",
"canReport": true,
"subscribedByData": null,
"subscribedOnData": null,
"isBlocked": false
}
}
}
```
### ❤️ Post Liked
A fan has liked one of your posts.
```json title="Example data"
{
"event": "posts.liked",
"account_id": "acct_123",
"payload": {
"id": "123",
"type": "favorited",
"createdAt": "2025-05-05T22:22:00+00:00",
"text": "liked your post",
"replacePairs": {
"{POST_LINK}": "post"
},
"subType": "new_favorite",
"user_id": "123",
"isRead": false,
"canGoToProfile": true,
"user": {
"avatar": null,
"avatarThumbs": null,
"header": null,
"headerSize": null,
"headerThumbs": null,
"id": 123,
"name": "Name",
"username": "username",
"canLookStory": false,
"canCommentStory": false,
"hasNotViewedStory": false,
"isVerified": false,
"canPayInternal": false,
"hasScheduledStream": false,
"hasStream": false,
"hasStories": false,
"tipsEnabled": false,
"tipsTextEnabled": true,
"tipsMin": 5,
"tipsMinInternal": 1,
"tipsMax": 200,
"canEarn": false,
"canAddSubscriber": false,
"subscribePrice": 0,
"subscribedBy": false,
"subscribedOn": false,
"canReceiveChatMessage": false,
"hideChat": false,
"lastSeen": null,
"isPerformer": false,
"isRealPerformer": false,
"view": "mn",
"canReport": true,
"subscribedByData": null,
"subscribedOnData": null,
"isBlocked": false
}
}
}
```
### 💬 Fan is Typing
A fan is typing a message.
```json title="Example data"
{
"event": "users.typing",
"account_id": "acct_123",
"payload": {
"id": 123
}
}
```
### ℹ️ Account Connected
A new OnlyFans account was connected.
```json title="Example data"
{
"event": "accounts.connected",
"account_id": "acct_123",
"payload": {
"state": "authenticated",
"progress": "started",
"latestAuthAttempt": {
"started_at": "2025-05-13T20:26:56.000000Z",
"completed_at": null,
"success": false,
"error_message": null,
"needs_otp": false,
"needs_face_otp": false,
"otp_phone_ending": null
}
}
}
```
### ℹ️ Account Reconnected
An OnlyFans account was reconnected.
```json title="Example data"
{
"event": "accounts.reconnected",
"account_id": "acct_123",
"payload": {
"state": "authenticated",
"progress": "started",
"latestAuthAttempt": {
"started_at": "2025-05-13T20:26:56.000000Z",
"completed_at": null,
"success": false,
"error_message": null,
"needs_otp": false,
"needs_face_otp": false,
"otp_phone_ending": null
}
}
}
```
### ℹ️ Account Connection Failed
An OnlyFans account's connection has expired, and we couldn't automatically re-connect it using our system.
```json title="Example data"
{
"event": "accounts.authentication_failed",
"account_id": "acct_123",
"payload": {
"state": "authenticated",
"progress": "started",
"latestAuthAttempt": {
"started_at": "2025-05-13T20:26:56.000000Z",
"completed_at": null,
"success": false,
"error_message": null,
"needs_otp": false,
"needs_face_otp": false,
"otp_phone_ending": null
}
}
}
```
### ℹ️ Account Session Expired
An OnlyFans account's connection has expired, but we're automatically re-connecting it using our system — you don't need to do anything.
```json title="Example data"
{
"event": "accounts.session_expired",
"account_id": "acct_123",
"payload": {
"state": "authenticated",
"progress": "started",
"latestAuthAttempt": {
"started_at": "2025-05-13T20:26:56.000000Z",
"completed_at": null,
"success": false,
"error_message": null,
"needs_otp": false,
"needs_face_otp": false,
"otp_phone_ending": null
}
}
}
```
### ℹ️ Account Requires Face Verification
Face verification is required to connect one of your OnlyFans accounts
```json title="Example data"
{
"event": "accounts.face_otp_required",
"account_id": "acct_123",
"payload": {
"state": "authenticated",
"progress": "started",
"face_otp_verification_url": "https://id.onlyfans.com/s?123",
"latestAuthAttempt": {
"started_at": "2025-05-13T20:26:56.000000Z",
"completed_at": null,
"success": false,
"error_message": null,
"needs_otp": false,
"needs_face_otp": false,
"otp_phone_ending": null
}
}
}
```
### ℹ️ Account Requires OTP (2FA) Code
A two-factor authentication code is required to connect one of your OnlyFans accounts.
```json title="Example data"
{
"event": "accounts.otp_code_required",
"account_id": "acct_123",
"payload": {
"state": "authenticated",
"progress": "started",
"latestAuthAttempt": {
"started_at": "2025-05-13T20:26:56.000000Z",
"completed_at": null,
"success": false,
"error_message": null,
"needs_otp": false,
"needs_face_otp": false,
"otp_phone_ending": null
}
}
}
```
# Quickstart
URL: /integrations/zapier
Best for quickly setting up no-code automations based on triggers like new messages, PPV purchases, or new fan subscriptions. Great for those who want ease-of-use and a large library of app connections.
***
title: "Quickstart"
description: "Best for quickly setting up no-code automations based on triggers like new messages, PPV purchases, or new fan subscriptions. Great for those who want ease-of-use and a large library of app connections."
icon: Rocket
------------
import {DownloadIcon, ZapIcon} from "lucide-react";
import { Step, Steps } from 'fumadocs-ui/components/steps';
import {Card} from "fumadocs-ui/components/card";
## Prerequisites
To get started, you must have:
* An OnlyFans API account with a creator account connected
* A [Zapier](https://zapier.com) account
## Getting started
Log in to your Zapier account.
Install our Zapier app:
} href="https://zapier.com/developer/public-invite/227143/bfb7f34aa95032c5d8801a65821e4a5c/" title="Install our Zapier app" className="w-fit">
It only takes a few seconds.
## Connecting your OnlyFans API account to Zapier
### Create a new Zap, or edit an existing one \[!toc]
} href="https://zapier.com/webintent/create-zap" title="Create new Zap" className="w-fit">
Build automated OnlyFans workflows by creating your first Zap.
### Choose the OnlyFans API App as the trigger \[!toc]
### Select a trigger event \[!toc]
### Create a new API key from the OnlyFans API Console \[!toc]
#### Go to the OnlyFans API console -> API Keys \[!toc]

#### Create a new API key from the OnlyFans API Console \[!toc]

#### Give it a name, and press "Add" \[!toc]

#### Copy the API key to your clipboard \[!toc]

### Connect Zapier with OnlyFans API \[!toc]
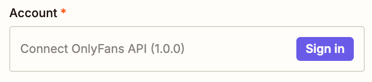
### Paste the API Key into the Zapier connection window \[!toc]
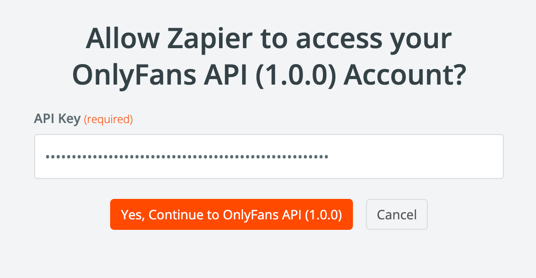
### Your Zapier account is now connected to OnlyFans API \[!toc]
If all went well, under "Account", Zapier will show your API key name, and the name of your OnlyFans API team.
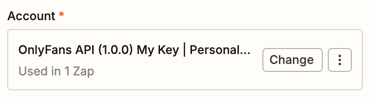
You're now ready to use the OnlyFans API app in your Zaps.
# Quickstart
URL: /integrations/n8n
We're excited to announce that our n8n integration is currently in development and will be available soon!
***
title: "Quickstart"
description: "We're excited to announce that our n8n integration is currently in development and will be available soon!"
icon: Rocket
------------
**Our n8n integration is currently in development and will be available soon!**
## What to expect
Our upcoming n8n integration will allow you to:
* Trigger workflows based on events in our platform
* Fetch and manipulate OnlyFans data
* Create and update resources automatically
* Build complex automation workflows with ease
# Credit System
URL: /introduction/essentials/credits
Understanding credit allocation and subscription plans
***
title: "Credit System"
description: "Understanding credit allocation and subscription plans"
icon: Coins
-----------
import {
ChartNoAxesCombinedIcon,
CodeIcon,
CoinsIcon,
DatabaseZapIcon,
FileTextIcon,
HeartPlusIcon,
MonitorIcon,
ScanSearchIcon,
SquareActivityIcon,
TrendingUpIcon,
} from 'lucide-react';
## Credit calculator
## Credit cost overview
Please refer to the table below to get a general overview of the credit cost for our endpoints.
For detailed information about where to find credit information in API responses, see our [Response Structure](/introduction/essentials/response-structure) documentation.
| Endpoint(s) | Cost | Notes |
| -------------------------------------------------------------------- | ------------------------------- | ---------------------------------------------------------------------------------------------------------------------------------------------------------------------------------------------------------------------------------- |
| [Search Profiles](/api-reference/public-profiles/searchProfiles) | 1 credit per result | E.g. if your search query has 10 results, you will be debited 10 credits. |
| [Media Uploading](/api-reference/media/uploadMediaToTheOnlyFansCDN) | 6 credits per MB | For easy calculation, we use decimal measurements. This means that 1MB is 1,000 KB. |
| [Media Scraping](/api-reference/media/scrapeMediaFromTheOnlyFansCDN) | 6 credits per MB | For easy calculation, we use decimal measurements. This means that 1MB is 1,000 KB. |
| [Webhooks](/webhooks) | 1 credit per sent webhook event | E.g. if you have one webhook configured for both `messages.received` and `messages.sent`, you will be charged 1 credit every time one of those events is triggered. Webhooks are not sent as a bundle, so every event is 1 credit. |
| [All other uncached responses](#uncached-responses) | 1 credit per request | - |
| [All other cached responses](#cached-responses) | 0 credits | - |
## Cached vs uncached
### Cached responses
Public endpoints make use of automatic caching by default, and thus won't cost you any credits if a cached response already exists.
**Account-specific endpoints will never be cached**, and will always give you a fresh response from OnlyFans.
#### Forcing a fresh response
You can force a fresh response by appending the endpoint URL with `?fresh=true`
### Uncached responses
All account-specific endpoints, and endpoints that reply on real-time data, will always return a fresh response from OnlyFans and thus will consume credits.
## Subscription Plans
Our subscription tiers provide different credit allocations:
• Perfect for small to medium projects\
• Includes all basic features\
• Automatic credit tracking
• Ideal for larger applications\
• Priority support\
• Advanced features included
• Tailored to your needs\
• Contact us to discuss requirements\
• Custom features and support
## Credit Features
All subscription tiers include:
}>
• Up to 200% of monthly allocation\
• Automatic rollover management\
• No manual activation required
}>
• Real-time balance tracking\
• Detailed usage analytics\
• Automated notifications
}>
• Automatic response caching\
• Zero-credit cached responses\
• Cache control with `?fresh=true`
## Monitoring Tools
You can easily track your credit usage through all of our API responses, and through our Console
}>
* Real-time credit balance
* Request-specific credit usage
* Cache status indicators
}>
* Real-time credit balance
* View your rate limit usage
* Easily purchase more credits
## Credit Management
Best practices for optimizing credit usage:
}>
Leverage cached responses when possible.
}>
Monitor your credit balance regularly.
}>
Review usage patterns regularly. Consider optimizing your requests.
Cached responses are free and don't consume any credits from your balance.
This applies to public endpoints like profile information.
## Enterprise Solutions
For high-volume requirements, we offer:
} />
} />
} />
} />
Please contact our team to discuss your specific needs and get a tailored solution.
# Proxies
URL: /introduction/essentials/proxies
Advanced proxy infrastructure and configuration options
***
title: "Proxies"
description: "Advanced proxy infrastructure and configuration options"
icon: ShieldCheck
-----------------
## Proxy Infrastructure
OnlyFans API leverages an advanced proxy architecture to ensure high-availability connections and robust security. Our infrastructure automatically manages dedicated proxy assignments for each account, providing enterprise-grade reliability and performance.
### Built-in Proxy System (Recommended)
We provide a sophisticated proxy management system at no additional cost:
* **Dedicated Mobile IP**: Each connected account gets its own exclusive mobile proxy IP
* **Intelligent Routing**: Advanced traffic routing optimized for OnlyFans platform
* **Geographic Distribution**: Choose your preferred proxy country during setup
* **Zero Configuration**: Everything is handled automatically
Our proxy infrastructure is specifically engineered for optimal OnlyFans API
performance. We recommend using our built-in system for the best experience.
### Custom Proxy Integration
For organizations with existing proxy infrastructure:
1. Select "Use custom proxy" during account configuration
2. Configure your proxy details:
* Host
* Port
* Username (if required)
* Password (if required)
### Technical Requirements
Custom proxy configurations must meet these specifications:
* **IP Exclusivity**: Dedicated, non-shared IP address per account
* **Network Type**: Mobile or residential IP ranges (datacenter IPs not supported)
* **Geolocation**: IP geolocation matching historical access patterns
* **Protocol Support**: HTTP/HTTPS protocols
### Best Practices
* Maintain consistent geolocation patterns
* Use the same proxy consistently for each account
* Monitor proxy health metrics
* Contact support if you experience connection issues
# Rate Limits
URL: /introduction/essentials/rate-limits
Understanding API rate limits and optimization
***
title: "Rate Limits"
description: "Understanding API rate limits and optimization"
icon: Gauge
-----------
## Rate Limiting Overview
Our platform employs a distributed rate limiting system to ensure optimal performance and resource allocation. Rate limits vary based on your subscription plan:
### Plan-Based Limits
1. **Basic Plan**:
* 1,000 requests per minute (RPM)
* Resets every minute
* Perfect for most applications
* Tracked via `remaining_minute` counter
2. **Pro Plan**:
* 5,000 requests per minute (RPM)
* Higher throughput for demanding applications
* Priority request processing
* Tracked via `remaining_minute` counter
3. **Enterprise Plan**:
* No rate limits
* Unlimited requests per minute
* Custom infrastructure
* Performance monitoring included
Enterprise customers get unlimited request throughput with dedicated
infrastructure to ensure optimal performance at any scale.
For information about where to find rate limit data in responses, see our [Response Structure](/introduction/essentials/response-structure) documentation.
### Caching and Rate Limits
Our caching system helps you optimize your rate limit usage:
* Public endpoints (like profile information) are automatically cached
* Cached responses don't count towards your rate limits
* Use `?fresh=true` when you need real-time data
* Cache duration varies by endpoint type
When using cached responses, you're not consuming any of your rate limits,
making it an effective way to optimize your API usage.
### Rate Limit Monitoring
Track your rate limit usage through:
1. **Response Headers**
* Current limits
* Remaining requests
* Reset timers
2. **Dashboard Analytics**
* Usage patterns
* Peak usage times
* Rate limit warnings
### Best Practices
Implement these strategies for optimal throughput:
1. **Monitor Your Limits**
* Track usage patterns
* Plan for limit resets
* Set up alerts before limits are reached
2. **Optimize Request Patterns**
* Distribute requests evenly
* Avoid request bursts
* Use batch operations when available
3. **Handle Rate Limits Gracefully**
* Implement exponential backoff
* Queue requests when near limits
* Use cached responses when possible
4. **Cache Strategy**
* Leverage cached responses
* Only use `?fresh=true` when necessary
* Implement local caching when appropriate
### Error Handling
When you exceed rate limits:
* Response will have status code `429 Too Many Requests`
* Contains information about when limits reset
* Implement automatic retry with backoff
Example backoff strategy:
```javascript
async function fetchWithRetry(url, maxRetries = 3) {
for (let i = 0; i < maxRetries; i++) {
try {
const response = await fetch(url);
if (response.status !== 429) return response;
// Get retry delay from headers or use exponential backoff
const retryAfter = response.headers.get("retry-after") || Math.pow(2, i);
await new Promise((resolve) => setTimeout(resolve, retryAfter * 1000));
} catch (error) {
if (i === maxRetries - 1) throw error;
}
}
}
```
### Enterprise Options
For high-volume requirements:
* No rate limits
* Dedicated infrastructure
* Custom performance tuning
* Advanced monitoring tools
Contact our enterprise team to discuss your specific needs.
# Response Structure
URL: /introduction/essentials/response-structure
Understanding API response format, metadata, and headers
***
title: "Response Structure"
description: "Understanding API response format, metadata, and headers"
icon: CodeXml
-------------
## Response Format
Every API response follows a consistent structure with two main components:
1. The `data` field containing OnlyFans information
2. Optional `_pagination` field with pagination information, if the endpoint is paginated
3. The `_meta` object containing request metadata
Here's an example response:
### Response Body Structure
```json
{
"data": {
// OnlyFans response data
"view": "f",
"avatar": "https://...",
"isFriend": false,
"isBlocked": false,
"canReport": false
},
"_meta": {
"_credits": {
"used": 0,
"balance": 9852,
"note": "Cache HIT. No credits debited"
},
"_cache": {
"is_cached": true,
"cached_at": "2025-01-29T16:30:43+00:00",
"note": "Add ?fresh=true to the request URL to skip the cache and get a fresh response from OnlyFans"
},
"_rate_limits": {
"limit_minute": 60,
"limit_day": 1000,
"remaining_minute": 59,
"remaining_day": 988
}
}
}
```
### The `data` Field
The `data` field always contains the actual OnlyFans response data. Its structure varies depending on the endpoint being called. For example:
* Profile information for `/profiles/{username}`
* Message data for `/messages` endpoints
* Subscriber data for `/subscribers` endpoints
### The optional `_pagination` field
Some endpoints return paginated data. For example, `/chats`, `/chats/XYZ/messages` or `/tracking-links`.
In this case, the response will include a `_pagination` field with the `next_page` field that you can use to fetch the next page of results.
If there are no more pages, the `next_page` field will be `null`.
```json
{
"data": {
// OnlyFans response data
},
"_meta": {
"_pagination": {
"next_page": "https://app.onlyfansapi.com/api/acct_XXXXXXXXXXX/chats/?offset=10&limit=10"
}
}
}
```
### The `_meta` Object
The `_meta` object contains three sections of metadata about your request:
1. **`_credits`**: Credit usage information
* `used`: Credits consumed by this request
* `balance`: Your remaining credit balance
* `note`: Additional information about credit usage
2. **`_cache`**: Caching status and information
* `is_cached`: Whether this response was served from cache
* `cached_at`: When the response was cached
* `note`: Instructions for bypassing cache if needed
3. **`_rate_limits`**: Rate limiting information
* `limit_minute`: Requests allowed per minute
* `limit_day`: Requests allowed per day
* `remaining_minute`: Remaining requests this minute
* `remaining_day`: Remaining requests today
## Response Headers
Each response includes comprehensive metadata in the headers:
| Header | Value | Category | Description |
| ------------------------------- | ------------------ | ------------------ | ----------------------------- |
| `content-type` | `application/json` | Content Headers | Always `application/json` |
| `x-ofapi-credits-balance` | `9852` | Credit Headers | Your remaining credit balance |
| `x-ofapi-credits-used` | `0` | Credit Headers | Credits used by this request |
| `x-ofapi-is-cached` | `true` | Credit Headers | Whether response was cached |
| `x-rate-limit-limit-day` | `1000` | Rate Limit Headers | Daily limit |
| `x-rate-limit-limit-minute` | `60` | Rate Limit Headers | Per-minute limit |
| `x-rate-limit-remaining-day` | `988` | Rate Limit Headers | Remaining daily requests |
| `x-rate-limit-remaining-minute` | `59` | Rate Limit Headers | Remaining minute requests |
## Cache Control
You can control caching behavior using query parameters:
* By default, responses are cached when possible (only for public endpoints)
* Add `?fresh=true` to force a fresh response from OnlyFans
* Cached responses don't consume credits
* Cache duration varies by endpoint
The same information is available in both headers and the `_meta` object. Use
headers for quick access in code, and the `_meta` object for more detailed
information including notes and timestamps.
# Composing messages
URL: /introduction/guides/composing-messages
Learn how to compose and send messages from our API, media, PPVs, and more.
***
title: "Composing messages"
description: "Learn how to compose and send messages from our API, media, PPVs, and more."
icon: MessageSquareText
-----------------------
This guide will give you a brief overview of how to compose messages with various elements using our API.
Please keep in mind that all of the below examples are meant to be sent as a `POST` request to our `https://app.onlyfansapi.com/api/{account}/chats/{chat_id}/messages` endpoint.
**Looking for the `chat_id`? Use our [List Chats](/api-reference/chats/listChats) endpoint.**
**Looking for the developer-oriented documentation?** Please refer to our [API Reference](/api-reference/chats/sendMessage).
## Text-only messages
Simply want to send a regular message? Use the following payload:
```json
{
"text": "The text of your message"
}
```
## Adding media
Please refer to our dedicated guide on [uploading media](/introduction/guides/uploading-media) for more information on how to upload media files, and how to include them in your chat messages.
## Setting a price (PPV)
To set a price for your chat message, you can use the `price` field in your payload. This will make your message paid (PPV). **All paid messages must contain at least one media file.**
### Only including paid media
To send a paid message without any free preview media, you can use the following payload:
```json
{
"text": "The text of your message",
"mediaFiles": ["ofapi_media_123", 3866342509],
"price": 5
}
```
The `mediaFiles` parameter can contain either `ofapi_media` IDs, or OnlyFans Vault Media ID (e.g., `3866342509`). You can find more information about these IDs in our [media uploads guide](/introduction/guides/uploading-media). **You can mix-and-match these IDs in the same array.**
### Including free preview media
To send a paid message with free preview media, you can use the `previews` field in your payload. This allows you to include media that will be visible to the recipient, even if they haven't paid for the message.
**Important!**\
Make sure to list every `previews` media file in the `mediaFiles` array as well. Otherwise, the API will return an error.
The `previews` array is only used to indicate which media files are free, while the `mediaFiles` array contains all media files included in the message, regardless of whether they are paid or free.
```json
{
"text": "The text of your message",
"mediaFiles": ["ofapi_media_123", 3866342509],
"previews": ["ofapi_media_456", 1234567890],
"price": 5
}
```
The `mediaFiles` and `previews` parameters can contain either `ofapi_media` IDs, or OnlyFans Vault Media ID (e.g., `3866342509`). You can find more information about these IDs in our [media uploads guide](/introduction/guides/uploading-media). **You can mix-and-match these IDs in the same array.**
## Tagging other OnlyFans creators
To tag other OnlyFans creators in your message, you can use the `rfTag` field in your payload. You can specify multiple creators by providing an array of their OnlyFans user IDs.
```json
{
"text": "The text of your message",
"rfTag": [123, 456]
}
```
**How to find the OnlyFans user ID of a creator?**
* **If you've connected the relevant creator account to OnlyFans API**, you can use our [List Accounts](/api-reference/account/listAccounts) endpoint.
* **Not connected, but you know the creator's username?** You can use our [Get Profile Details](/api-reference/public-profiles/getProfileDetails) endpoint.
* **Not connected and don't know the username?** You can use our [Search Profiles](/api-reference/public-profiles/searchProfiles) endpoint.
## Formatting your message text
Please refer to our dedicated guide on [text formatting](/introduction/guides/text-formatting) for more information on how to format your message text, including text styles, colors, and more.
# Composing posts
URL: /introduction/guides/composing-posts
Learn how to compose posts from our API, including labels, media, polls, schedules, and more.
***
title: "Composing posts"
description: "Learn how to compose posts from our API, including labels, media, polls, schedules, and more."
icon: SquarePen
---------------
This guide will give you a brief overview of how to compose posts with various elements using our API.
Please keep in mind that all of the below examples are meant to be sent as a `POST` request to our `https://app.onlyfansapi.com/api/{account}/posts` endpoint.
**Looking for the developer-oriented documentation?** Please refer to our [API Reference](/api-reference/posts/sendPost).
## Text-only posts
Simply want to send a regular text post? Use the following payload:
```json
{
"text": "The text of your post"
}
```
## Post labels
### Retrieving the account's existing labels
**Looking for the developer-oriented documentation?** Please refer to our [API Reference](/api-reference/post-labels/listLabels).
You can retrieve the account's existing labels by sending a `GET` request to the `https://app.onlyfansapi.com/api/{account}/posts/labels` endpoint.
It will return a payload like:
```json
[
{
"id": "archived",
"name": "Archive",
"type": "archived",
"isClearInProgress": false,
"postsCount": 0,
"posts": []
},
{
"id": "private_archived",
"name": "Private Archive",
"type": "private_archived",
"isClearInProgress": false,
"postsCount": 0,
"posts": []
},
{
"id": 123,
"name": "My new label",
"type": "custom",
"isClearInProgress": false,
"postsCount": 123,
"posts": []
}
]
```
You can then use the `id` of the label(s) to apply it to your post.
### Creating a new label
**Looking for the developer-oriented documentation?** Please refer to our [API Reference](/api-reference/post-labels/createLabel).
To create a new label, send a `POST` request to the `https://app.onlyfansapi.com/api/{account}/posts/labels` endpoint with the following payload:
```json
{
"name": "My new label"
}
```
It will then return a payload like:
```json
{
"data": {
"id": 123,
"name": "My new label",
"type": "custom",
"isClearInProgress": false,
"postsCount": 0,
"posts": []
}
}
```
You can then use the `id` of the newly created label to apply it to your post.
### Adding label(s) to your post
To add label(s) to your post, you can use the `labels` field in your payload. You can specify multiple labels by providing an array of label IDs.
```json
{
"text": "The text of your post",
"labelIds": [123, 456]
}
```
## Adding media
Please refer to our dedicated guide on [uploading media](/introduction/guides/uploading-media) for more information on how to upload media files, and how to include them in your posts.
## Adding polls
Both regular polls and quizzes are supported in our API. You can choose which type of poll to include in your post by setting the `votingType` field in your payload to either `poll` or `quiz`.
### Regular polls
To include a regular poll in your post, set the `votingType` field to `poll`.
**Specifying the options**\
The poll's options can be set by using the `votingOptions` field. It should be an array of strings. **You must provide at least 2 options.**
**Setting a due date** (optional)\
You can set a due date by using the `votingDue` field, which specifies the number of days until the poll expires. Valid values are **1**, **3**, **7**, or **30** days. If not specified, the poll will never expire.
```json
{
"text": "The text of your post",
"votingType": "poll",
"votingOptions": ["Option 1", "Option 2"],
"votingDue": 7
}
```
### Quizzes
To include a quiz in your post, set the `votingType` field to `quiz`.
**Specifying the options**\
The quiz options can be set by using the `votingOptions` field. It should be an array of strings. **You must provide at least 2 options.**
**Specifying the correct answer**\
Specify the correct answer by using the `votingCorrectIndex` field. It should be an integer representing the index of the correct answer in the `votingOptions` array (starting from 0). For example, if the correct answer is the first option, set it to `0`.
**Setting a due date** (optional)\
You can set a due date by using the `votingDue` field, which specifies the number of days until the quiz expires. Valid values are **1**, **3**, **7**, or **30** days. If not specified, the quiz will never expire.
```json
{
"text": "The text of your post",
"votingType": "quiz",
"votingOptions": ["Option 1", "Option 2"],
"votingCorrectIndex": 0,
"votingDue": 7
}
```
## Setting an expiration date
To set an expiration date for your post, you can use the `expireDays` field in your payload. The value must be **1**, **3**, **7** or **30** days.
```json
{
"text": "The text of your post",
"expireDays": 7
}
```
## Scheduling posts
To schedule your post, you can use the `scheduledDate` field in your payload. The value must be a valid date-time string formatted as `2025-06-03T15:30:00.000Z` (ISO 8601 format) in UTC timezone.
```json
{
"text": "The text of your post",
"scheduledDate": "2023-10-01T12:00:00Z"
}
```
## Saving a post for later
To save a post for later, you can use the `saveForLater` field in your payload. Set it to `true` to save the post without publishing it immediately. You can then find your post here: [https://onlyfans.com/saved-for-later-posts](https://onlyfans.com/saved-for-later-posts)
```json
{
"text": "The text of your post",
"saveForLater": true
}
```
## Setting a fundraising target
To include a fundraising target in your post, you can use the `fundRaisingTargetAmount` and `fundRaisingTipsPresets` fields in your payload.
**Setting a target amount**\
The `fundRaisingTargetAmount` field specifies the target amount for your fundraising post. It must be a at least `10` representing the amount in your account's currency.
**Setting tip presets**\
The `fundRaisingTipsPresets` field allows you to specify the preset tip amounts that users can choose from. It should be an array of integers representing the amounts in your account's currency.
**Tip preset rules**
* You must provide at least one preset value.
* Each preset value must be at least `5`.
* Each preset value may not be more than the `fundRaisingTargetAmount`.
```json
{
"text": "The text of your post",
"fundRaisingTargetAmount": 30,
"fundRaisingTipsPresets": [5, 10, 15]
}
```
## Tagging other OnlyFans creators
To tag other OnlyFans creators in your post, you can use the `rfTag` field in your payload. You can specify multiple creators by providing an array of their OnlyFans user IDs.
```json
{
"text": "The text of your post",
"rfTag": [123, 456]
}
```
**How to find the OnlyFans user ID of a creator?**
* **If you've connected the relevant creator account to OnlyFans API**, you can use our [List Accounts](/api-reference/account/listAccounts) endpoint.
* **Not connected, but you know the creator's username?** You can use our [Get Profile Details](/api-reference/public-profiles/getProfileDetails) endpoint.
* **Not connected and don't know the username?** You can use our [Search Profiles](/api-reference/public-profiles/searchProfiles) endpoint.
## Formatting your post text
Please refer to our dedicated guide on [text formatting](/introduction/guides/text-formatting) for more information on how to format your post text, including text styles, colors, and more.
# Connect OnlyFans account
URL: /introduction/guides/connect-onlyfans-account
Learn how to connect your OnlyFans account so you can use it with OnlyFans API
***
title: "Connect OnlyFans account"
description: "Learn how to connect your OnlyFans account so you can use it with OnlyFans API"
icon: UserPlus
--------------
## Why do you need to connect your OnlyFans account?
If you want to use our API to interact with OnlyFans API endpoints like:
* Reading chats
* Sending messages to fans
* Getting statistics
* Getting fans
* Following / unfollowing users
* Getting webhook notifications
* ... basically anything that requires you to be logged in to your OnlyFans account.
Then, you need to connect your OnlyFans account to our API.
Currently, there are two ways to connect your OnlyFans account to our API:
1. Using our automated login flow (email & password) - **Captcha and 2FA supported** *(Recommended)*
2. By providing cURL request
### Option 1: Using our automated login flow (email & password)
This is the recommended way to connect your OnlyFans account to our API.
Our system can bypass captcha and if you've setup 2FA, you'll be able to enter the 2FA code directly inside our interface while we sign in your profile.
Your credentials are securely stored in our database and are never shared with
anyone (not even our engineers can see your credentials).
Steps to connect your OnlyFans account:
1. Go to the [OnlyFansAPI Console -> Accounts](https://app.onlyfansapi.com/accounts)
2. Click on the **+ Connect Account** button
3. Enter name of the account (this will be used for your reference)
4. Enter your OnlyFans email and password
5. Choose Proxy Country (we will automatically assign a dedicated mobile IP address for this account), or enter your own proxy details
6. Click on the **Add** button
7. Your account will start connecting and you'll see the live progress of the login process.
8. **If you've 2FA enabled on your OnlyFans account**, you'll be asked to enter the 2FA code.
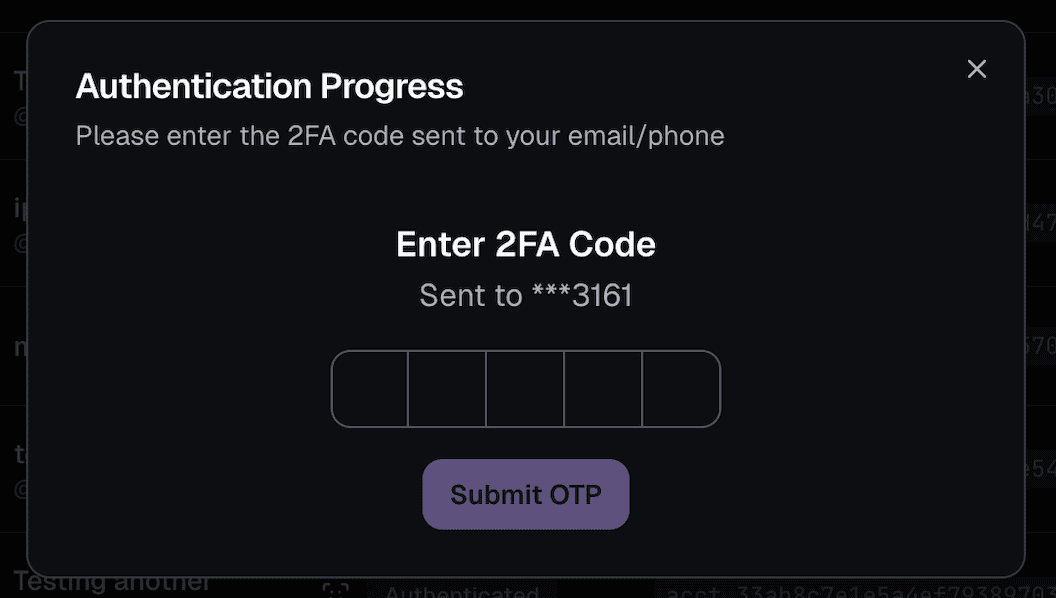
9. Done! ✅ You're now able to see the account details and start using your account with our API.
### Option 2: By providing cURL request
This is the manual way to connect your OnlyFans account to our API.
We recommend to sign in and enter the cURL request from a **incognito
window**. Please do NOT sign out account after you've connected it to our API,
just close the incognito window.
Honestly, it's easier to watch the video below and follow the steps.
# Text formatting
URL: /introduction/guides/text-formatting
Learn how to format text in your posts and chat messages.
***
title: "Text formatting"
description: "Learn how to format text in your posts and chat messages."
icon: Type
----------
## Best practices
Generally, all text should be contained within one singular `
` tag. Example:
```html
Hi there! This is a message containing normal text
```
## New lines
To create a new line, you can use the ` ` tag. Example:
```html
Hi there! This is a message containing normal text
This is a new line!
```
Which will render as:
> Hi there! This is a message containing normal text\
> This is a new line!
## Text sizes
OnlyFans has the following text size options:
* Largest
* Large
* Default
* Small
* Smallest

You can use them as follows:
### Smallest
To create the smallest text, you can use the `` tag. Example:
```html
Hi there! This is a message containing normal text
This is the smallest text!
```
### Small
To create a small text, you can use the `` tag. Example:
```html
Hi there! This is a message containing normal text
This is a small text!
```
### Large
To create a large text, you can use the `` tag. Example:
```html
Hi there! This is a message containing normal text
This is a large text!
```
### Largest
To create the largest text, you can use the `` tag. Example:
```html
Hi there! This is a message containing normal text
This is the largest text!
```
## Text styles
When using text styles like **bold** or *italic*, make sure that you wrap the text in a `` tag. Example:
```html
Bold textItalic text
```
### Bold
To create bold text, you can use the `` tag. Example:
```html
Hi there! This is a message containing normal text
This is bold text!
```
### Italic
To create italic text, you can use the `` tag. Example:
```html
Hi there! This is a message containing normal text
This is italic text!
```
## Text colors
OnlyFans has three possible colors for text:
* Gray (`#8a96a3`)
* Blue 1 (`#00aff0`)
* Blue 2 (`#1b98e0`)
You can use them as follows:
### Gray
To create gray text, you can use the `` tag. Example:
```html
Hi there! This is a message containing normal text
This is gray text!
```
### Blue 1
To create blue 1 text, you can use the `` tag. Example:
```html
Hi there! This is a message containing normal text
This is blue 1 text!
```
### Blue 2
To create blue 2 text, you can use the `` tag. Example:
```html
Hi there! This is a message containing normal text
This is blue 2 text!
```
# Uploading media
URL: /introduction/guides/uploading-media
Learn how to upload photos/videos, and include them in your posts or messages.
***
title: Uploading media
description: "Learn how to upload photos/videos, and include them in your posts or messages."
icon: Upload
------------
OnlyFans API makes it really easy to include photos and videos in your posts and messages. You can upload media files directly to our API, and then reference them in our relevant endpoints.
## Prepare the relevant photo or video
* If you want to use a new photo or video, you may upload it to our API.
* Alternatively, if you want to use a photo or video from your Vault, you may reference its ID directly in the relevant endpoints.
### Upload your photo or video to our API
The full media upload endpoint documentation can be found
[here](/api-reference/media/uploadMediaToTheOnlyFansCDN).
Submit a POST request to our `https://app.onlyfansapi.com/api/{account}/media/upload` endpoint, with `form-data` as the body type.
It must have a `file` field, which is the media file you want to upload. This can either be a photo or a video, and it can be in any format that OnlyFans supports (e.g., JPEG, PNG, MP4).
```bash tab="cURL"
curl --location 'https://app.onlyfansapi.com/api/{account}/media/upload' \
--header 'Authorization: Bearer {token}' \
--form 'file=@"/Users/me/Documents/MyVideo.mp4"'
```
```ts tab="JavaScript (Fetch)"
const myHeaders = new Headers();
myHeaders.append("Authorization", "Bearer {token}");
const formdata = new FormData();
formdata.append("file", fileInput.files[0], "MyVideo.mp4");
const requestOptions = {
method: "POST",
headers: myHeaders,
body: formdata,
redirect: "follow",
};
fetch("https://app.onlyfansapi.com/api/{account}/media/upload", requestOptions)
.then((response) => response.text())
.then((result) => console.log(result))
.catch((error) => console.error(error));
```
```js tab="Node.js (Axios)"
const axios = require("axios");
const FormData = require("form-data");
const fs = require("fs");
let data = new FormData();
data.append("file", fs.createReadStream("/Users/me/Documents/MyVideo.mp4"));
let config = {
method: "post",
maxBodyLength: Infinity,
url: "https://app.onlyfansapi.com/api/{account}/media/upload",
headers: {
Authorization: "Bearer {token}",
...data.getHeaders()
},
data: data
};
axios
.request(config)
.then((response) => {
console.log(JSON.stringify(response.data));
})
.catch((error) => {
console.log(error);
});
```
```php tab="PHP (Guzzle)"
$client = new Client();
$headers = [
'Authorization' => 'Bearer {token}'
];
$options = [
'multipart' => [
[
'name' => 'file',
'contents' => Utils::tryFopen('/Users/me/Documents/MyVideo.mp4', 'r'),
'filename' => '/Users/me/Documents/MyVideo.mp4',
]
]];
$request = new Request('POST', 'https://app.onlyfansapi.com/api/{account}/media/upload', $headers);
$res = $client->sendAsync($request, $options)->wait();
echo $res->getBody();
```
**If the upload was successful, the response will be something as follows:**
```json
{
"prefixed_id": "ofapi_media_123",
"file_name": "MyVideo.mp4",
"processId": "a9k3l2m7n8p0q4r5s6t",
"host": "convert1.onlyfans.com",
"sourceUrl": "https://of2transcoder.s3.amazonaws.com/upload/642a4d7e-134e-4cb4-99b5-6774248341c2/57141494436/file_name.jpg?X-Amz-Content-Sha256=UNSIGNED-PAYLOAD&X-Amz-Security-Token=token&X-Amz-Algorithm=AWS4-HMAC-SHA256&X-Amz-Credential=credentials&X-Amz-Date=20250521T151119Z&X-Amz-SignedHeaders=host&X-Amz-Expires=604800&X-Amz-Signature=signature",
"extra": "YW4gZW5jb2RlZCBzdHJpbmcgYW4gZW5jb2RlZCBzdHJpbmcgYW4gZW5jb2RlZCBzdHJpbmcgYW4gZW5jb2RlZCBzdHJpbmcgYW4gZW5jb2RlZCBzdHJpbmcgYW4gZW5jb2RlZCBzdHJpbmcgYW4gZW5jb2RlZCBzdHJpbmcgYW4gZW5jb2RlZCBzdHJpbmcgYW4gZW5jb2RlZCBzdHJpbmcgYW4gZW5jb2RlZCBzdHJpbmcgYW4gZW5jb2RlZA==",
"additional": {
"user": "123"
},
"thumbs": [
{
"id": 1,
"url": "https://cdn2.onlyfans.com/files/f/f0/fsdnjdsnf3k2rk/300x300_fjkdnknk23efsknj.jpg?Expires=1750518679&Signature=signature&Key-Pair-Id=PAIRID"
}
]
}
```
You may use the `prefixed_id` (e.g., `ofapi_media_123`) in our relevant endpoints to include this media file.
**Important!**
The `prefixed_id` from the above request can only be used **once**. After you use it in a post or message, it will no longer be valid for future use. If you want to reuse the same media file, you must upload it again to get a new `prefixed_id`.
## Including your media in a new post
The full send post endpoint documentation can be found
[here](/api-reference/posts/sendPost).
Once you have retrieved the correct media IDs (either from the upload response, or from your Vault), you can include them in your post:
```json Example request body
{
"text": "The text of your post",
"mediaFiles": ["ofapi_media_123", "1234567890"]
}
```
## Including your media in a chat message
The full send chat message endpoint documentation can be found
[here](/api-reference/chats/sendMessage).
Once you have retrieved the correct media IDs (either from the upload response, or from your Vault), you can include them in your post:
```json Example request body
{
"text": "The text of your message",
"mediaFiles": ["ofapi_media_123", "1234567890"]
}
```
## Media file array options
You can include two different types of IDs in the `mediaFiles` array:
1. An OnlyFans API ID starting with `ofapi_media_`. This needs to be the `prefixed_id` of the media file we just uploaded.
**Important! The `ofapi_media_` ID from a media file upload can only be used once.**
After you use it in a post or message, it will no longer be valid for future use. To use the media again, you must use the OnlyFans Vault Media ID.
2. An OnlyFans Vault Media ID like `1234567890`. This is the OnlyFans ID of a media file that already exists in the Vault. Use our [List Vault Media](api-reference/media-vault/listVaultMedia) endpoint to retrieve this ID.
## Demo video
# Example scenarios
URL: /integrations/make/example-scenarios
We've prepared a few common example scenarios for you. Please choose one of the following to get started:
***
title: "Example scenarios"
description: "We've prepared a few common example scenarios for you. Please choose one of the following to get started:"
------------------------------------------------------------------------------------------------------------------------
import {ArrowLeftRightIcon, LinkIcon} from "lucide-react";
} href="/integrations/make/example-scenarios/tracking-links-airtable" title="Tracking Links + Airtable">
Learn how to easily synchronize Tracking Link Data from your OnlyFans accounts to Airtable.
} href="/integrations/make/example-scenarios/transaction-data-airtable" title="Transaction Data + Airtable">
Learn how to easily synchronize Transaction Data from your OnlyFans accounts to Airtable.
# [Airtable] Tracking links
URL: /integrations/make/example-scenarios/tracking-links-airtable
Learn how to easily synchronize Tracking Link Data from your OnlyFans accounts to Airtable.
***
title: "\[Airtable] Tracking links"
description: "Learn how to easily synchronize Tracking Link Data from your OnlyFans accounts to Airtable."
----------------------------------------------------------------------------------------------------------
import { Step, Steps } from 'fumadocs-ui/components/steps';
For this example, we'll create a scenario that periodically retrieves the tracking link data from all of your connected OnlyFans accounts, and saves the data to Airtable.
#### Create a base on Airtable
Go to Airtable and create a base. You can name it "OnlyFans API", or anything else that will help you identify it later.
#### Create a table within your base
Within the base, create a table named "Tracking links". Give the table the following fields:
* `ID` (primary) - Single line text
* `Campaign code` - Single line text
* `Campaign URL` - URL
* `Clicks count` - Number
* `Subscriber count` - Number
* `Total revenue` - Currency
Your table should now look like this:
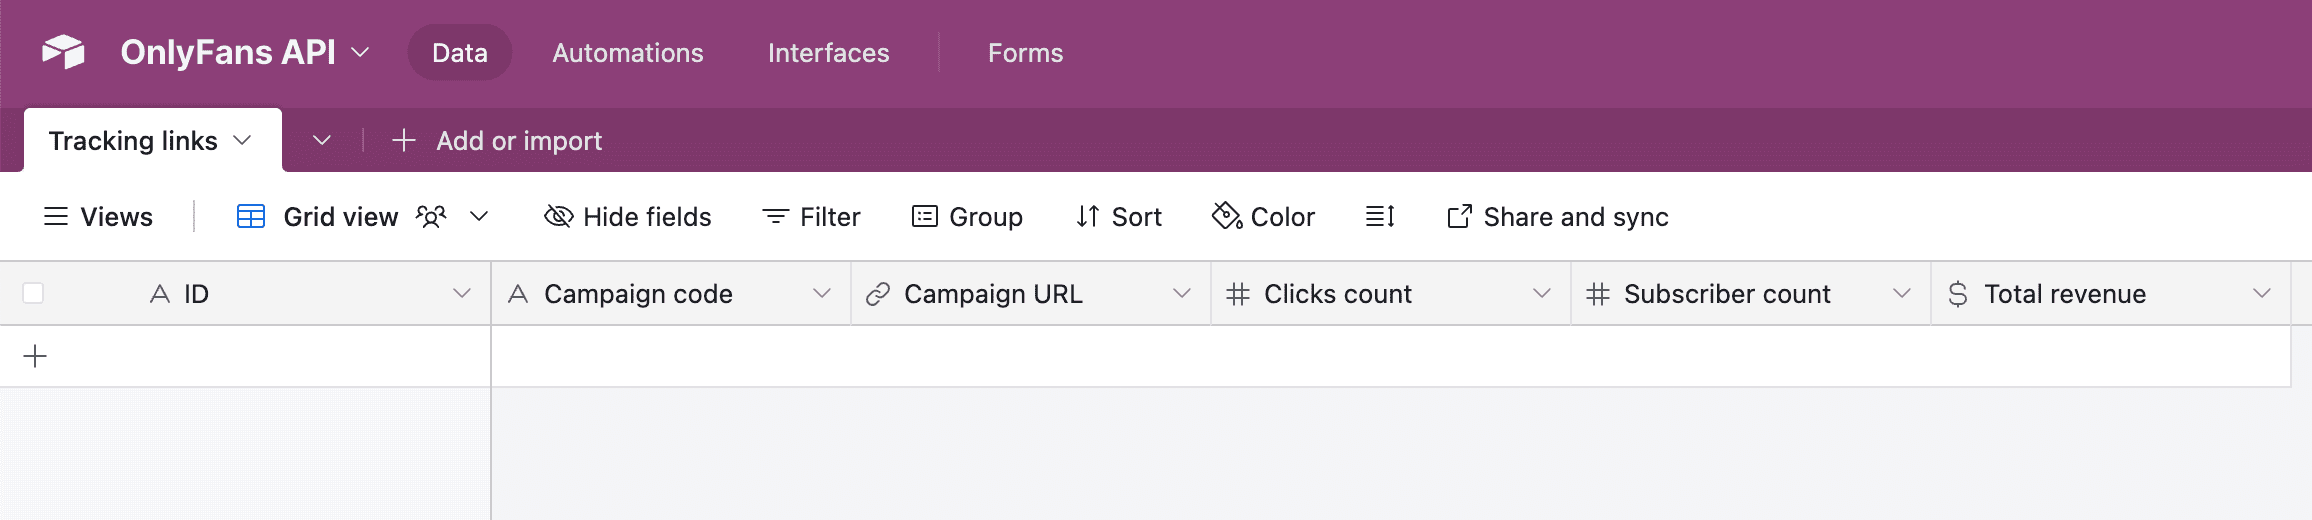
#### Add our "List Accounts" module
If you don't see this module, make sure to click on "Show more".
#### Add our "List Tracking Links" module
After adding "List Tracking Links" module, you will be asked to provide an "Account ID".
Simply click on the field, and drag the "ID" from the left card into the field, like in the below image. Make sure to click on "Save".
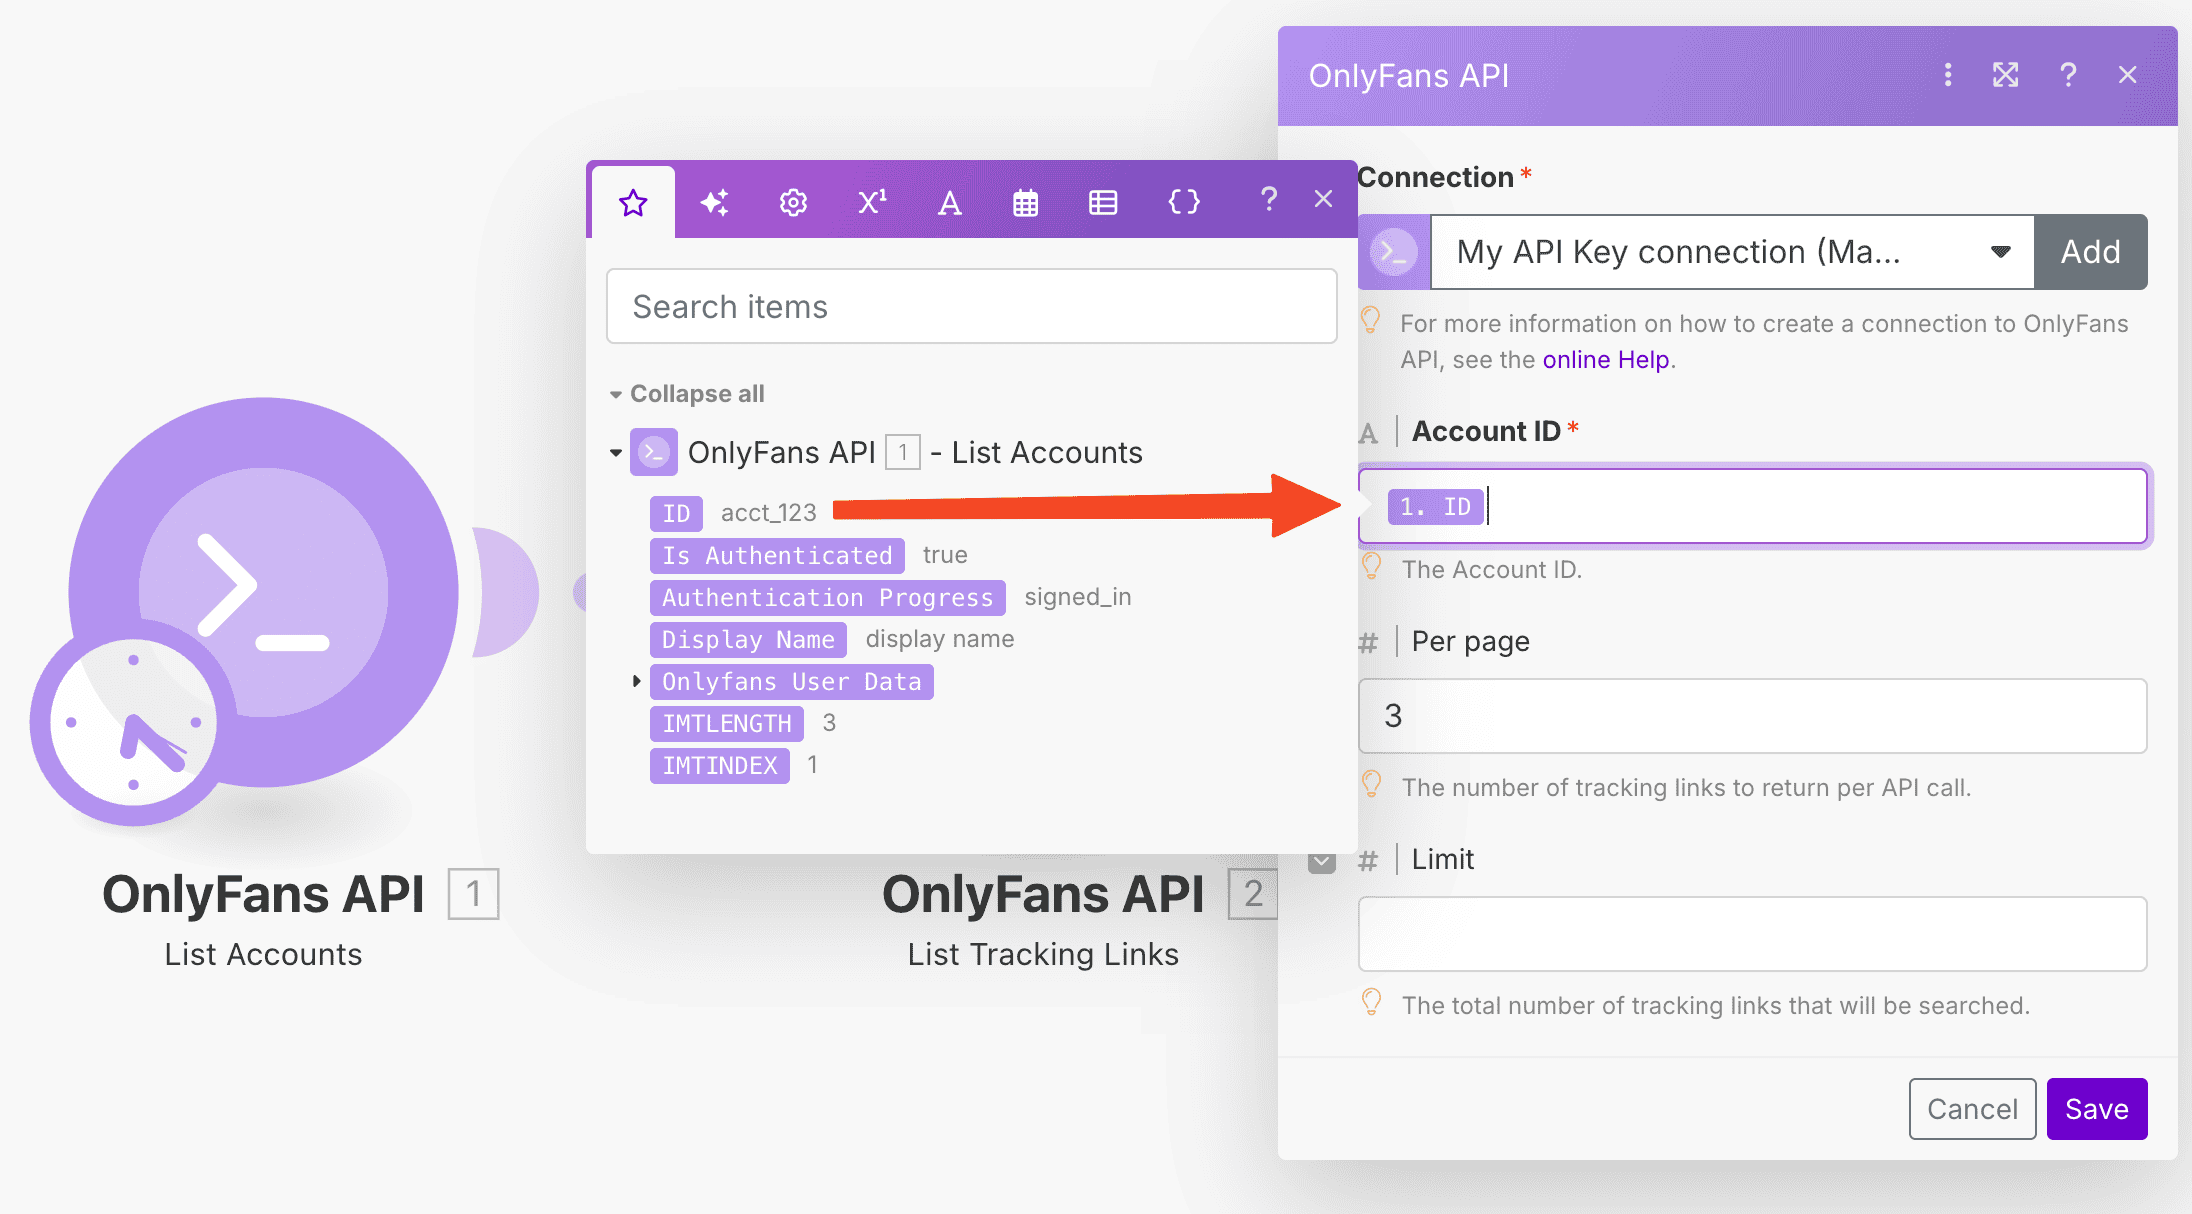
#### Add the Airtable "Create a Record" module
If you don't see this module, make sure to click on "Show more".
#### Connect your Airtable account, and select the correct Base and Table
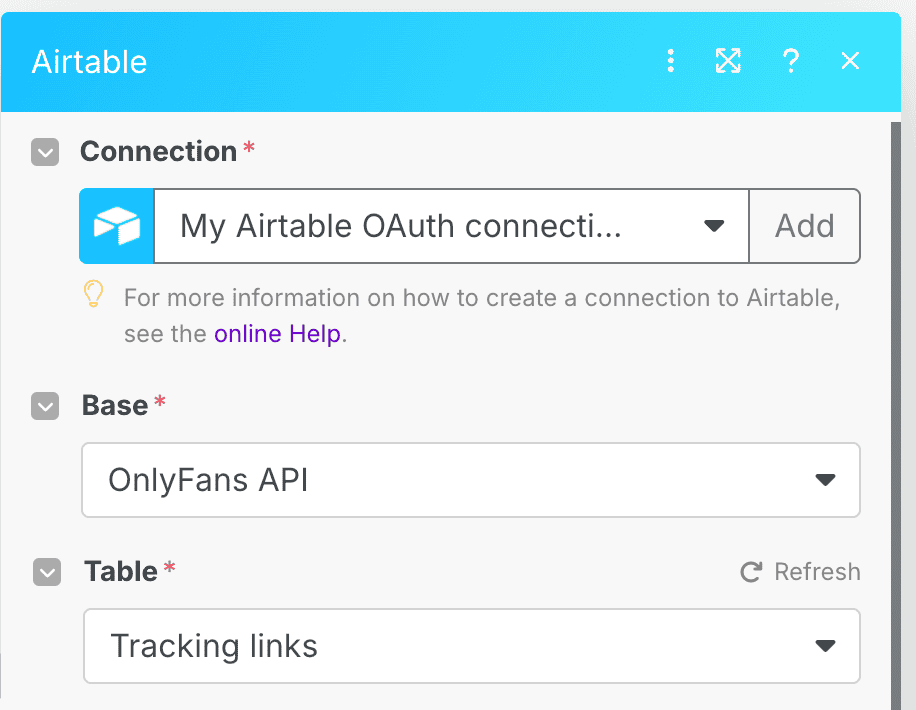
#### Map the fields
Now, let's map the OnlyFans API module fields to your Airtable's table fields. Make sure to click on "Save".
If you've done it correctly, your scenario should look like this:
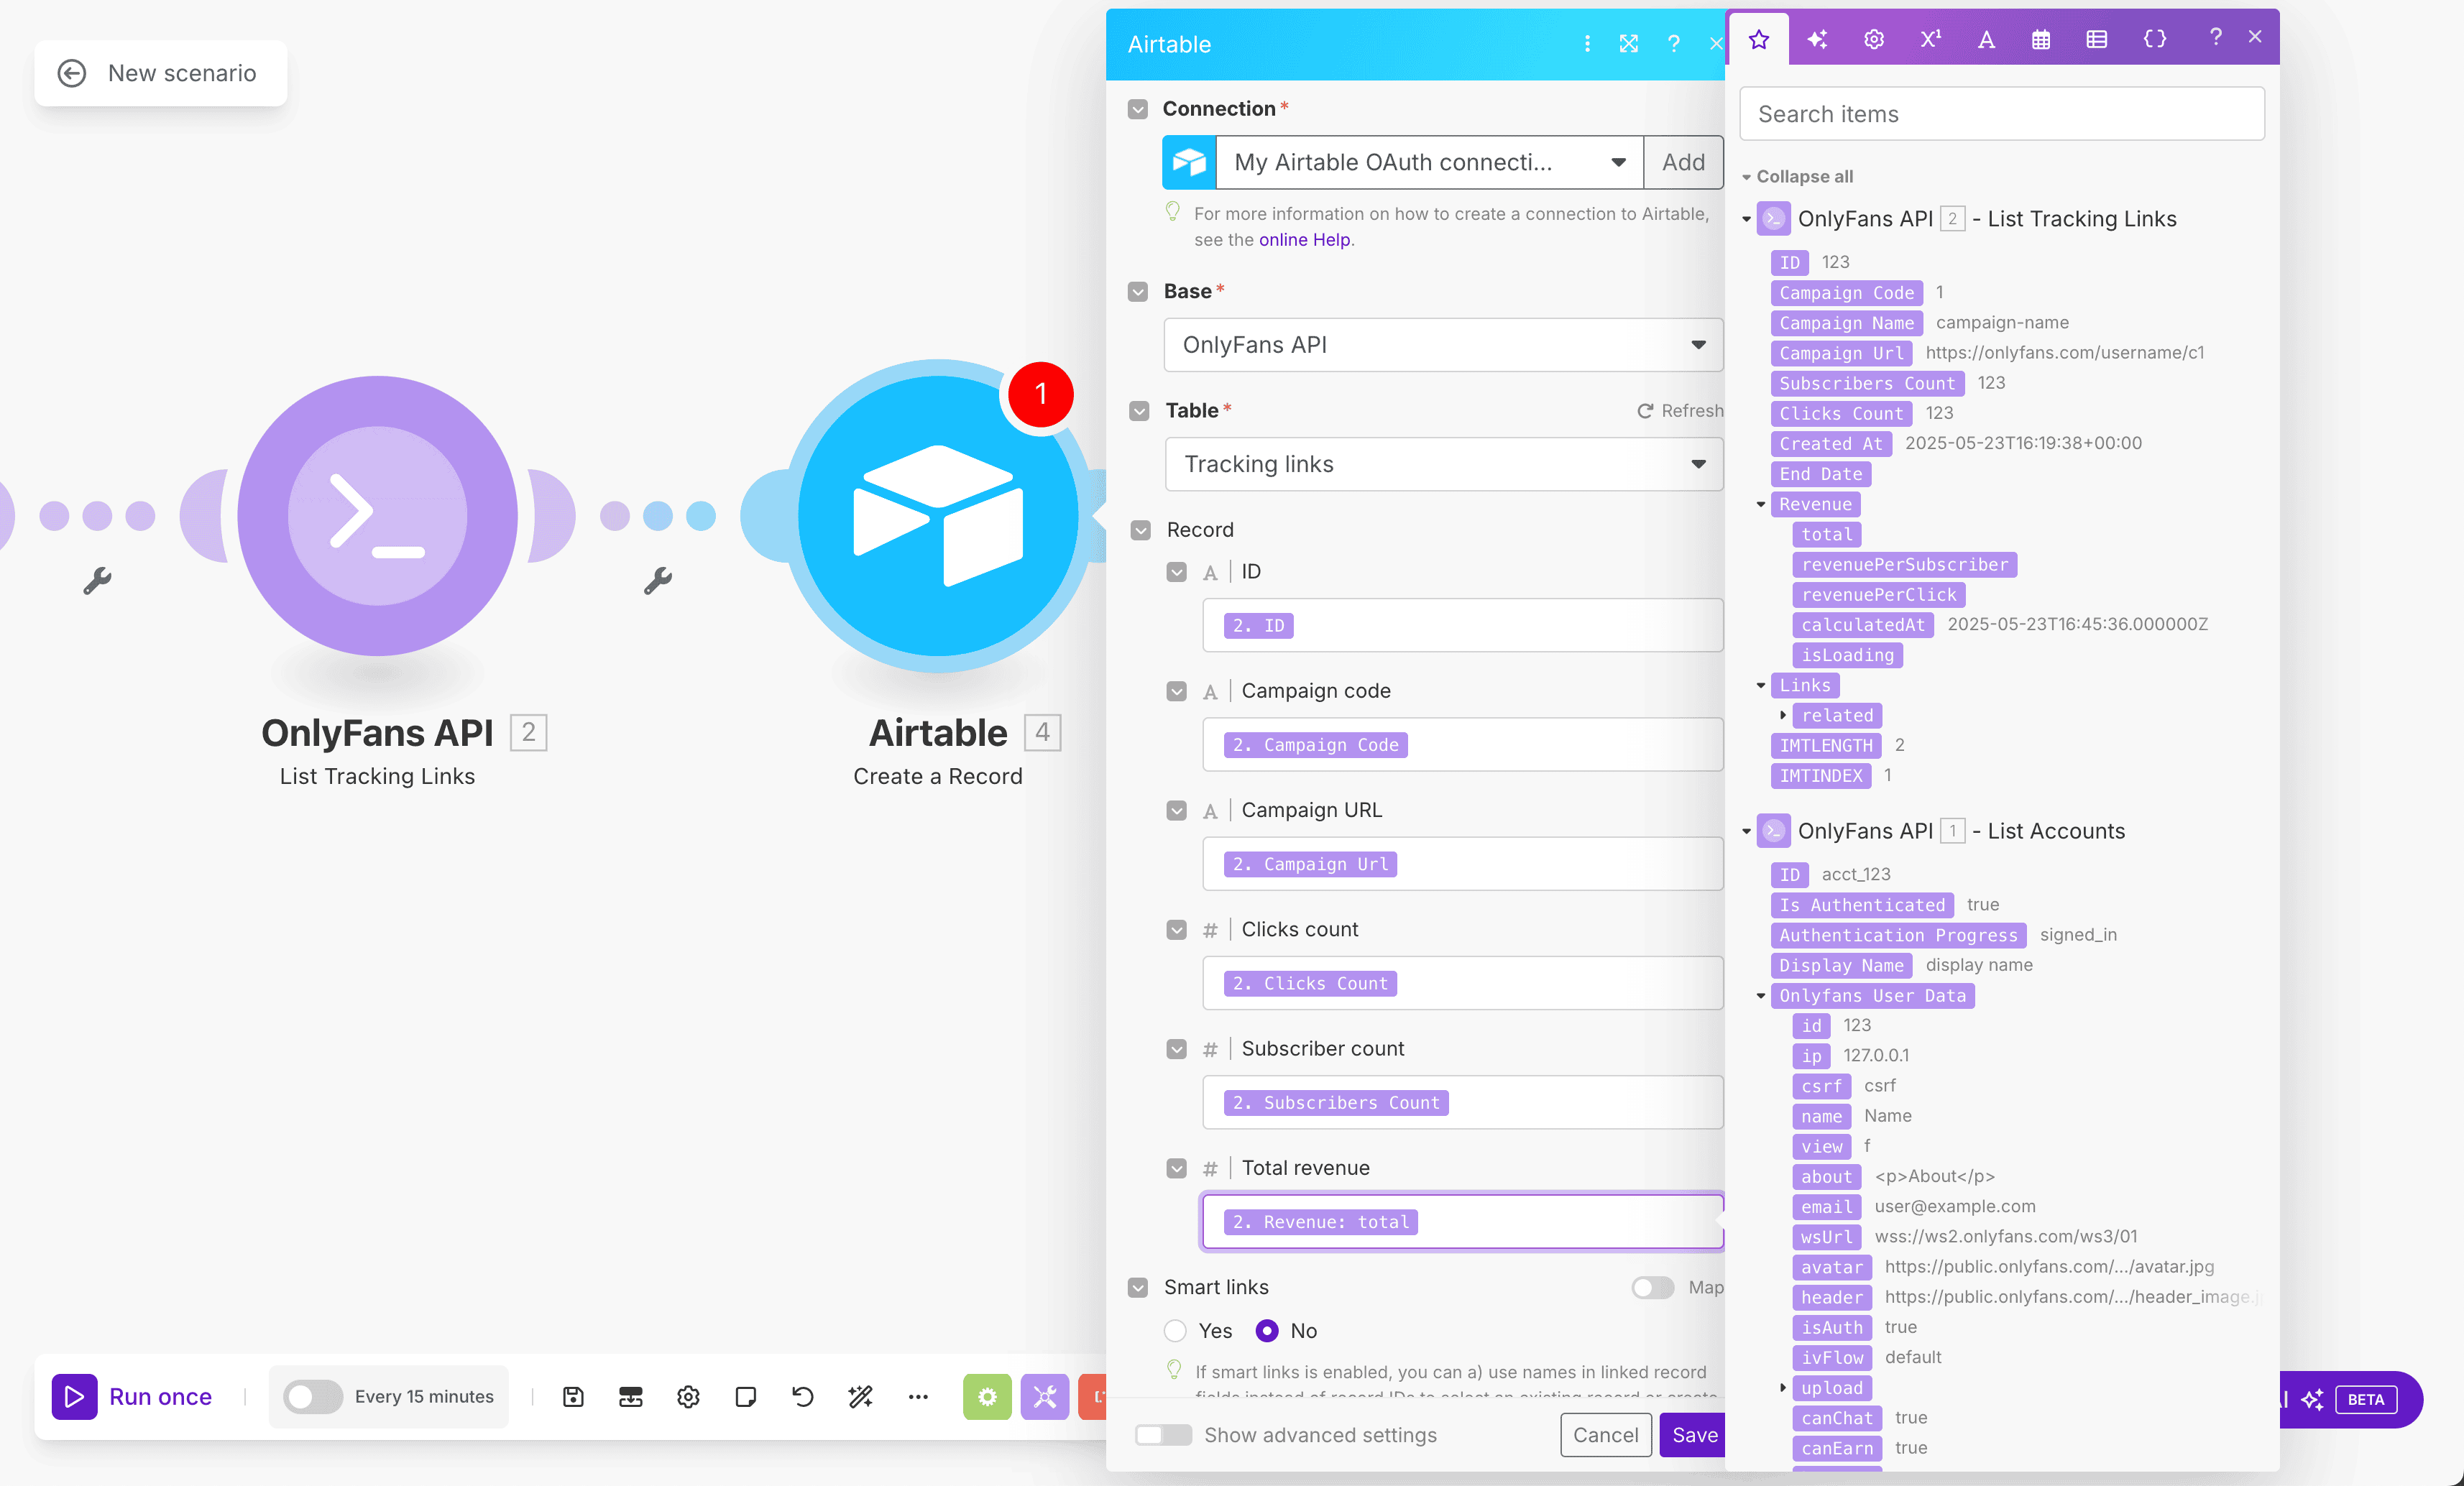
#### Finally, schedule and run the scenario!
You can set a schedule time, and then run it manually with the "Run once" button to see if everything works correctly.
If it does, you will see the tracking link data of all your accounts appear in your Airtable table, like so:
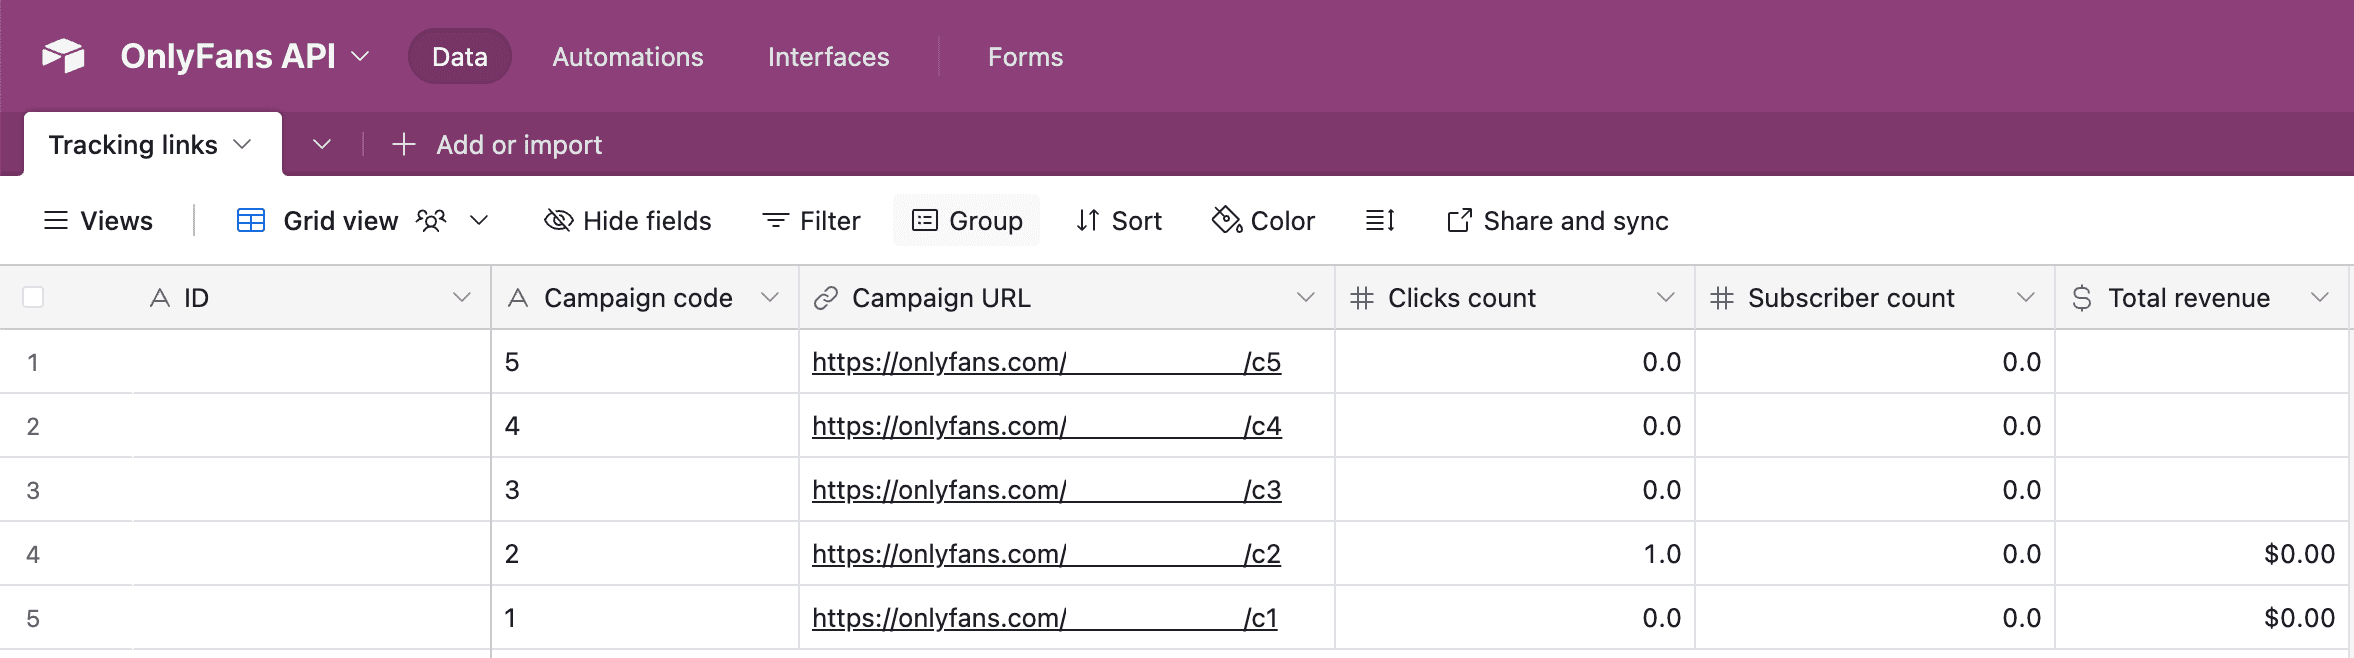
The tracking link data of all of your connected OnlyFans accounts will now automatically be updated in Airtable.
Of course, you can further customize this scenario for a more advanced setup.
# [Airtable] Tracking links
URL: /integrations/make/example-scenarios/transaction-data-airtable
Learn how to easily synchronize Transaction Data from your OnlyFans accounts to Airtable.
***
title: "\[Airtable] Tracking links"
description: "Learn how to easily synchronize Transaction Data from your OnlyFans accounts to Airtable."
--------------------------------------------------------------------------------------------------------
import { Step, Steps } from 'fumadocs-ui/components/steps';
For this example, we'll create a scenario that periodically retrieves the transaction data from all of your connected OnlyFans accounts, and saves the data to Airtable.
#### Create a base on Airtable
Go to Airtable and create a base. You can name it "OnlyFans API", or anything else that will help you identify it later.
#### Create a table within your base
Within the base, create a table named "Transaction data". Give the table the following fields:
* `Transaction ID` (primary) - Single line text
* `Account name` - Single line text
* `Amount` - Currency
* `Net amount` - Currency
Your table should now look like this:

#### Add our "List Accounts" module

#### Add our "List Transactions" module
You will be asked to provide an "Account ID".
Simply click on the field, and drag the "ID" from the left card into the field. Afterwards, choose a start date like "-30 days".
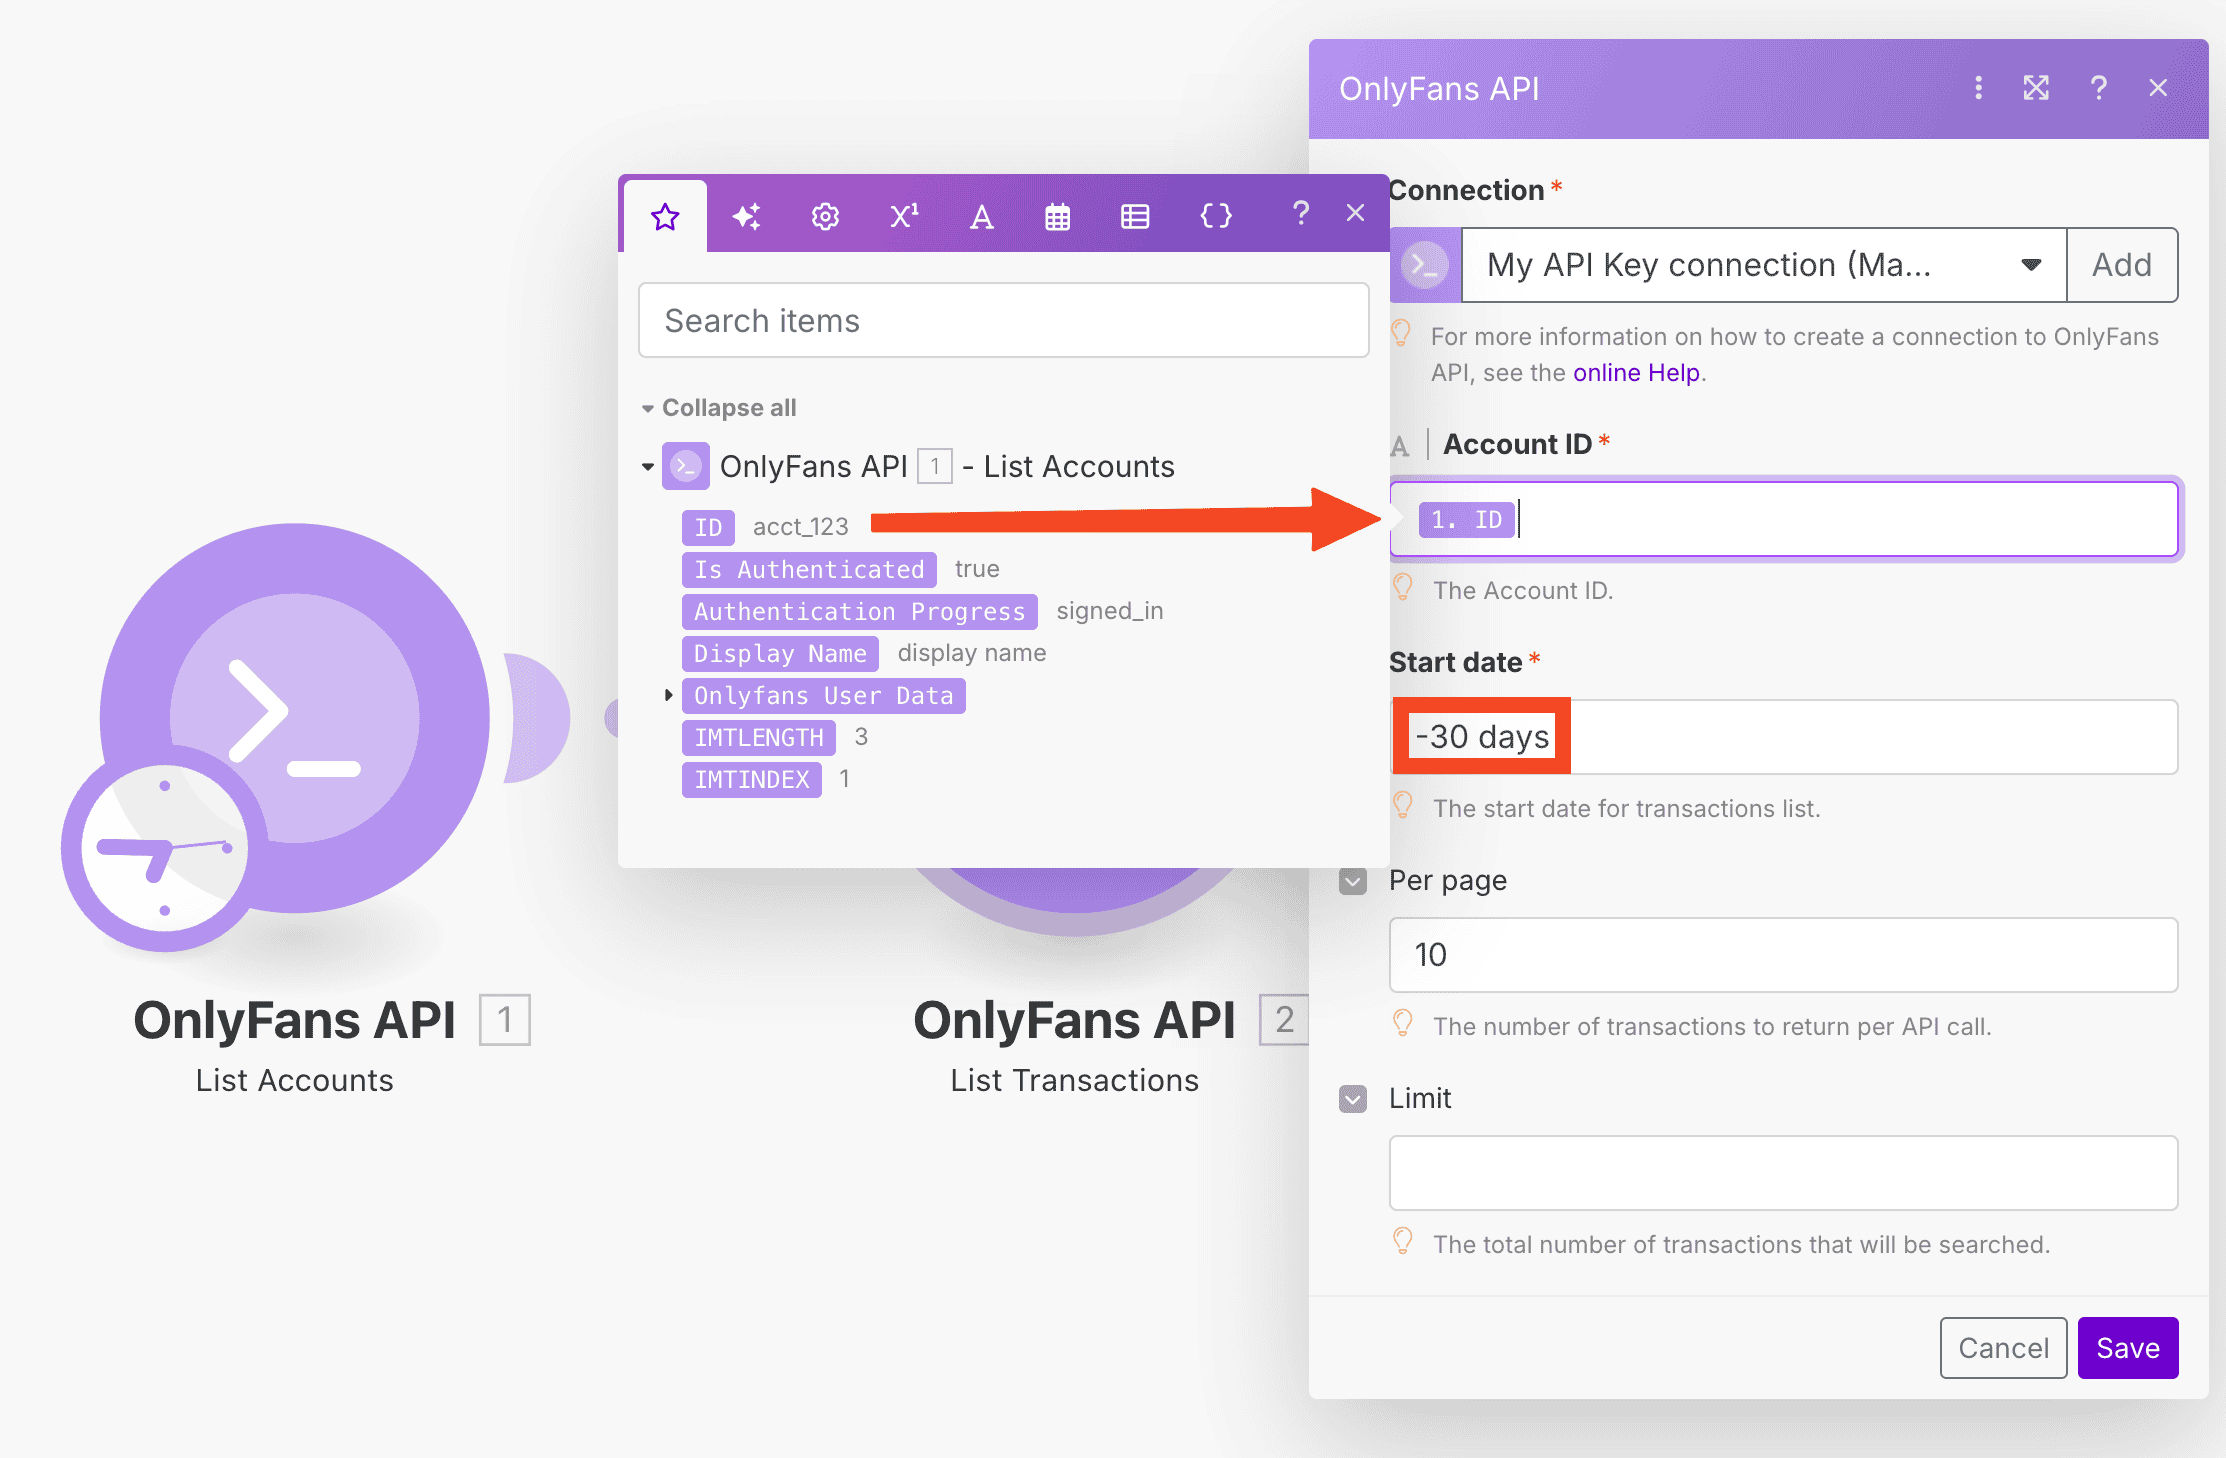
Afterwards, make sure to click on "Save".
#### Add the Airtable "Create a Record" module
If you don't see this module, make sure to click on "Show more".
#### Connect your Airtable account, and select the correct Base and Table

#### Map the fields
Now, let's map the OnlyFans API module fields to your Airtable's table fields. Make sure to click on "Save".
If you've done it correctly, your scenario should look like this:
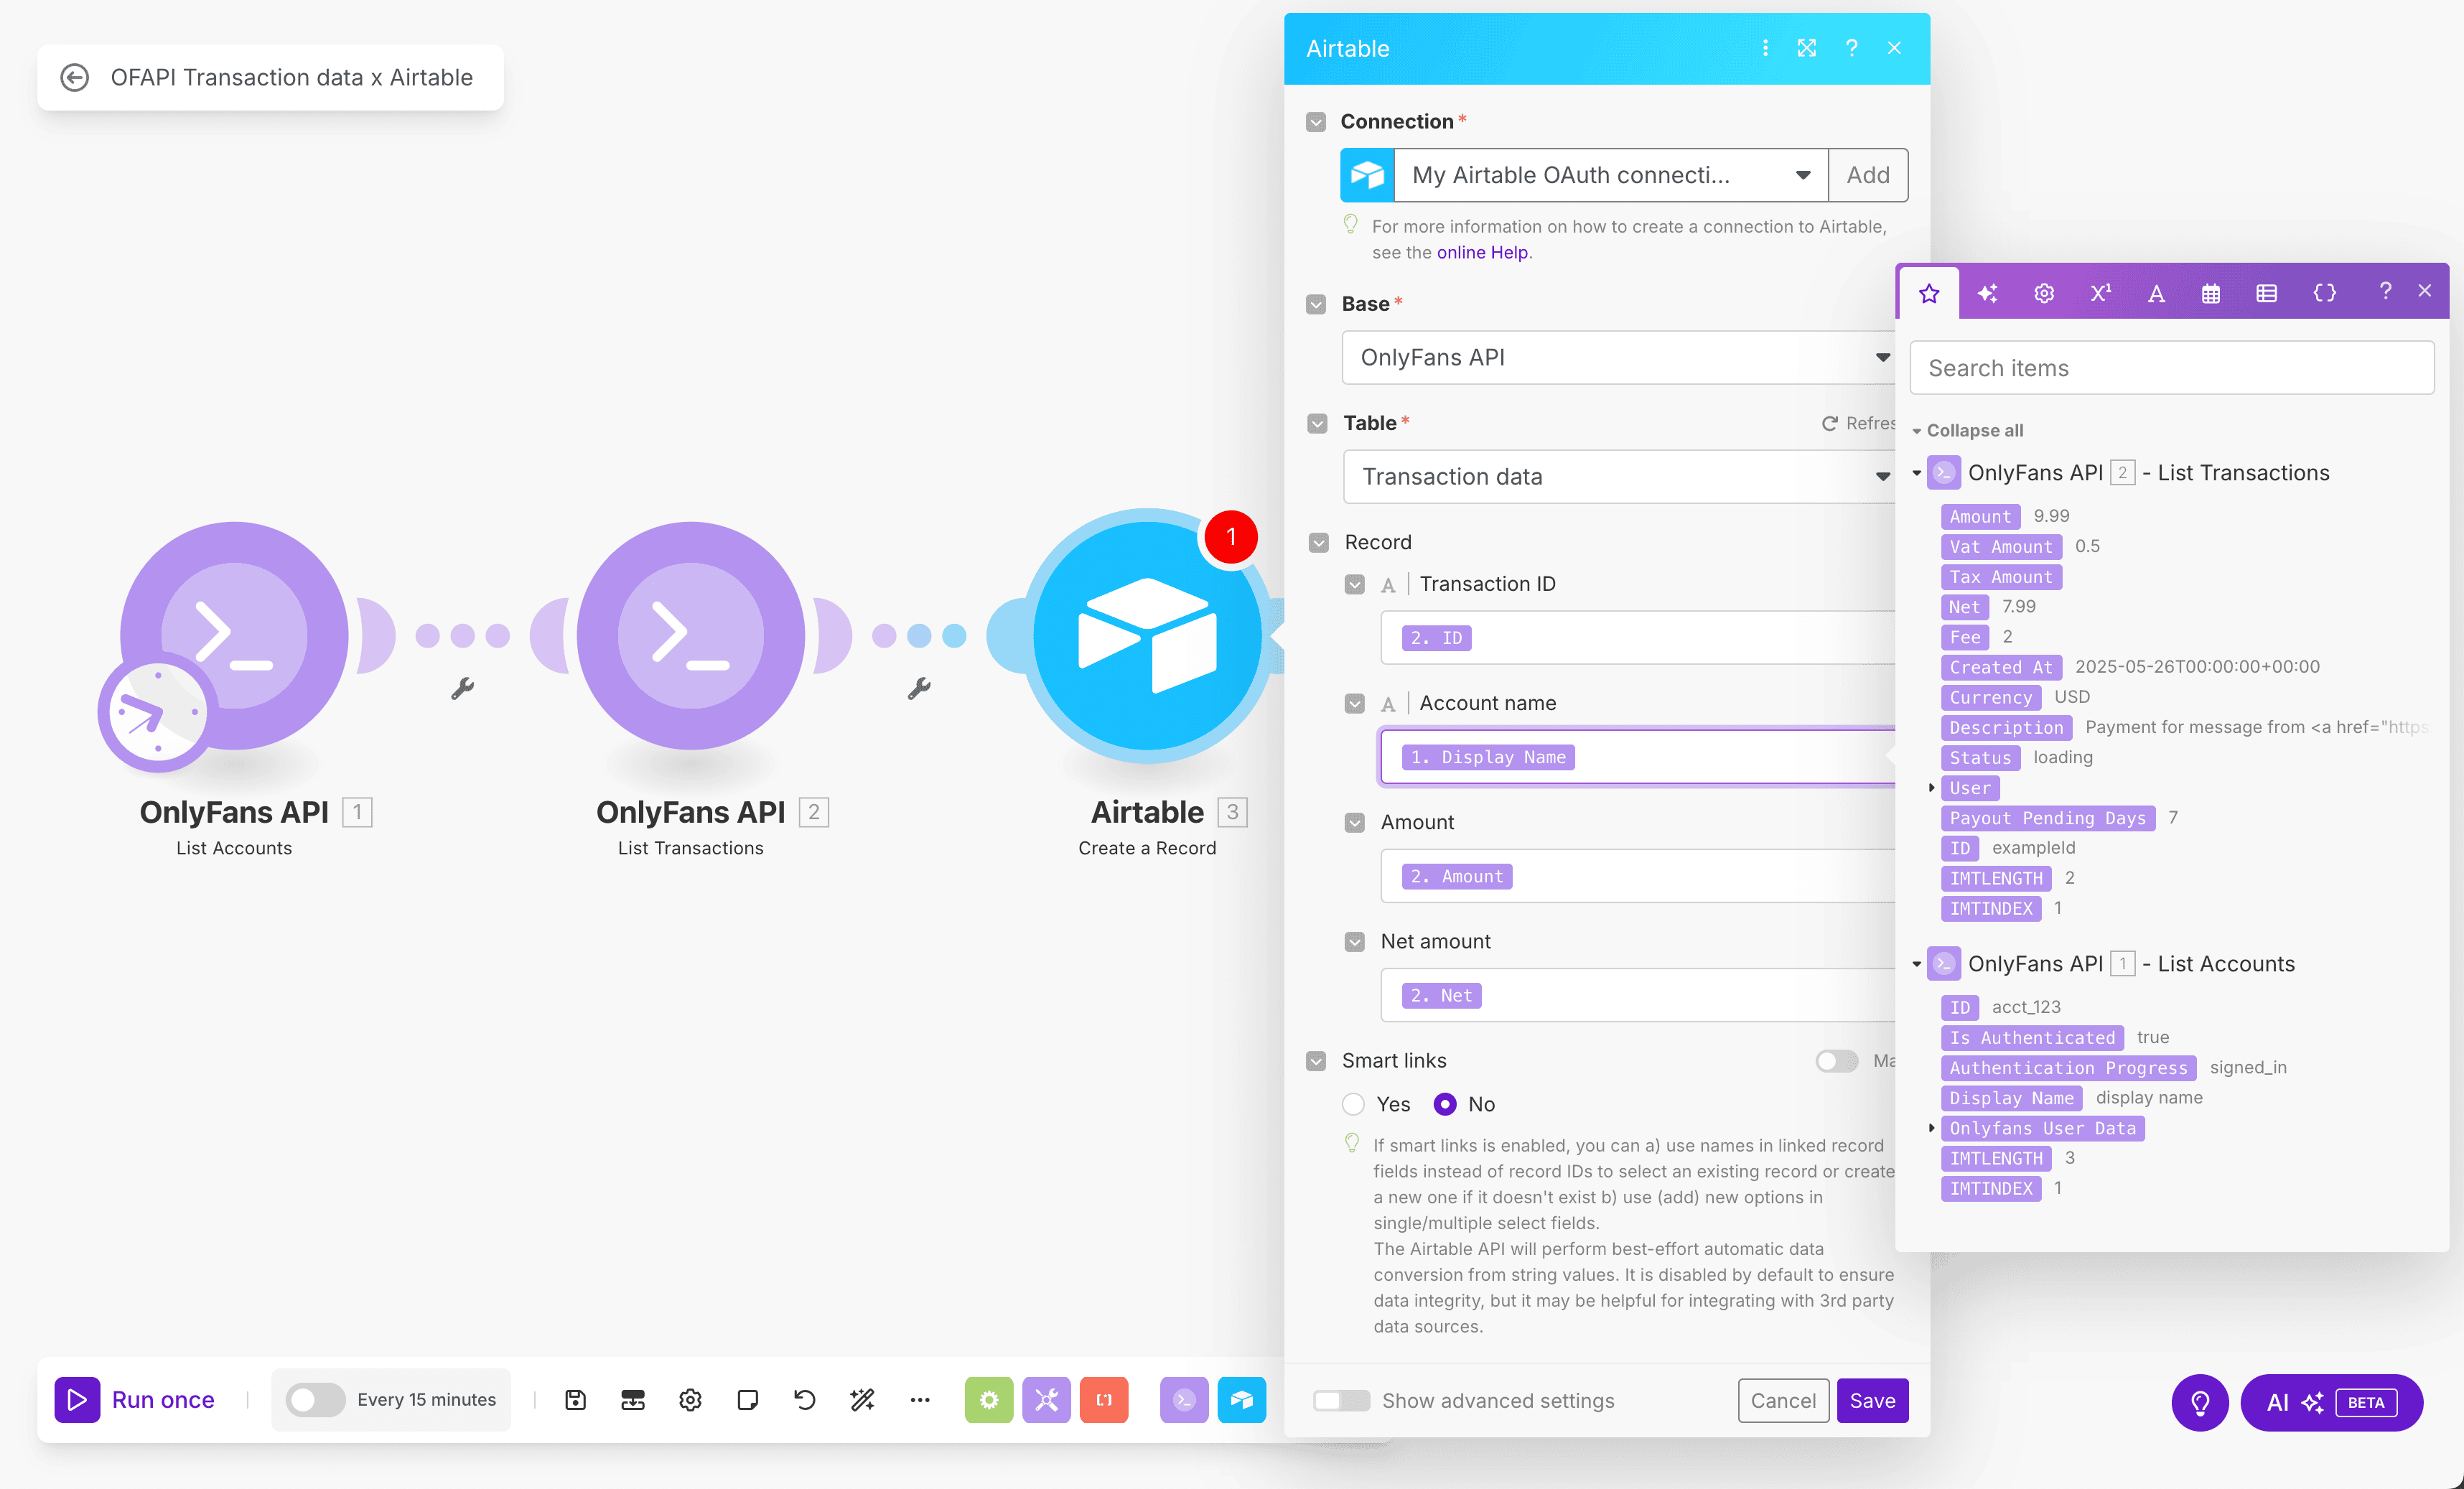
#### Finally, schedule and run the scenario!
You can set a schedule time, and then run it manually with the "Run once" button to see if everything works correctly.
If it does, you will see the tracking link data of all your accounts appear in your Airtable table, like so:
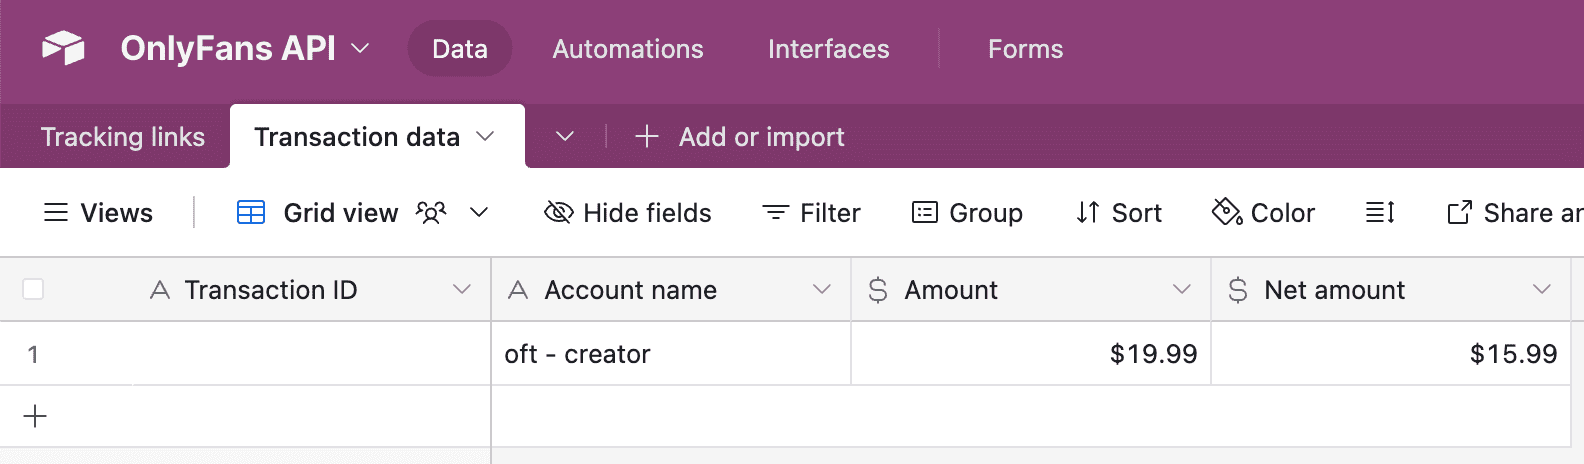
The transaction data of all of your connected OnlyFans accounts will now automatically be updated in Airtable.
Of course, you can further customize this scenario for a more advanced setup.
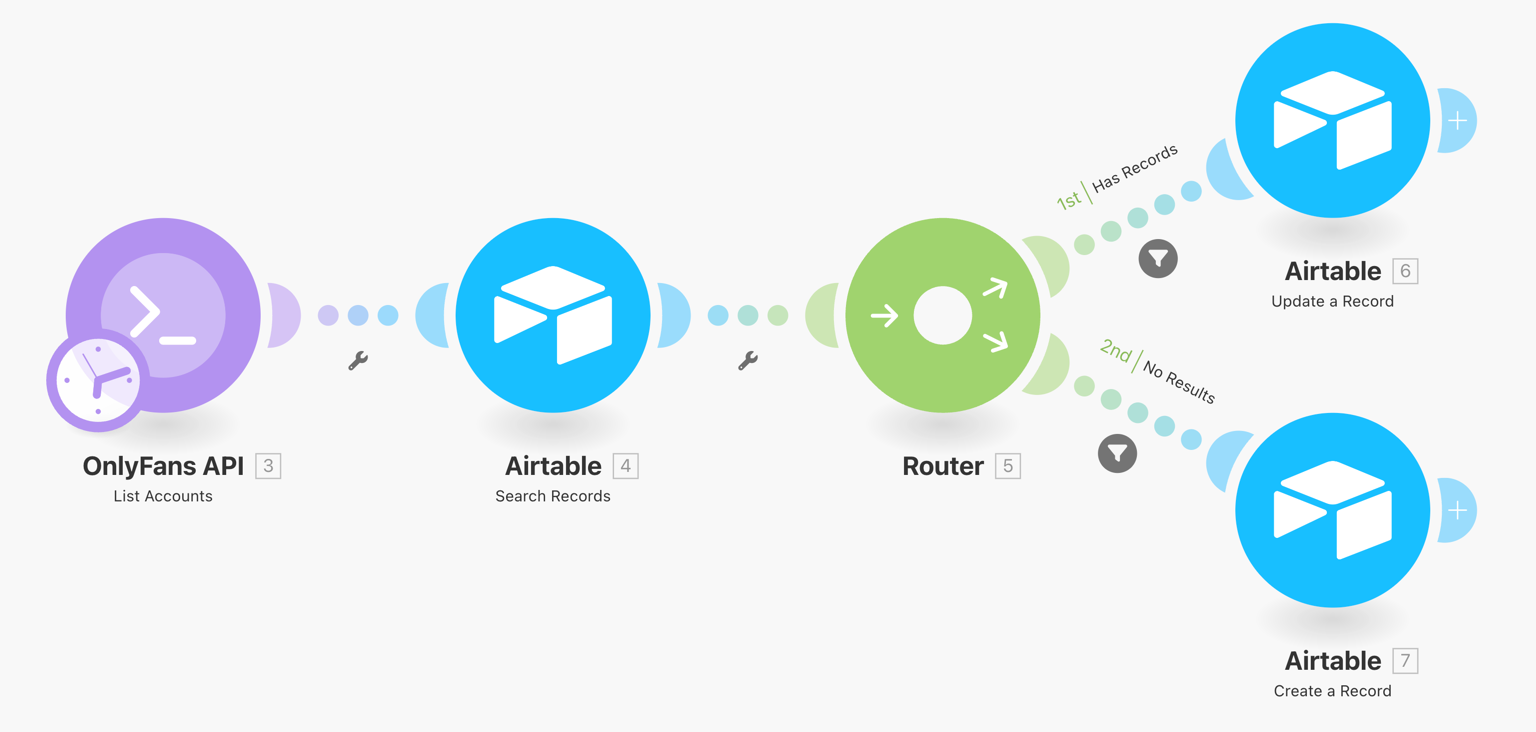 This scenario will synchronize your OnlyFans accounts with Airtable, and update the data once a day.
**Download scenario blueprint ›**
This scenario will synchronize your OnlyFans accounts with Airtable, and update the data once a day.
**Download scenario blueprint ›**
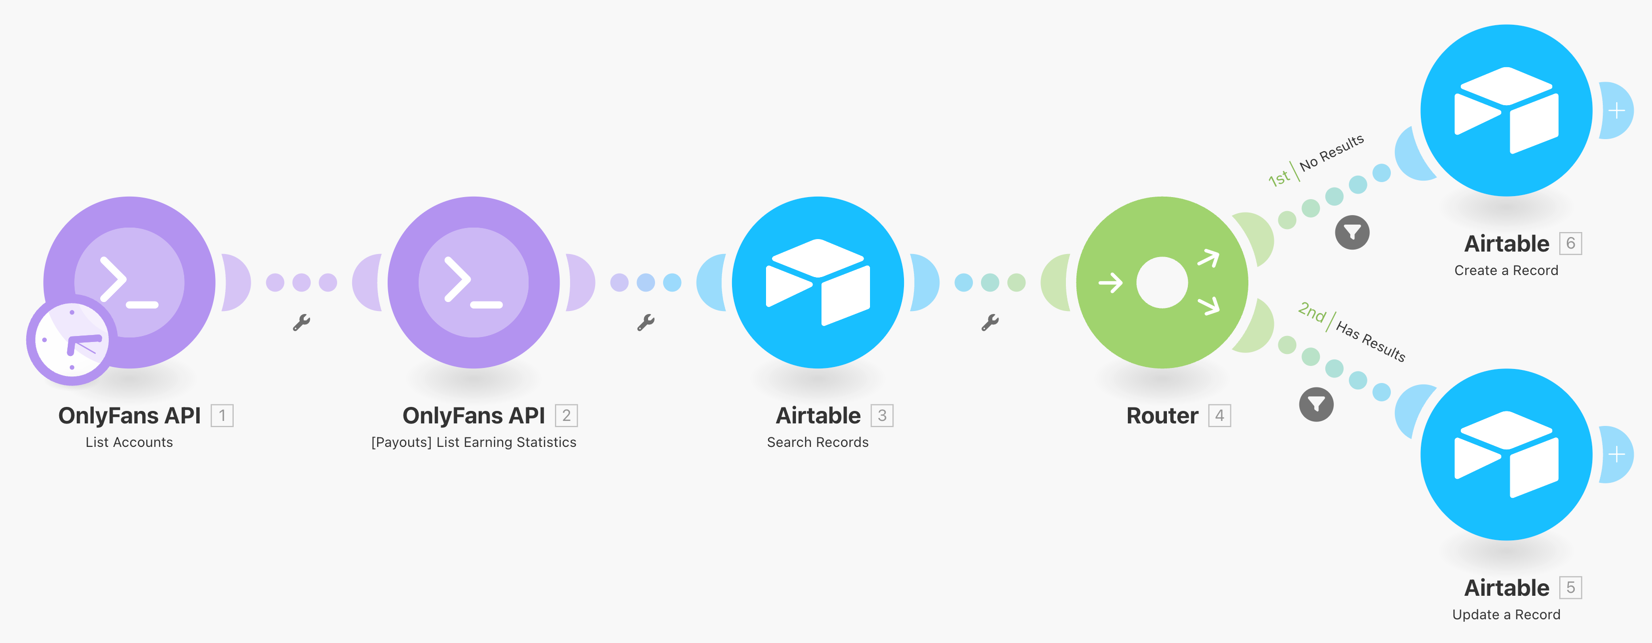 This scenario will synchronize your OnlyFans account revenue data with Airtable. Every account will have one record for each day, which updates hourly.
**Download scenario blueprint ›**
This scenario will synchronize your OnlyFans account revenue data with Airtable. Every account will have one record for each day, which updates hourly.
**Download scenario blueprint ›**